So you’re craving something tasty, comforting, and utterly delicious but too lazy to spend forever in the kitchen, huh? Same, friend, same. We’ve all been there: staring into the abyss of an empty snack cupboard, dreaming of something warm, chocolatey, and moist. Well, snap out of it, buttercup, because today we’re making a **Moist Chocolate Chip Loaf** that’s so easy, you’ll wonder why you ever bought those dry, overpriced bakery versions. Get ready to bake a little piece of heaven!
Why This Recipe is Awesome
Listen, I get it. The world is full of complicated recipes that require a chemistry degree and the patience of a saint. But this isn’t one of them. This chocolate chip loaf recipe is so ridiculously straightforward, it’s practically idiot-proof. Seriously, even *I* didn’t mess it up, and my kitchen adventures often involve smoke alarms and existential crises. It’s quick to whip up, bakes into a beautifully golden, incredibly moist crumb, and is absolutely bursting with chocolate chips. Plus, the smell alone will make you feel like a domestic goddess (or god) even if you just rolled out of bed. It’s basically a warm, chocolatey hug in loaf form, and who doesn’t need more of those?
Ingredients You’ll Need
Gather ’round, my fellow food fanatics! Here’s what you’ll need to create this masterpiece. Don’t stress too much; most of these are probably already lurking in your pantry.
- 1 ½ cups (180g) All-Purpose Flour: The basic building block. Don’t even *think* about substituting fancy flours unless you’re feeling adventurous (and prepared for consequences).
- ½ cup (100g) Granulated Sugar: For that perfect touch of sweetness.
- ½ cup (113g) Unsalted Butter: Softened, please! The good stuff, not that weird spread that pretends to be butter.
- 2 Large Eggs: Room temperature, if you can remember to take them out. If not, don’t sweat it too much, it’s not the end of the world.
- ½ cup (120ml) Milk: Any kind will do – whole, 2%, almond, oat… live your best life!
- 1 tsp Vanilla Extract: The secret weapon for making everything taste better. Don’t skimp!
- 1 ½ tsp Baking Powder: Our lift-off agent.
- ¼ tsp Salt: Don’t skip this! It balances out the sweetness and makes everything pop.
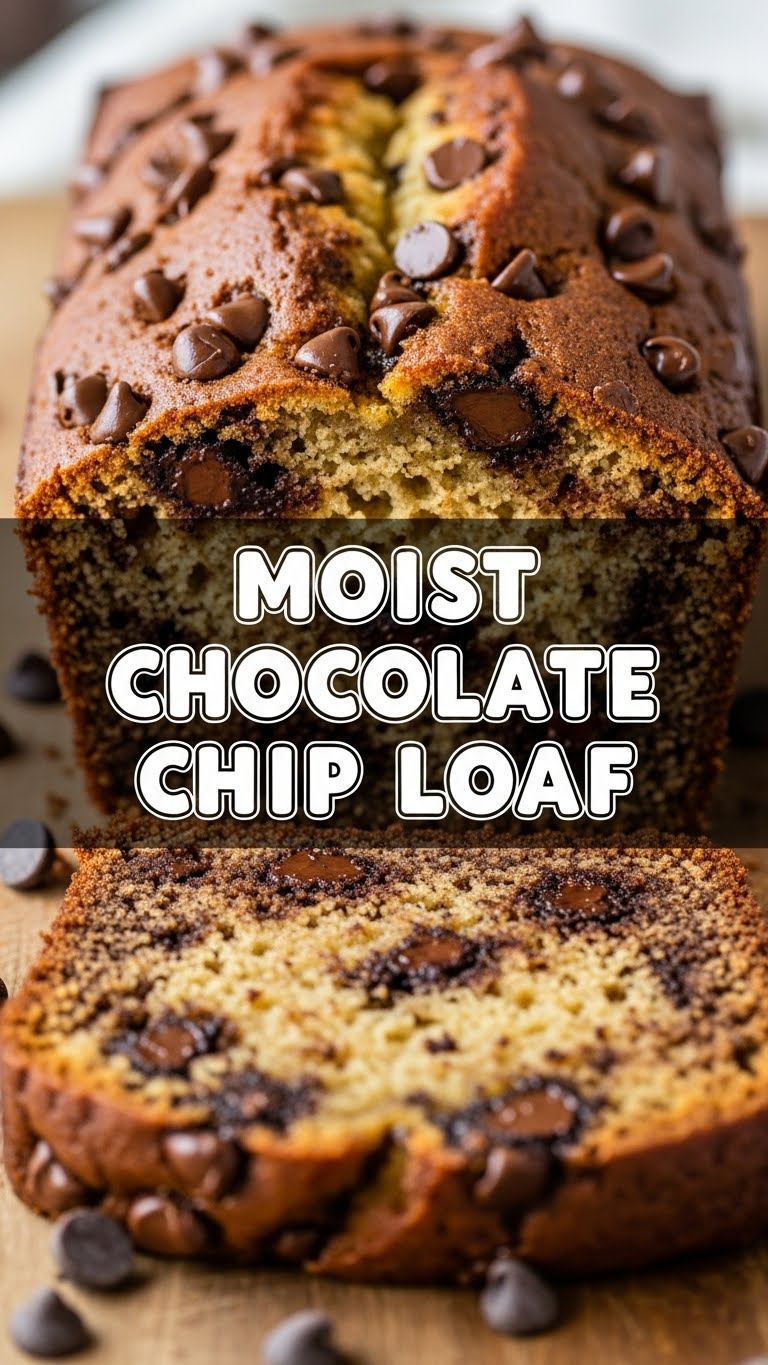
- 1 cup (170g) Semi-Sweet Chocolate Chips: The star of the show! Feel free to go wild here. More is always more, IMO.
Step-by-Step Instructions
Alright, apron on, game face on, let’s bake!
- Get That Oven Ready: First things first, preheat your oven to **350°F (175°C)**. While it’s heating up, grease and flour a 9×5-inch loaf pan. Or, if you’re fancy, line it with parchment paper with an overhang – makes for easy lifting!
- Mix the Dry Stuff: In a medium bowl, whisk together the flour, baking powder, and salt. Give it a good whisk to get rid of any lumps and ensure even distribution. Set aside.
- Cream the Wet Stuff (Part 1): In a larger bowl, using an electric mixer (or some serious arm muscle), cream together the softened butter and granulated sugar until it’s light and fluffy. This usually takes about 2-3 minutes. Don’t rush this step!
- Eggs and Vanilla Join the Party: Beat in the eggs, one at a time, making sure each is fully incorporated before adding the next. Then, stir in that glorious vanilla extract. Scrape down the sides of the bowl to ensure everything is mixed.
- Alternate Like a Pro: Now, we’re going to add the dry ingredients and milk in stages. Add about one-third of the flour mixture to the wet ingredients and mix on low speed until *just* combined. Then, pour in half of the milk and mix again. Repeat with another third of the flour, the rest of the milk, and finally the last of the flour. Stop mixing as soon as everything comes together. Overmixing is the enemy of moist!
- Chocolate Chip Avalanche: Gently fold in the chocolate chips with a spatula. Don’t be shy; make sure they’re evenly distributed throughout the batter.
- Into the Pan and Bake: Pour the batter into your prepared loaf pan and spread it evenly. Bake for **50-60 minutes**, or until a wooden skewer or toothpick inserted into the center comes out clean.
- Cool Down, Buttercup: Let the loaf cool in the pan for about 10-15 minutes before carefully transferring it to a wire rack to cool completely. Or, if you’re like me, eat a slice while it’s still warm and gooey. You’ve earned it!
Common Mistakes to Avoid
Fear not, aspiring baker! Even seasoned pros (ahem, me) make silly mistakes. Here are a few to steer clear of:
- Overmixing the Batter: This is the cardinal sin. Too much mixing develops the gluten in the flour, leading to a tough, dense, sad loaf. Mix until *just* combined. Seriously, walk away when you think it’s good enough.
- Not Preheating the Oven: Rookie mistake! A properly preheated oven ensures even baking from the start. Otherwise, your loaf might rise unevenly and get all grumpy.
- Opening the Oven Door Too Early: Resist the urge! Opening the oven door during the first 30-40 minutes can cause your loaf to collapse because the structure hasn’t set yet. Patience, young padawan.
- Not Letting It Cool: I know, I know, the smell is intoxicating. But slicing a hot loaf can make it crumble and dry out faster. Give it some time to set up.
- Eating All the Chocolate Chips Before They Go In: Okay, this isn’t a *mistake*, per se, but it does leave you with fewer chips in your loaf. Exercise some self-control… or just buy extra. Your call!
Alternatives & Substitutions
Feeling creative? Here are some simple tweaks to make this loaf your own personal masterpiece:
- Milk Swap: If you want an even richer, slightly tangy loaf, try using **buttermilk** instead of regular milk. You can also use plain yogurt or sour cream thinned slightly with water or milk.
- Chocolate Chip Variants: Go wild! Use dark chocolate chunks, milk chocolate chips, white chocolate chips, or even a mix. Add some mini M&Ms for extra fun.
- Add-ins: Throw in a handful of chopped walnuts or pecans for a nutty crunch. A teaspoon of orange zest would also be *divine* with the chocolate.
- Butter Substitute: You *can* use vegetable oil instead of butter (use the same amount), but honestly, the butter flavor is superior. Why compromise on deliciousness?
- Flour Power: Want to make it a bit healthier? You could substitute up to half of the all-purpose flour with whole wheat pastry flour for some added fiber, but your texture might be slightly different.
FAQ (Frequently Asked Questions)
Got questions? I’ve got (casual) answers!
- Can I use margarine instead of butter? Well, technically yes, but why hurt your soul like that? Butter just tastes better, period. For ultimate moistness and flavor, stick with butter.
- How do I know if my loaf is done? A wooden skewer or toothpick inserted into the center should come out clean, maybe with a few moist crumbs attached, but no wet batter. Also, the top should be golden brown and spring back when lightly pressed.
- Can I make muffins instead of a loaf? Absolutely! Divide the batter among a 12-cup muffin tin (paper liners recommended). Bake for about 20-25 minutes at the same temperature. Perfect for grab-and-go treats!
- My loaf came out dry! What happened? Chances are, you overbaked it, or your dry-to-wet ingredient ratio was off. Next time, keep a closer eye on the baking time and make sure you’re measuring accurately (especially the flour!).
- How should I store this amazing loaf? Once completely cooled, wrap it tightly in plastic wrap or aluminum foil. It’ll stay fresh at room temperature for 3-4 days. You can also freeze slices for later!
- Can I skip the chocolate chips? Are you okay? Who *are* you? While technically possible to make a plain loaf, why would you deny yourself this much joy? Just kidding (mostly)! Sure, you can, but it wouldn’t be a *chocolate chip* loaf, would it?
Final Thoughts
And there you have it, folks! A ridiculously easy, incredibly moist, and utterly delicious chocolate chip loaf recipe that’s practically guaranteed to make you feel like a kitchen wizard. This isn’t just baking; it’s self-care. It’s therapy. It’s a delicious way to tell yourself, “Hey, I did a good thing today.” So go ahead, whip up this bad boy, slice yourself a generous piece, and enjoy every single crumb. Now go impress someone—or yourself—with your new culinary skills. You’ve earned it!


