So you’re craving something warm, gooey, and chocolatey but the thought of dirtying every single bowl in your kitchen makes you want to curl up and cry? Same, friend. Oh, and you want it to be ridiculously moist? And, like, *actually* easy? My culinary co-pilot, you’ve hit the jackpot. Let’s whip up some magic with this legendary one-bowl chocolate cake, without turning your kitchen into a war zone. Ready? Let’s dive in!
Why This Recipe is Awesome
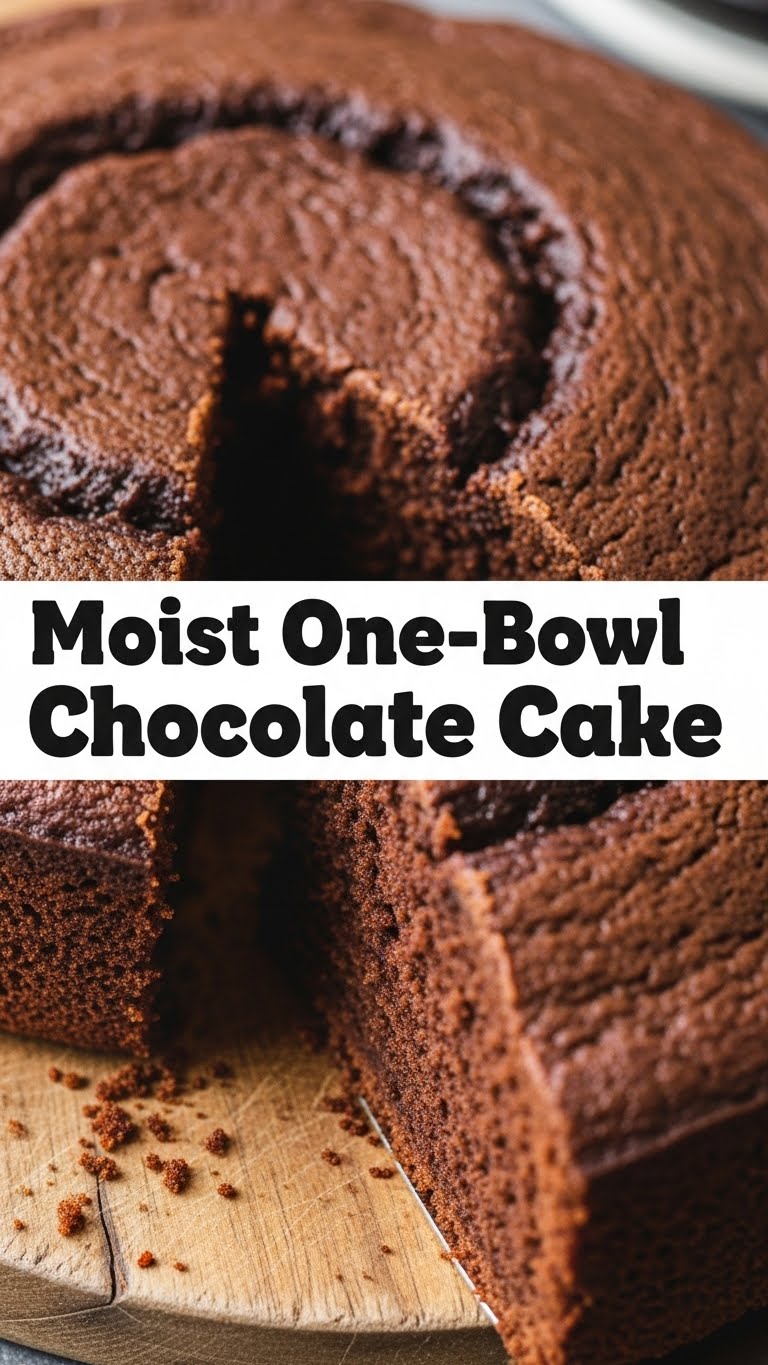
Look, I get it. There are a million chocolate cake recipes out there. But this one? This one is different. It’s the kind of recipe that makes you feel like a pro baker without actually having to, you know, *be* a pro baker. Here’s the lowdown:
- One. Single. Bowl. Seriously, less dishes = more cake-eating time. It’s simple math, people.
- Moist-Meter Maxed Out. We’re talking melt-in-your-mouth, never-dry deliciousness. This cake defies all the dry-cake nightmares you’ve ever had.
- Chocolatey AF. It hits that deep, rich cocoa craving square in the face. No wimpy chocolate here.
- Idiot-Proof. If I, a person whose culinary adventures sometimes involve setting off the smoke alarm, can master this, you absolutely can too.
- Quick & Easy. From “I need chocolate NOW” to “OMG, I just made cake!” in under an hour (mostly passive oven time, FYI).
Ingredients You’ll Need
Gather ’round, my sweet-toothed friends. Here’s your shopping list. Keep it simple, keep it real.
- 1 ½ cups (190g) All-purpose flour: The unsung hero. Don’t overthink it.
- 1 ½ cups (300g) Granulated sugar: Sweetness. Lots of it. You deserve it.
- ¾ cup (65g) Unsweetened cocoa powder: This is where the chocolate party starts. Make sure it’s unsweetened, unless you’re trying to invent a new level of sugary chaos.
- 1 ½ teaspoons Baking soda: Our little lift-off agent. Don’t skip it.
- 1 teaspoon Salt: Just a pinch to make everything pop and balance the sweetness. Trust me, it works wonders.
- 2 Large eggs: Room temperature is best here, for a smoother batter. You can warm them up quickly in a bowl of warm water if you forgot.
- 1 cup (240ml) Milk: Any kind, really! Whole milk gives it that extra hug, but almond, oat, or whatever you have lurking in the fridge works too.
- ½ cup (120ml) Vegetable oil: Or canola. This is our secret weapon for mind-blowing moisture. Don’t try to get “healthy” here; oil is your friend.
- 2 teaspoons Vanilla extract: Liquid gold. Please don’t use imitation vanilla. Your taste buds will thank you.
- 1 cup (240ml) Boiling water: Sounds weird, right? But it’s the *real* MVP for ultimate moistness and deepening that chocolate flavor. Get your kettle on!
Step-by-Step Instructions
Alright, apron on (optional, but cute), tunes blasting (mandatory), let’s bake!
- Preheat & Prep: First things first, preheat your oven to 350°F (175°C). Grab an 8 or 9-inch round cake pan (or an 8×8 square if you’re feeling edgy), grease it up, and dust with a little cocoa powder or flour. This prevents sticking and makes for a prettier cake.
- Dry Mix Magic: In your ONE glorious mixing bowl, dump in the flour, sugar, cocoa powder, baking soda, and salt. Give it a good whisk until everything is nicely combined. No lumps, please!
- Wet Wonders (Mostly): Now, crack in your eggs, pour in the milk, vegetable oil, and vanilla extract. Don’t add the boiling water yet! Mix these wet ingredients into the dry until just combined. You don’t want to overmix; a few small lumps are okay.
- The Boiling Brilliance: Carefully pour in that cup of boiling water. Stir it in gently until the batter is smooth. Don’t panic if it looks super thin—that’s exactly how it should be! This is where the magic happens, giving you that super moist crumb.
- Into the Pan: Pour your beautiful, thin batter into your prepared cake pan. Give the pan a gentle tap on the counter a few times to release any air bubbles.
- Bake It Up: Slide that pan into your preheated oven and bake for 30-35 minutes. How do you know it’s done? A wooden skewer or toothpick inserted into the center should come out clean, or with just a few moist crumbs attached.
- Cool Down, Buttercup: Let the cake cool in the pan for about 10-15 minutes. Then, carefully invert it onto a wire rack to cool completely. Patience, young padawan, patience!
- Devour: Once cool, frost it, dust it with powdered sugar, or just eat it with a spoon. You earned this!
Common Mistakes to Avoid
Nobody’s perfect, but we can avoid some classic cake calamities, right? Listen up!
- Overmixing the Batter: This is a cardinal sin, folks. Once you add the wet to the dry, mix *just* until combined. Overmixing develops the gluten in the flour, leading to a tough, dry cake. We want tender, not tough!
- Not Preheating the Oven: Thinking you can just shove it in and let the oven catch up? Rookie mistake! Uneven heat means uneven baking. **Always preheat your oven fully.**
- Opening the Oven Door Too Often: I know, it’s tempting to peek. But every time you open that door, you let out heat, causing temperature fluctuations that can make your cake sink. Resist the urge!
- Skipping the Boiling Water: This isn’t just for show. That boiling water is crucial for activating the cocoa powder’s flavor and creating that incredibly moist texture. Don’t be a hero and skip it!
- Not Greasing Your Pan Properly: You did all that work, don’t let your cake get stuck! Grease and flour/cocoa powder that pan like your life depends on it.
Alternatives & Substitutions
Feeling a little rebellious? Here are some ways to shake things up without ruining your masterpiece.
- Milk Alternatives: Got dairy issues? No problem! Almond milk, oat milk, soy milk – they all work beautifully here. The cake won’t even know the difference.
- Oil vs. Butter: While oil is king for moisture in this recipe, if you’re craving a richer, butterier flavor, you *can* swap the oil for an equal amount of melted unsalted butter. Just know it might alter the moistness ever so slightly. IMO, stick with the oil for maximum moist factor.
- Cocoa Power-Up: For an even deeper, darker chocolate experience, try using Dutch-processed cocoa powder. It’s less acidic and gives a rich, dark hue.
- Flavor Boosters: Add a teaspoon of instant espresso powder along with the dry ingredients to enhance the chocolate flavor without making it taste like coffee. Or, toss in a handful of chocolate chips for extra chocolatey pockets!
FAQ (Frequently Asked Questions)
Got questions? I’ve got (casual) answers!
- Can I use self-rising flour instead of all-purpose?
Nope, please don’t! Self-rising flour already has leavening agents in it, and this recipe is balanced for plain flour and baking soda. You’ll throw everything off.
- What if I don’t have boiling water? Can I just use hot tap water?
You *can*, but it’s not ideal. The “boiling” part is key to fully dissolving the cocoa and sugar and creating that super-thin, moist batter. Heat up some water in a kettle or microwave; it only takes a minute!
- Can I make cupcakes with this recipe?
Absolutely! Line a muffin tin with liners, fill them about two-thirds full, and bake for about 18-22 minutes. Keep an eye on them; they bake faster!
- How long does this cake stay fresh?
Stored in an airtight container at room temperature, it’ll stay deliciously moist for 3-4 days. But let’s be real, it probably won’t last that long.
- My cake came out dry! What did I do wrong?
The usual culprits are overbaking (keep that skewer handy!) or forgetting the crucial boiling water. Also, make sure your oven temperature is accurate!
- Can I make this gluten-free?
You can definitely try using a 1:1 gluten-free all-purpose flour blend. Results can vary a bit in texture, but many people have success with it!
- Any quick frosting ideas?
Oh, honey, the world is your oyster! A simple chocolate ganache, a classic buttercream, or just a generous dusting of powdered sugar are all winners. Or, just eat it plain. No judgment here!
Final Thoughts
See? I told you it was easy. You’ve just whipped up a ridiculously moist, deeply chocolatey cake with minimal fuss and only one bowl to wash. Go forth and conquer, my friend! Share it, don’t share it—your call. But definitely bask in the glory. You’ve earned every single delicious bite. Now go impress someone (or just yourself!) with your new culinary skills. Happy baking!


