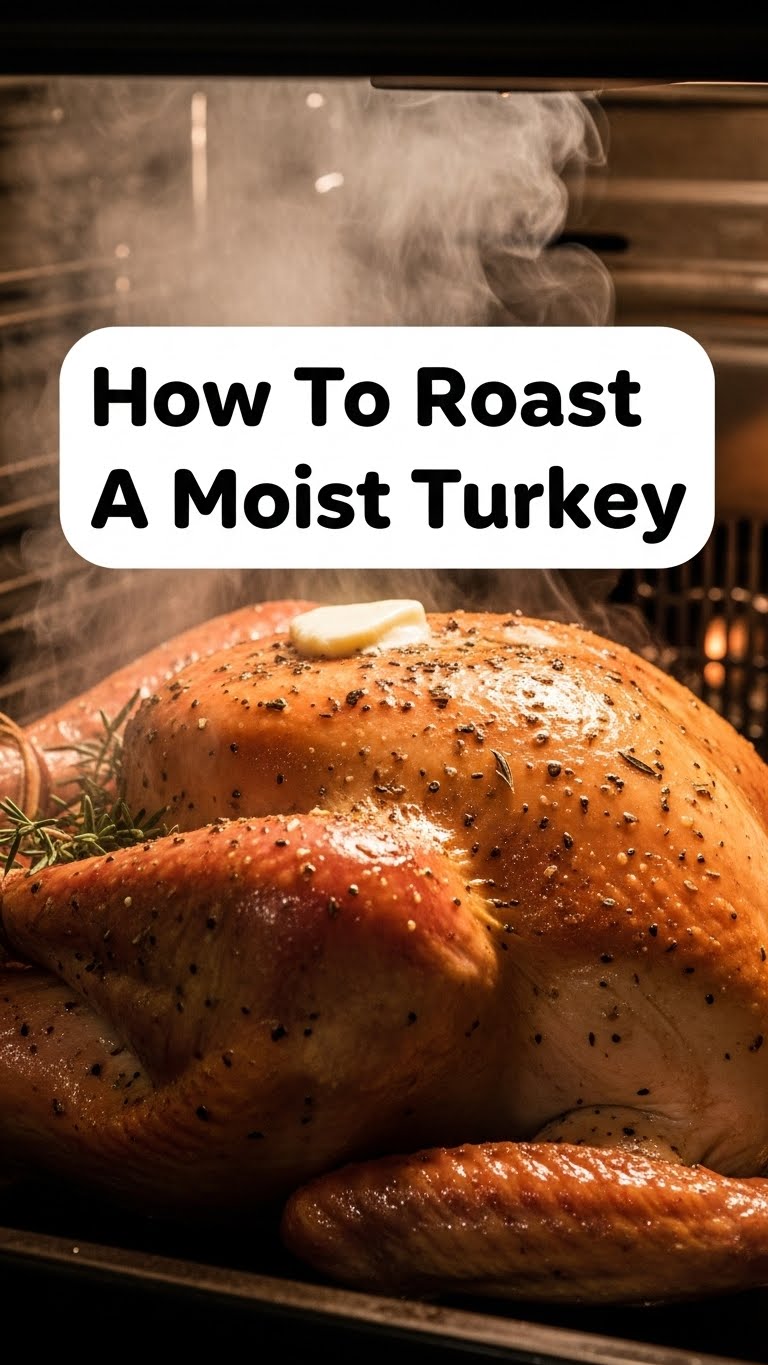
Tired of dry, cardboard-textured turkey that makes you question all your life choices? Me too, friend. It’s a culinary tragedy we’ve all faced. But fear not, because today we’re tackling the Everest of holiday cooking and coming out victorious with a turkey so moist, it’ll make other turkeys jealous.
Why This Recipe is Awesome
Okay, let’s be real. Roasting a turkey sounds intimidating. Like, ‘level 10 chef’ intimidating. But this recipe? It’s like your cool, laid-back aunt who actually knows how to cook but also encourages you to take shortcuts. This isn’t your grandma’s dry bird (unless your grandma was a secret culinary genius, in which case, apologies). This is *the* recipe for a turkey so juicy, you’ll wonder if it secretly took a spa day before hitting your oven.
It’s practically idiot-proof, even I didn’t mess it up. Plus, you get major “I’m a culinary god/goddess” points with minimal stress. And who doesn’t want that? It’s all about a few key tricks that turn a bland bird into a succulent showstopper. Prepare for compliments, because they’re coming.
Ingredients You’ll Need
- One Whole Turkey (10-14 lbs is a good starting point, adjust as needed. Try not to buy one that still has its passport.)
- 1/2 cup Unsalted Butter (the good stuff, softened. Don’t even think about margarine, you’ll hurt its feelings.)
- 1 Large Onion (cut into quarters. It’s basically aromatherapy for your turkey.)
- 4-5 Cloves Garlic (smashed. Because who doesn’t love garlic?!)
- Fresh Herbs Galore (think a few sprigs of rosemary, thyme, and sage. They make your turkey smell fancy.)
- Salt and Freshly Ground Black Pepper (to taste, but don’t be shy. Turkeys are big, they need a lot of love.)
- 2 cups Chicken or Vegetable Broth (for that extra moisture kick, like a little spa for your oven.)
- Optional: Olive Oil (if you want to get really crispy skin, or just ran out of butter, which is a tragedy.)
Step-by-Step Instructions
- Prep Your Bird: First things first, unwrap your turkey and remove the giblet bag (usually lurking in the neck or body cavity, ew). Pat the entire turkey, inside and out, super dry with paper towels. This is crucial for crispy skin! No one wants soggy skin, IMO.
- Butter Up: Gently separate the skin from the breast meat with your fingers, being careful not to tear it. Take about half of that softened butter and spread it directly onto the breast meat under the skin. Then, rub the remaining butter all over the outside of the turkey. Don’t miss a spot!
- Aromatic Stuffing (Not for Eating!): Shove the quartered onion, smashed garlic cloves, and fresh herbs into the turkey cavity. These aren’t for eating; they just provide amazing flavor and moisture from the inside out.
- Season Like a Pro: Season the outside of the turkey generously with salt and pepper. Seriously, don’t be shy. If you’re using olive oil, drizzle a bit over the skin now too.
- Oven Time! Preheat your oven to a scorching 425°F (220°C). Place the turkey, breast-side up, on a roasting rack in a large roasting pan. Pour the chicken or vegetable broth into the bottom of the pan.
- Roast & Reduce: Roast the turkey at 425°F for 30 minutes. This initial blast of heat helps get that skin beautifully golden. Then, reduce the oven temperature to 350°F (175°C) and continue roasting.
- Baste (But Don’t Obsess): Baste the turkey every 45 minutes to an hour with the pan juices. If the turkey is browning too quickly, tent it loosely with foil. Roast until a meat thermometer inserted into the thickest part of the thigh (without touching bone) registers 165°F (74°C). For a 10-14 lb turkey, this usually takes about 2.5-3.5 hours total.
- The Golden Rule: Rest! Once it hits 165°F, take that beautiful bird out of the oven. Transfer it to a carving board and tent it loosely with foil. Let it rest for at least 20-30 minutes (even up to an hour for larger birds). This step is non-negotiable for juicy meat!
- Carve & Conquer: Now for the grand finale! Carve your perfectly moist turkey and get ready for applause.
Common Mistakes to Avoid
- Not Drying the Turkey: Thinking you can skip the pat-dry step? Rookie mistake. That moisture on the skin prevents it from getting crispy.
- Overcooking: This is the number one killer of moist turkey. Get a meat thermometer, use it, and trust it! Pull it out at 165°F.
- Not Resting the Bird: You’ve just put in all that hard work, don’t ruin it by carving too soon! Resting allows the juices to redistribute, leading to a much more tender and moist result.
- Constant Oven Peeking: Every time you open the oven door, you drop the temperature, extending cooking time and drying out your turkey. Resist the urge to peek every five minutes!
- Stuffing the Turkey with Actual Stuffing: While traditional, it makes for uneven cooking and potential food safety issues. Cook your stuffing separately, folks!
Alternatives & Substitutions
Feeling a little rebellious? Here are some tweaks:
- Olive Oil vs. Butter: While butter truly delivers on flavor and browning, you *can* use olive oil for rubbing the outside if you’re dairy-free or just prefer it. But seriously, butter. Just sayin’.
- Herb Power: Don’t have fresh rosemary and thyme? Dried herbs work in a pinch, just use about a third of the amount. Or try some other fresh herbs like marjoram or even a dash of dried poultry seasoning.
- Broth Boost: No chicken broth? Vegetable broth is a perfect substitute. Water can work, but broth adds so much more flavor to the pan juices (hello, gravy base!).
- Spice it Up: Feel free to add a pinch of paprika, garlic powder, or onion powder to your salt and pepper rub for extra oomph.
FAQ (Frequently Asked Questions)
Do I really need to pat the turkey dry?
Yes, friend, YES! Think of it like this: would you want to fry a potato that’s still dripping wet? No! Patting it dry is your express ticket to crispy, golden skin. Don’t skip it unless you’re aiming for sad, rubbery skin (and why would you?).
How long does it take to roast a turkey?
Great question! It really depends on the size of your bird. A good rule of thumb is about 13-15 minutes per pound at 350°F, but remember, ovens vary, and every turkey is a unique snowflake. **Always go by temperature (165°F in the thigh), not by time alone!**
My turkey is browning too fast! What do I do?
Easy fix! Just grab some aluminum foil and loosely tent it over the parts that are getting too dark (usually the breast). This will shield it from the direct heat and allow the rest of the turkey to catch up. Crisis averted!
Can I use frozen turkey?
Totally! Just make sure it’s completely thawed before you start. This can take several days in the fridge (about 24 hours for every 4-5 pounds). Don’t try to roast a partially frozen turkey unless you want unevenly cooked, potentially dangerous results. Patience, grasshopper!
Is basting really necessary?
It helps, but it’s not the end-all, be-all. Basting contributes to a beautiful, even browning and adds a little moisture to the skin, but it doesn’t significantly affect the moisture of the meat itself. The real heroes for moist meat are butter under the skin and letting it rest!
What’s the deal with resting the turkey? Is it really that important?
Oh, it’s CRUCIAL. Seriously, don’t skip this. When meat cooks, the muscle fibers contract, pushing juices to the center. Resting allows those juices to redistribute throughout the meat. If you cut into it too soon, all those precious juices will just run out onto your cutting board, leaving you with dry meat. So, chill out, let the bird chill out, everyone wins.
Final Thoughts
So there you have it, your cheat sheet to turkey domination. Roasting a moist, flavorful turkey isn’t a dark art; it’s just a few simple steps and a little patience. You’ve got this, culinary superstar! Go forth and roast something delicious. Your tastebuds (and your guests) will thank you. Now go impress someone—or yourself—with your new culinary skills. You’ve earned it!
