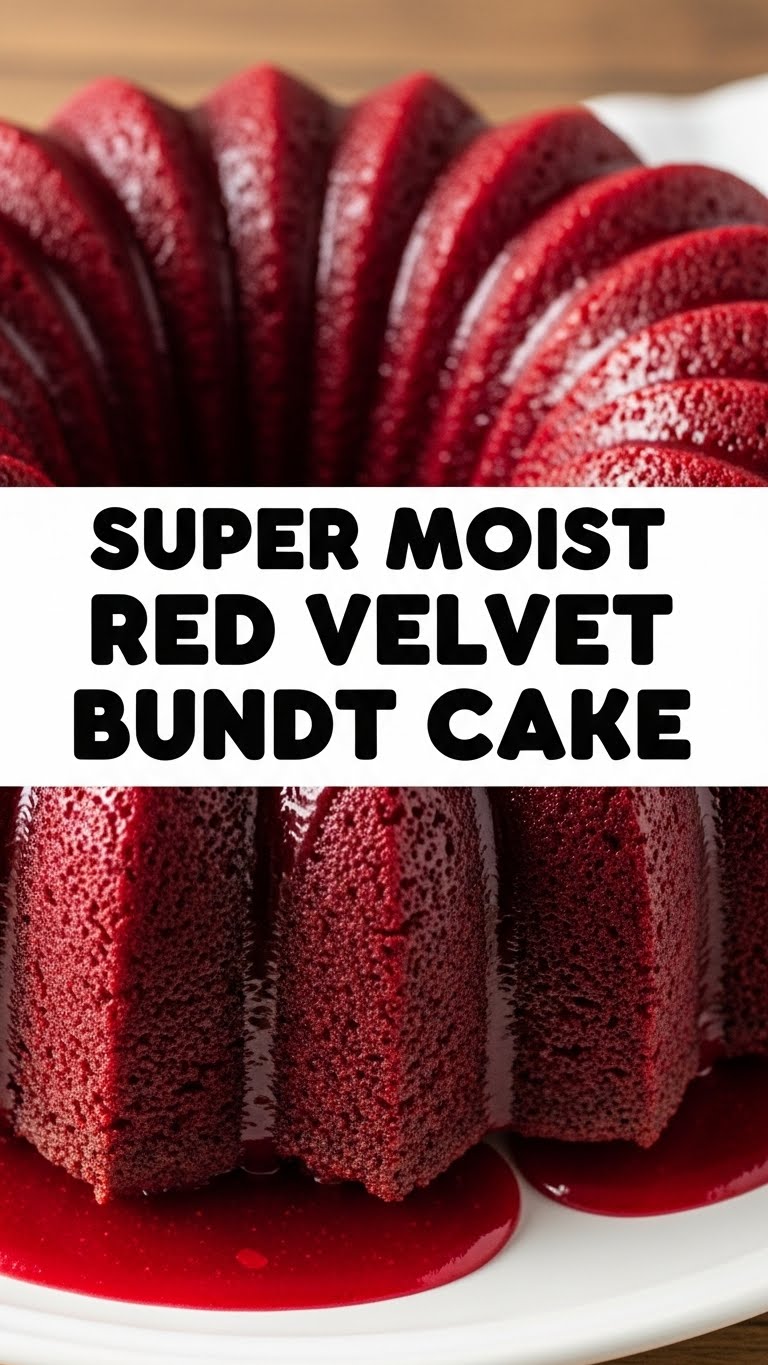
So, you’re scrolling, you’re hungry, and a tiny voice in your head is whispering “cake… make cake…” but also “no effort, plz!” Sound familiar? Because, same, friend. Same. And that, my dears, is why we’re diving headfirst into the glorious, surprisingly simple world of a Super Moist Red Velvet Bundt Cake. No fussy layers, just pure, unadulterated crimson deliciousness in a fancy-pants Bundt shape. Let’s get this party started!
Why This Recipe is Awesome
Okay, let’s be real. We want amazing results without feeling like we just survived a culinary bootcamp. And this recipe? It delivers. First off, it’s a Bundt cake, which means less fussing with stacking and crumb coats than a traditional layer cake. You just pour, bake, flip, and drizzle. Genius, right? Secondly, the “super moist” isn’t just a catchy phrase; it’s a promise. This cake stays ridiculously tender for days, so you can secretly snack on it without anyone knowing. It’s practically idiot-proof – and trust me, if I can do it without setting off the smoke detector, so can you. Plus, red velvet? It’s just a classic, classy choice that screams “I tried!” even when you barely did.
Ingredients You’ll Need
Gather ’round, my little baking buddies. Here’s what you’ll need to transform into a Bundt-baking wizard:
- For the Cake:
- 2 ½ cups all-purpose flour (the basic stuff, no fancy flours needed)
- 1 ½ cups granulated sugar (sweetness central!)
- 1 teaspoon baking soda (our bubbly friend for lift)
- 1 teaspoon salt (don’t skip it, it balances everything)
- 1 tablespoon unsweetened cocoa powder (just a hint for that signature red velvet depth, not full-on chocolate)
- 1 cup buttermilk (this is key for moisture and tang – if you don’t have it, don’t panic, see FAQ!)
- ½ cup vegetable oil (or canola, or grapeseed – something neutral!)
- 2 large eggs (straight from the fridge is fine, we’re not baking pros here)
- 1 tablespoon white vinegar (another secret weapon for tender crumb and activating that soda)
- 1 teaspoon vanilla extract (the good stuff, please)
- 1-2 ounces liquid red food coloring (we’re going for vibrant, not shy! Start with 1 oz, add more if you’re feeling bold)
- For the Cream Cheese Glaze:
- 4 ounces cream cheese, softened (full-fat is your friend here, trust me)
- ½ stick (4 tablespoons) unsalted butter, softened (again, good quality makes a difference)
- 2 cups powdered sugar (sifted, if you’re feeling extra fancy and want no lumps)
- ½ teaspoon vanilla extract
- 1-2 tablespoons milk (or cream, for thinning to perfection)
Step-by-Step Instructions
- Preheat & Prep: Preheat your oven to 350°F (175°C). Seriously, don’t skip this. Grease and flour your Bundt pan like your life depends on it. Get into all those nooks and crannies! A non-stick baking spray with flour works wonders here.
- Dry Mix: In a large bowl, whisk together the flour, sugar, baking soda, salt, and cocoa powder. Give it a good whisk to break up any lumps and distribute everything evenly.
- Wet Mix: In a separate medium bowl, whisk together the buttermilk, oil, eggs, vinegar, vanilla extract, and that vibrant red food coloring. Make sure it’s all nicely combined and wonderfully red.
- Combine Forces: Pour the wet ingredients into the dry ingredients. Mix on low speed with an electric mixer (or by hand with a spatula) just until everything is combined and there are no dry streaks. Do not overmix! Overmixing is the enemy of a moist cake.
- Into the Pan: Pour the batter evenly into your prepared Bundt pan. Give the pan a gentle tap on the counter a few times to release any air bubbles.
- Bake Time: Bake for 45-55 minutes, or until a wooden skewer or toothpick inserted into the center comes out with only a few moist crumbs. Every oven is different, so keep an eye on it.
- Cool Down: Let the cake cool in the pan on a wire rack for 10-15 minutes. This is crucial! Don’t try to flip it too early, or it might stick. After 10-15 minutes, carefully invert the cake onto the wire rack to cool completely. Patience, my friend.
- Glaze Glory: While the cake cools, make your glaze. Beat the softened cream cheese and butter together until smooth. Gradually add the powdered sugar, then the vanilla and milk (a tablespoon at a time) until you have a smooth, pourable glaze. If it’s too thick, add a tiny bit more milk; too thin, a tiny bit more powdered sugar.
- Drizzle & Devour: Once the cake is completely cool, drizzle that glorious cream cheese glaze all over it. Slice, serve, and accept all the compliments!
Common Mistakes to Avoid
Nobody’s perfect, but we can avoid the most common cake crimes! Here’s a quick rundown:
- Not Greasing Your Bundt Pan Properly: Oh, the horror! A cake stuck in the pan is a sad, sad sight. Grease it like you mean it, then flour it! Get into every single crevice.
- Overmixing the Batter: This is a cardinal sin. Mix until just combined, otherwise, your cake will be tough and dry instead of tender and moist.
- Opening the Oven Door Too Early: Resist the urge to peek! Especially in the first 30 minutes, this can cause your cake to sink in the middle.
- Not Letting it Cool in the Pan: Patience, grasshopper. Flipping too soon guarantees half your cake stays cemented to the pan. Give it 10-15 minutes, then flip.
- Ignoring the Food Coloring: Unless you want a “surprise” brown cake, don’t skimp on the red food coloring. We’re going for *red* velvet, not just *velvet*.
Alternatives & Substitutions
Life happens, and sometimes you don’t have every ingredient. No sweat!
- No Buttermilk? No Problem! You can make a quick substitute: add 1 tablespoon of white vinegar or lemon juice to a measuring cup, then fill the rest of the way to 1 cup with regular milk (any fat percentage). Let it sit for 5-10 minutes until it looks slightly curdled. Voila!
- Food Coloring: Gel vs. Liquid: We used liquid, but gel food coloring will give you an even more vibrant color with less liquid, so you might need just 1-2 teaspoons. Just adjust to your desired hue!
- Spice it Up: Want a little extra zing? A tiny pinch of ground cloves or cinnamon (like ¼ teaspoon) can add another layer of flavor.
- No Bundt Pan? You can totally bake this in two 9-inch round cake pans for about 25-30 minutes, or a 9×13-inch pan for 35-40 minutes. Adjust baking time and keep an eye on it!
FAQ (Frequently Asked Questions)
- “Can I use margarine instead of butter in the glaze?” Well, technically yes, but why hurt your soul like that? For the best flavor and texture, stick with real butter. Your taste buds will thank you.
- “My cake stuck to the Bundt pan! What happened?” Rookie mistake! You likely didn’t grease and flour it thoroughly enough, or you tried to unmold it too soon. Live and learn! Next time, really get into those crevices.
- “How long does this cake last?” Covered tightly at room temperature, it’s amazing for 3-4 days. In the fridge, it’ll happily hang out for up to a week. IMO, it tastes best at room temp!
- “Can I freeze red velvet cake?” Absolutely! Unfrosted cake can be wrapped tightly in plastic wrap, then foil, and frozen for up to 3 months. Thaw overnight in the fridge before glazing.
- “Do I *have* to use red food coloring?” TBH, if you skip it, it’ll still taste amazing, but it won’t be “red velvet.” It’ll be more of a subtle chocolatey-buttermilk cake. The red is part of the fun!
- “What if my glaze is too thin/thick?” Too thin? Add a tablespoon or two more powdered sugar. Too thick? Add milk by the teaspoon until it’s the perfect drizzling consistency. It’s a forgiving glaze!
Final Thoughts
So there you have it, folks! A super moist, ridiculously delicious red velvet Bundt cake that’s pretty much guaranteed to make you feel like a baking superstar. Whether you’re making it for a special occasion or just because it’s Tuesday (my favorite reason), this cake won’t disappoint. Now go impress someone—or yourself—with your new culinary skills. You’ve earned it!

