So, you’re eyeing that picture-perfect, impossibly moist cake online and thinking, “Ugh, too much effort for my current level of ambition”? Been there, baked that (and sometimes burned that, oops!). But what if I told you that baking a cake so moist it practically winks at you can be, dare I say, *easy*? And fun? Yes, even for us mere mortals who sometimes confuse baking soda with baking powder. Let’s get our aprons on, because today, we’re making cake magic without the stress!
Why This Recipe is Awesome
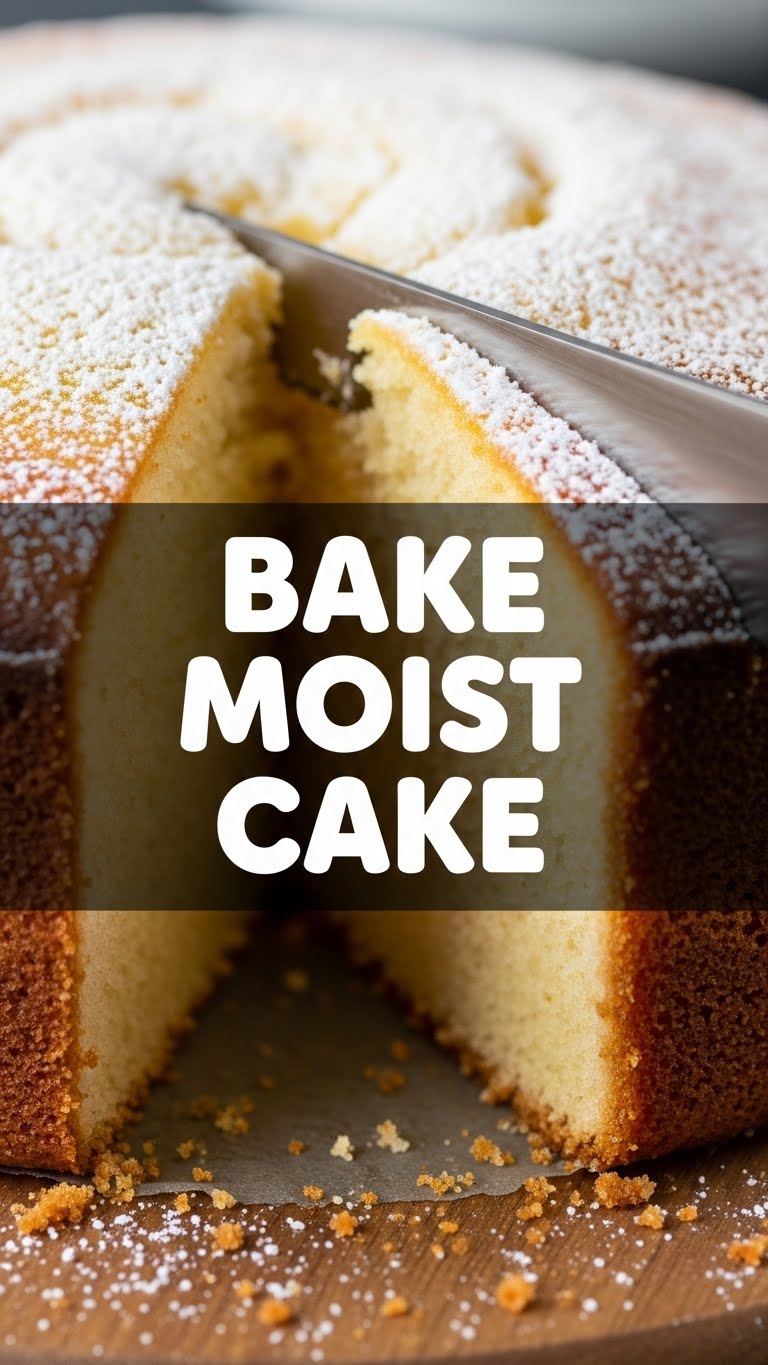
Okay, let’s be real. Most cake recipes promise “moist” but deliver “crumbly disappointment.” Not this one, my friend! This recipe is basically your cake’s hydration hero. It’s so simple, even I (who once mistook a baking sheet for a pizza peel—long story) couldn’t mess it up. It yields a cake that’s perfectly tender, stays fresh for days (if it even lasts that long, LOL), and is a fantastic base for pretty much any frosting or topping your heart desires. No dry edges, no dense bricks, just pure, melt-in-your-mouth goodness. Consider it your new go-to for impressing everyone, including your highly judgmental cat.
Ingredients You’ll Need
Gather your troops! Here’s what we need for our moisture mission. No fancy stuff, just kitchen staples:
- 1 ½ cups All-Purpose Flour: The usual suspect. Sift it if you’re feeling fancy, otherwise, just make sure there are no lumps.
- 1 ½ cups Granulated Sugar: The sweet stuff. Don’t skimp, this is cake, not a health food smoothie.
- ½ cup Unsalted Butter: Softened, please! Like, leave-it-on-the-counter-for-an-hour soft, not melted goo. This is key for that lovely texture.
- 2 Large Eggs: Room temp is best, trust me. It helps everything blend better, creating a smoother batter.
- 1 cup Buttermilk: Our secret weapon for ultimate moisture and a tender crumb. If you don’t have it, see the “Alternatives” section!
- 1 teaspoon Baking Powder: For lift!
- ½ teaspoon Baking Soda: More lift and helps with that buttermilk magic.
- 1 teaspoon Vanilla Extract: The soul of the cake. Don’t even *think* about skipping it.
- ½ teaspoon Salt: Just a pinch to balance out all that sweetness. Seriously, it makes a difference!
Step-by-Step Instructions
Alright, let’s get baking! Follow these simple steps and try not to eat all the batter (I know, it’s tough).
- Preheat & Prep: First things first, preheat your oven to 350°F (175°C). Then, grease and flour a 9-inch round cake pan. You can also line the bottom with parchment paper for extra non-stick insurance.
- Dry Mix Assembly: In a medium bowl, whisk together your flour, baking powder, baking soda, and salt. Give it a good whisk to distribute everything evenly. Set this aside for a hot minute.
- Wet Mix Party: In a larger bowl, using an electric mixer (or a strong arm and a whisk, you superhero), cream together the softened butter and granulated sugar until it’s light and fluffy. This usually takes about 2-3 minutes.
- Egg-cellent Addition: Add the eggs one at a time to the butter-sugar mixture, beating well after each addition. Scrape down the sides of the bowl to make sure everything gets incorporated. Now, stir in that glorious vanilla extract.
- Alternate Additions: With the mixer on low speed, add about a third of the dry ingredient mixture to the wet ingredients, mixing until just combined. Then, pour in half of the buttermilk and mix. Repeat with another third of the dry, then the remaining buttermilk, and finally the last of the dry ingredients. Mix only until *just* combined—don’t overmix! Overmixing develops the gluten, leading to a tough cake. We want tender, remember?
- Pour & Bake: Pour your beautifully smooth batter into your prepared cake pan. Give the pan a gentle tap on the counter a few times to release any air bubbles.
- Bake It Off: Pop it into the preheated oven and bake for 30-35 minutes, or until a wooden skewer or toothpick inserted into the center comes out clean.
- Cool Down: Let the cake cool in the pan on a wire rack for about 10-15 minutes before inverting it onto the rack to cool completely. Patience, young padawan! Frosting a warm cake is a messy business.
Common Mistakes to Avoid
Baking is a science, but don’t worry, we’re doing the fun kind of science. Here are a few traps to sidestep:
- Overmixing: We talked about it, but it bears repeating! Once the flour goes in, mix only until just combined. It’s not a race, it’s a gentle waltz.
- Cold Ingredients: Using cold butter and eggs is like trying to make friends with a porcupine – it just doesn’t work as smoothly. Room temperature is your BFF here.
- Not Preheating: Thinking you can skip preheating the oven? Rookie mistake! An oven that hasn’t reached temperature means uneven baking and a sad, dense cake.
- Opening the Oven Door Too Soon: Resist the urge to peek! Opening the oven door lets out heat and can cause your cake to sink. Wait until at least 25 minutes into baking.
- Ignoring the Recipe: Okay, sometimes you can get away with it, but for a truly moist cake, follow the measurements. Baking is precision, mostly.
Alternatives & Substitutions
Life happens, and sometimes you don’t have exactly what the recipe calls for. No stress!
- No Buttermilk? No Problem! You can totally make your own. Just add 1 tablespoon of white vinegar or lemon juice to a measuring cup, then fill the rest of the way to 1 cup with regular milk (any fat percentage is fine). Stir it and let it sit for 5 minutes until it curdles slightly. Voila! Instant buttermilk substitute.
- Butter Substitute: You can use unsalted stick margarine or even vegetable oil (use ½ cup) instead of butter. Keep in mind oil cakes tend to be a bit denser but *very* moist. Butter gives a richer flavor and a lighter crumb, IMO.
- Gluten-Free Flour: Swap out the all-purpose flour for a 1:1 gluten-free baking blend. Results may vary slightly, but many blends work wonderfully for cakes like this.
- Add-ins: Want to jazz it up? Fold in ½ cup of chocolate chips, sprinkles, or even some citrus zest (lemon or orange) at the very end of mixing. YUM!
FAQ (Frequently Asked Questions)
Got questions? I’ve got (casual) answers!
- Can I use margarine instead of butter? Well, technically yes, but why hurt your soul like that? Butter just has a superior flavor and texture contribution. If you absolutely must, go for it, but don’t say I didn’t warn you!
- My cake sank in the middle! What went wrong? Classic! Usually, this means either your leavening agents (baking powder/soda) are old and inactive, you opened the oven door too early, or the oven temperature was too low. Check those expiration dates!
- How do I know when the cake is done? The toothpick test! Insert a wooden skewer or toothpick into the center of the cake. If it comes out clean (no wet batter), it’s done. If it has sticky crumbs, give it a few more minutes.
- Can I make this into cupcakes? Absolutely! Divide the batter into 12-18 lined cupcake tins and bake for about 18-22 minutes. Keep an eye on them, as baking times will be shorter.
- How should I store this amazing cake? Once cooled, store it in an airtight container at room temperature for up to 3-4 days. If it’s frosted with something perishable (like cream cheese frosting), store it in the fridge.
- What kind of frosting goes best with this? Oh, the possibilities! A simple vanilla buttercream, chocolate ganache, or even a tangy cream cheese frosting would be divine. Pick your poison!
Final Thoughts
See? You didn’t just bake a cake; you conquered a mountain of potential dryness and emerged victorious with a moist, delicious masterpiece! Give yourself a pat on the back, or better yet, a generous slice of that cake. Now go impress someone—or yourself—with your new culinary skills. You’ve earned it! Seriously, go enjoy your creation. You totally deserve it!


