So you’re craving something warm, spicy, and utterly delicious but too lazy to spend forever in the kitchen, huh? Same, friend, *same*. And let’s be real, autumn might be over, but our pumpkin obsession? That’s a year-round commitment. It’s time to whip up some Moist Pumpkin Bread Dessert that’s so good, you’ll wonder why you ever bought it from a bakery.
Why This Recipe is Awesome
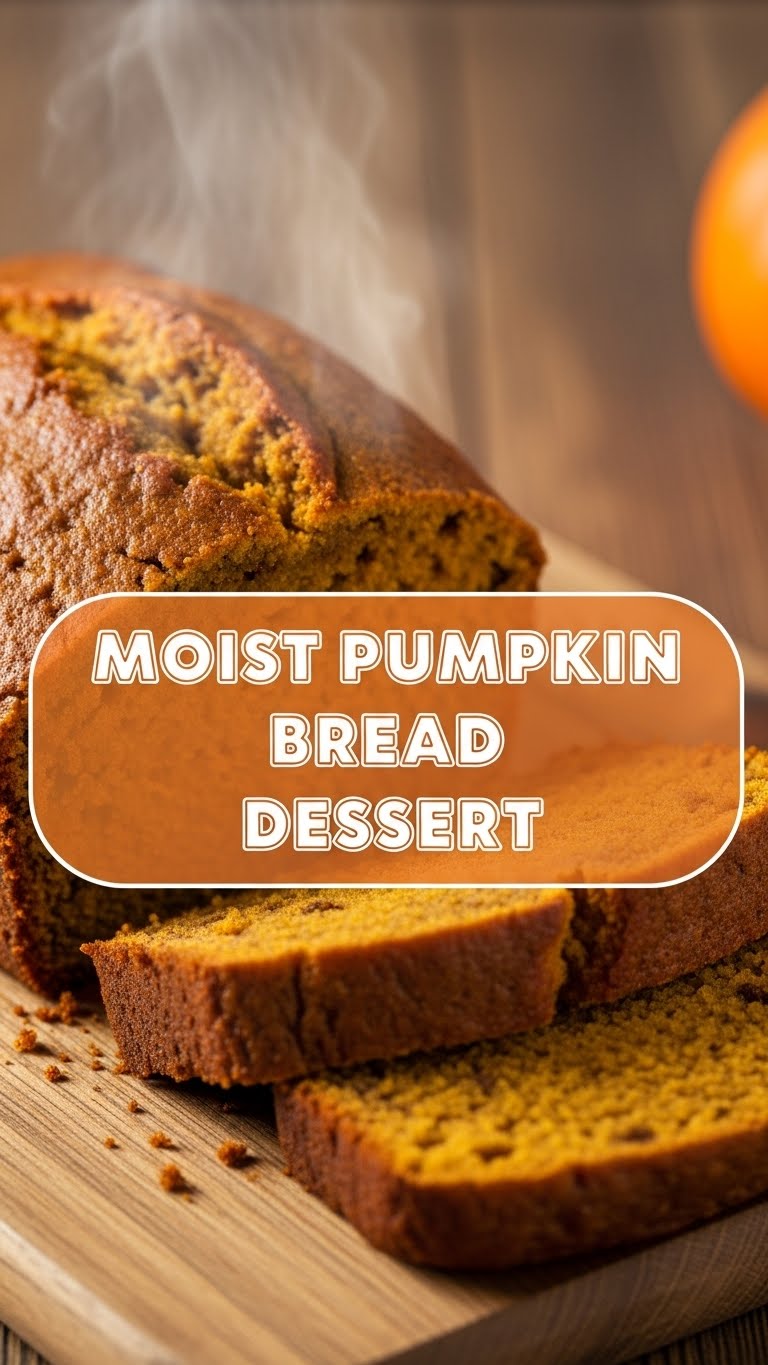
Okay, let’s get one thing straight: this isn’t just *any* pumpkin bread. This is THE moist pumpkin bread. We’re talking melt-in-your-mouth, perfect-for-coffee, hide-it-from-your-family-if-you-want-any-left kind of amazing. It’s also incredibly forgiving, meaning it’s pretty much **idiot-proof**. Even I, the queen of kitchen mishaps, manage to nail this one every single time. Seriously, if you can stir, you can make this. Plus, your house will smell like a cozy autumn dream, no fancy candles required. You’re welcome.
Ingredients You’ll Need
- All-Purpose Flour: About 1 ½ cups. The backbone of our deliciousness.
- Granulated Sugar: 1 ½ cups. Because life is sweet, and so should your bread be.
- Baking Soda: 1 teaspoon. Our little magic poof-maker.
- Cinnamon: 1 teaspoon. Spice, spice, baby!
- Pumpkin Pie Spice: 1 teaspoon. Double the spice, double the nice. Or just use more cinnamon and a pinch of nutmeg if you’re out. YOLO.
- Salt: ½ teaspoon. Just a pinch to make everything pop.
- Large Eggs: 2, lightly beaten. The glue that holds our dreams together.
- Pumpkin Puree: 1 cup (from a 15-oz can). **Important: Make sure it’s PUREE, not pie filling!** Unless you enjoy sadness in loaf form.
- Vegetable Oil: ½ cup. The secret to that glorious moistness.
- Vanilla Extract: 1 teaspoon. Because vanilla makes everything better. It’s a fact.
Step-by-Step Instructions
- First things first, preheat your oven to 350°F (175°C). Then, **grease and flour a 9×5-inch loaf pan**. Don’t skip this, unless you enjoy a good wrestling match with your baked goods later.
- In a large bowl, whisk together your dry ingredients: the flour, sugar, baking soda, cinnamon, pumpkin pie spice, and salt. Give it a good whisk until there are no lumpy surprises.
- In a separate medium bowl, combine your wet team: the lightly beaten eggs, pumpkin puree, vegetable oil, and vanilla extract. Mix ’em up until they’re happily blended.
- Now for the fun part! Pour the wet ingredients into the dry ingredients. **Mix just until combined.** Seriously, stop when you don’t see any more streaks of flour. Overmixing is the enemy of moist bread.
- Pour the glorious batter into your prepared loaf pan. Give the pan a gentle tap on the counter a few times to settle the batter and release any air bubbles.
- Bake for 50-60 minutes, or until a toothpick inserted into the center comes out clean. Every oven is a diva in its own right, so keep an eye on it!
- Once baked, let your pumpkin bread cool in the pan for about 10-15 minutes. Then, gently remove it and place it on a wire rack to cool completely. Or, if you’re impatient like me, slice it warm and suffer the consequences of a slightly crumbly but utterly delicious first piece.
Common Mistakes to Avoid
- Ignoring the Preheat: Thinking you don’t need to preheat the oven? **Rookie mistake.** An unheated oven can mess with the rise and texture.
- Using Pumpkin Pie Filling: We already covered this, but it bears repeating. Pie filling has added sugar and spices, which will throw off your recipe. Stick to pure pumpkin puree!
- Overmixing the Batter: This is a biggie. Overmixing develops the gluten in the flour too much, leading to a tough, dense bread instead of that dreamy moist texture we’re aiming for. Mix gently and only until just combined.
- Not Greasing Your Pan: Unless you enjoy chiseling your bread out of the pan, grease and flour that bad boy properly. Or use parchment paper if you’re feeling fancy.
- Opening the Oven Door Too Often: Resist the urge to peek every five minutes! You’re letting heat out, which can cause your bread to sink. Be patient, little grasshopper.
Alternatives & Substitutions
Feeling a bit wild? Let’s jazz things up!
- Nutty Goodness: Add ½ cup of chopped walnuts or pecans to the batter for a nice crunch. Because who doesn’t love a little texture?
- Chocolate Lover’s Dream: Stir in ½ cup of chocolate chips (dark, milk, or white—your choice!) for an extra level of decadence. Seriously, pumpkin and chocolate are a match made in heaven. Don’t @ me.
- Spice It Up: If you’re a cinnamon fiend, add an extra ½ teaspoon. Or, for a warmer, spicier kick, a tiny pinch of ground cloves or ginger can elevate the flavor.
- Cream Cheese Frosting: If you want to take this from “dessert bread” to “full-blown cake,” whip up a simple cream cheese frosting. It’s extra, but in the best possible way.
- Oil vs. Butter: While oil gives amazing moistness, you can swap half the oil for melted butter for a richer flavor profile. Just sayin’.
FAQ (Frequently Asked Questions)
- Can I use margarine instead of oil? Well, technically yes, but why hurt your soul like that? Vegetable oil really is your best bet for ultimate moistness here.
- How long does pumpkin bread last? Wrapped tightly at room temperature, it’ll be good for 3-4 days. In the fridge? Up to a week. If it even lasts that long, that is.
- Can I freeze it? Heck yes! Wrap cooled bread tightly in plastic wrap, then foil. It’ll last in the freezer for up to 3 months. Perfect for future cravings.
- What if I don’t have pumpkin pie spice? No stress! Just use more cinnamon, and if you have it, a tiny pinch of nutmeg and ground ginger. Nobody’s judging your spice cabinet.
- Is it okay to reduce the sugar? You can try, but be warned, it might affect the texture and moisture content slightly. Reducing by ¼ cup usually works without too much drama.
- Can I make these into muffins? Absolutely! Pour the batter into greased muffin tins and bake for 20-25 minutes. Mini deliciousness, FTW!
Final Thoughts
So there you have it, your new go-to recipe for the most irresistibly moist pumpkin bread dessert. It’s easy, it’s comforting, and it’s guaranteed to make you feel like a culinary wizard (even if you just followed my simple instructions to a T). Now go impress someone—or yourself—with your new baking skills. You’ve earned that delicious slice, trust me. Happy baking, my friend!


