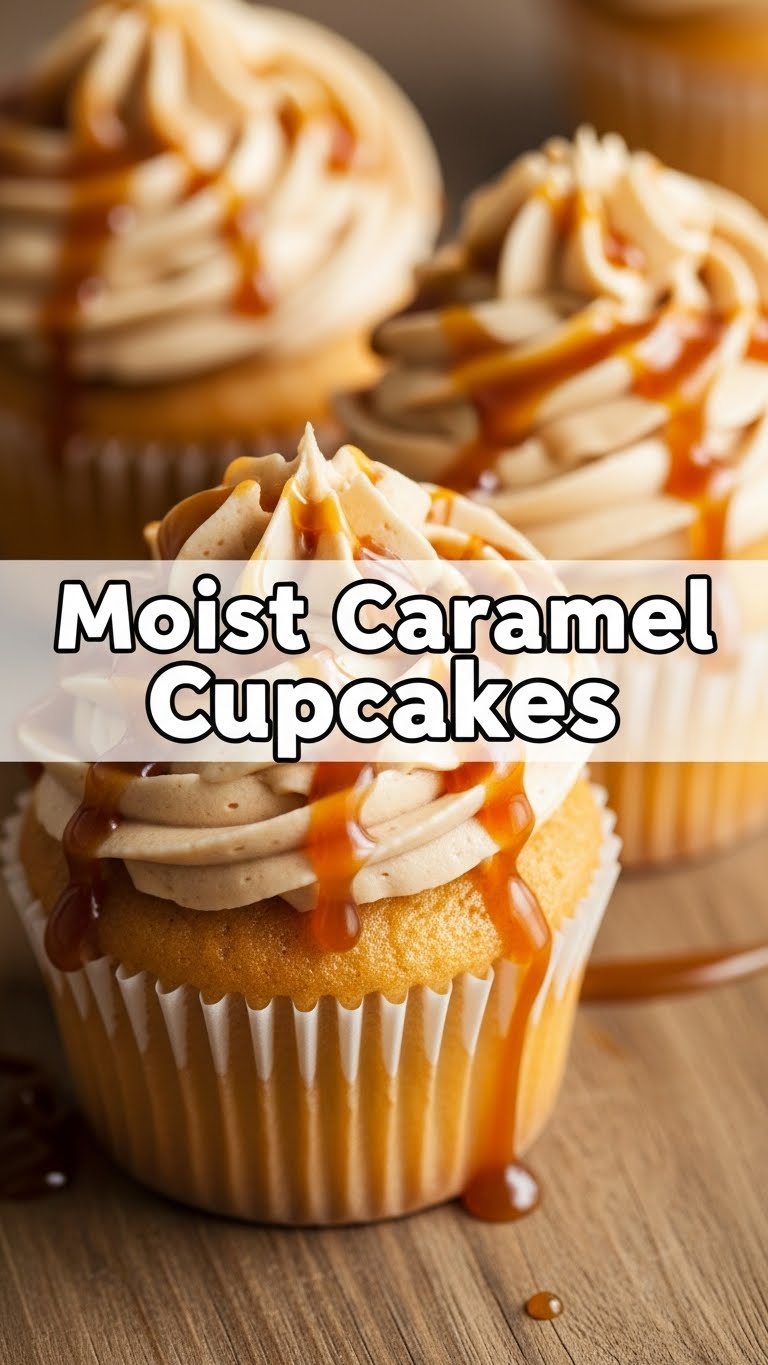
So, you woke up today with that specific craving for something sweet, gooey, and utterly comforting, but the thought of a culinary marathon makes you want to crawl back under the covers? Been there, baked that. And now, my friend, you’re about to bake *this*. Get ready for the moistest, most luscious caramel cupcakes you’ve ever had the pleasure of devouring. Seriously, they’re a game-changer.
Why This Recipe is Awesome
Why waste your precious Netflix binge time on complicated recipes? This one is practically **idiot-proof** – seriously, even I managed it without burning down the kitchen (mostly). It’s got that perfect balance of fluffy cake and rich, buttery caramel that makes people ooh and aah like you’re some kind of pastry wizard. Plus, it uses mostly stuff you probably already have lurking in your pantry. No obscure ingredients that require a quest to the farthest corners of the internet, thank goodness. You’ll look like a baking superstar with minimal effort. Win-win, right?
Ingredients You’ll Need
Gather ’round, my fellow sugar fiend! Here’s what you’ll need for these magical little bites of heaven:
For the ridiculously moist cupcakes:
- 1 ½ cups All-Purpose Flour: The foundation of all good things.
- 1 tsp Baking Powder & ½ tsp Baking Soda: Our leavening dream team. Don’t skip these unless you like hockey pucks.
- ½ tsp Salt: Balances the sweetness, makes everything pop.
- ¾ cup Granulated Sugar: The sweet star of the show.
- ½ cup Unsalted Butter, softened: Let it get soft, but not melted. This is important, peeps!
- 2 Large Eggs, room temperature: Seriously, room temp makes a difference. Pop ’em in warm water for 5 mins if you forgot.
- 1 tsp Vanilla Extract: Use the good stuff, your taste buds will thank you.
- ½ cup Milk: Any kind works, but whole milk gives that extra richness.
For the glorious homemade caramel sauce:
(Because store-bought just doesn’t hit the same, **IMO**)
- 1 cup Granulated Sugar: Yes, more sugar. We’re making caramel, not health food.
- ¼ cup Water: Just to get things started.
- ½ cup Heavy Cream, warmed: Warm it gently in the microwave or a small saucepan. Cold cream will seize your caramel!
- 2 tbsp Unsalted Butter: For that silky finish.
- Pinch of Sea Salt: Totally optional, but highly recommended for that salty-sweet vibe.
Step-by-Step Instructions
Alright, apron on, game face on. Let’s get baking!
- Preheat & Prep: Get your oven to **350°F (175°C)** and line a 12-cup muffin tin with liners. Don’t be a hero and skip the liners – cleaning melted sugar is zero fun.
- Dry Mix: In a medium bowl, whisk together the flour, baking powder, baking soda, and salt. Set it aside.
- Wet Mix (Part 1): In a large bowl, cream the softened butter and sugar together until it’s **light and fluffy**. This takes about 2-3 minutes with an electric mixer. Don’t rush it!
- Wet Mix (Part 2): Beat in the eggs one at a time, mixing well after each addition. Scrape down the sides of the bowl. Then stir in the vanilla extract.
- Combine: Gradually add the dry ingredients to the wet ingredients, alternating with the milk, starting and ending with the dry ingredients. **Don’t overmix!** Mix until *just* combined; a few small lumps are totally fine. Overmixing leads to tough cupcakes, and nobody wants that.
- Fill & Bake: Divide the batter evenly among the cupcake liners, filling each about two-thirds full. Bake for **18-22 minutes**, or until a toothpick inserted into the center comes out clean.
- Cool: Let them cool in the muffin tin for a few minutes, then transfer them to a wire rack to cool completely. *Self-control is key here, resist the urge to eat them hot!*
- Make the Caramel: While cupcakes cool, melt sugar and water in a heavy-bottomed saucepan over medium heat. Swirl occasionally, but **don’t stir** with a spoon (you’ll get crystals!). Let it bubble until it turns a beautiful amber color. This takes patience, but trust the process.
- Finish the Caramel: Remove from heat immediately. Carefully, and slowly, pour in the warm heavy cream (it will bubble up aggressively – stand back!). Stir until smooth. Add the butter and sea salt, stirring until melted and combined. Let it cool slightly.
- Assemble: Once cupcakes are cool, use a small knife or a cupcake corer to scoop out a little hole from the center of each cupcake. Fill the hole with a spoonful of caramel sauce. Then, drizzle generously with more caramel on top.
Common Mistakes to Avoid
Nobody’s perfect, but we can avoid these common oopsies:
- Cold Ingredients: Thinking those eggs and butter don’t *really* need to be at room temp. Oh, they do. Cold ingredients don’t emulsify properly, leading to a lumpy, sad batter.
- Overmixing: Whirring away with your mixer until your arm hurts. Stop! Overmixing develops gluten, which is great for bread, terrible for fluffy cupcakes. Mix until *just* combined.
- Opening the Oven Door: Peeking constantly during baking. Every time you open that door, you drop the oven temperature and risk your cupcakes sinking. Have faith!
- Stirring the Caramel: Stirring the sugar and water while it’s boiling. This is how you get crystallized sugar instead of smooth caramel. Swirl the pan, don’t stir with a spoon. You’ve been warned!
- Eating Them Warm: Cutting into a warm cupcake. While tempting, it’s a messy, crumbly affair. Let them cool completely for the best texture and structure. **Patience, grasshopper.**
Alternatives & Substitutions
Life happens, ingredients run out, or maybe you’re just feeling experimental. Here are some simple tweaks:
- Store-bought Caramel: Look, if you’re *really* short on time or just intimidated by making caramel from scratch (it’s okay, we all have our limits), a good quality store-bought caramel sauce will do in a pinch. **But seriously, try the homemade one first!** It’s worth it.
- Different Milk: Ran out of whole milk? 2%, 1%, even almond milk can work here. The texture might be *slightly* less rich, but still totally delicious.
- Add-ins: Feeling fancy? Sprinkle some flaky sea salt on top of the finished cupcakes for an extra pop. Or chop up some pecans or walnuts and fold them into the batter for a nutty crunch.
- Spice it up: A tiny pinch of cinnamon or nutmeg in the dry ingredients can add a lovely warmth, especially if it’s autumn vibes you’re going for.
FAQ (Frequently Asked Questions)
Got questions? I’ve got (casual) answers!
- “Can I use salted butter?” Well, technically yes, but why risk messing with the salt balance? Unsalted butter gives you control. If you *must* use salted, reduce the added salt in the recipe by half.
- “My caramel crystallized! What went wrong?” You probably stirred it, didn’t you? Or maybe your pan wasn’t super clean, leaving tiny sugar crystals. Start over, and remember: **swirl, don’t stir.**
- “How long do these caramel cupcakes last?” If they last more than 2 days in your house, you have remarkable self-control! Seriously though, stored in an airtight container at room temperature, they’re best for 2-3 days. In the fridge, maybe a day longer.
- “Can I freeze these?” Yep! Freeze the *un-frosted* cupcakes in an airtight container for up to a month. Thaw them at room temp, then fill and top with fresh caramel. Frozen caramel isn’t quite the same.
- “My cupcakes are dry! Help!” Chances are, you overmixed the batter or overbaked them. Keep an eye on the oven, and remember to mix until *just* combined. **Baking is a science, but also an art of not overdoing it!**
- “What if I don’t have a cupcake corer?” A small paring knife works perfectly! Just cut a small cone out of the center. Easy-peasy.
Final Thoughts
See? That wasn’t so scary, was it? You just whipped up a batch of glorious, moist caramel cupcakes that are going to make you very popular (or just very happy, which is equally important). So go on, grab a fork (or just dive in face-first, I won’t judge), and enjoy your hard work. You’ve totally earned this deliciousness. Now go impress someone—or yourself—with your new culinary skills. You’ve earned it! **Happy baking!**

