So, you’ve scrolled past one too many aesthetically pleasing dessert pics on Instagram, and now your sweet tooth is doing a full-on conga line in your mouth, huh? And you want something delicious, comforting, and *actually* doable without needing a culinary degree or a small army of kitchen assistants? Friend, you’ve come to the right place. We’re making Moist Honey Cake today, and trust me, it’s a hug in cake form. Get ready for some sticky, sweet perfection!
Why This Recipe is Awesome
Look, I’m not going to lie; I’m pretty selective about what makes it into my “easy and amazing” recipe hall of fame. This honey cake? It’s a gold medalist. Why? First off, it’s ridiculously moist. Like, “did a unicorn cry happy tears into this batter?” moist. Secondly, it’s pretty much **idiot-proof**. If I can nail it after a long day (and let’s be real, I’ve set off the smoke detector making toast before), you definitely can. You probably have most of the ingredients already chilling in your pantry, and the best part? It actually tastes *better* the next day. Yes, you read that right. Less effort, more flavor. It’s basically magic. Plus, your kitchen will smell like a dream factory, and who doesn’t want that?
Ingredients You’ll Need
Alright, gather your troops! These are the heroes of our honey cake saga. No fancy stuff, promise.
- All-Purpose Flour: The backbone of any good cake. About 2 ½ cups.
- Baking Soda: Our fluffy-maker. Just 1 teaspoon. Don’t confuse it with baking powder; they’re distant cousins with different jobs.
- Salt: A mere ½ teaspoon. It brings out all the other flavors, like a tiny flavor hype man.
- Ground Cinnamon: 1 teaspoon. **Highly recommended** for that warm, cozy vibe. You can add a pinch of nutmeg or allspice too if you’re feeling spicy.
- Large Eggs: 3 of ’em. Room temperature if you’re a fancy baker, but honestly, direct from the fridge is usually fine for this one.
- Granulated Sugar: ½ cup. The classic sweetener.
- Light Brown Sugar: ½ cup, packed. This is our secret weapon for extra moisture and a deeper flavor. Don’t skip it!
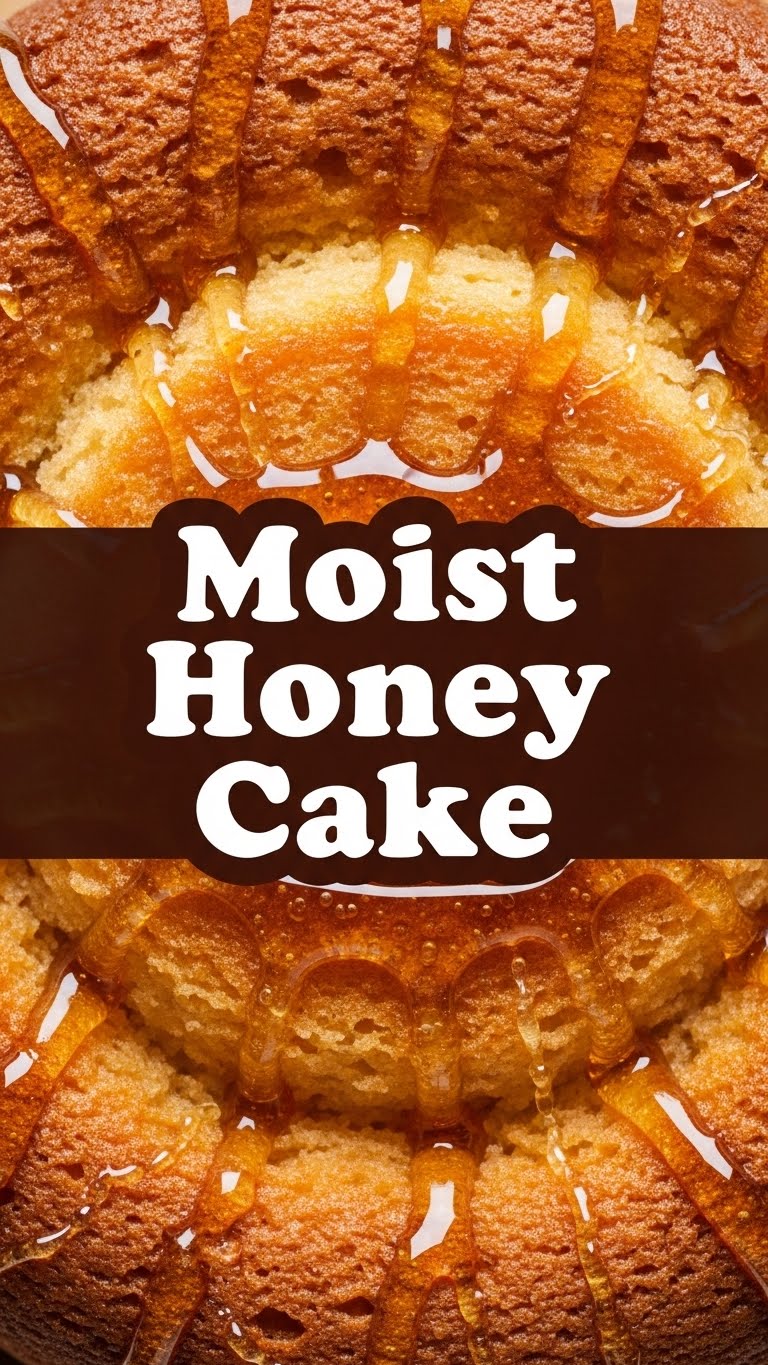
- Honey: 1 cup. The star of the show! Use good quality honey if you can, it truly makes a difference.
- Vegetable Oil (or Canola): ½ cup. This is what keeps our cake so incredibly moist. Don’t substitute with butter if you want that ultimate moistness; butter makes it denser.
- Milk: 1 cup. Any kind works, but whole milk gives it that extra richness.
- Vanilla Extract: 2 teaspoons. Because, well, it’s vanilla. Enough said.
Step-by-Step Instructions
Ready to bake? Let’s do this!
- Get Your Oven & Pan Ready: Preheat your oven to 350°F (175°C). Grab a 9×13 inch baking pan (or a 10-inch round springform if you’re feeling classy). **Grease it generously** and then dust it with flour. Tap out the excess. No sticking allowed!
- Dry Mix Party: In a large bowl, whisk together your flour, baking soda, salt, and cinnamon. Give it a good whisk to make sure everything is evenly distributed. Set aside.
- Wet Mix Wonderland: In a separate, even larger bowl, whisk the eggs, granulated sugar, and brown sugar until they’re nice and combined and a bit lighter in color. Then, pour in the honey, vegetable oil, milk, and vanilla extract. Whisk it all up until it’s looking smooth and gorgeous.
- Marry the Mixtures: Now for the magic! Pour your wet ingredients into your dry ingredients. Using a spatula or wooden spoon, gently mix until *just* combined. A few streaks of flour are totally fine; **do NOT overmix!** Overmixing is the enemy of moist cake.
- Bake It Up: Pour the luscious batter into your prepared pan. Pop it into the preheated oven and bake for 45-55 minutes. You’ll know it’s done when a wooden skewer or toothpick inserted into the center comes out clean or with a few moist crumbs attached.
- Cool Down, Buttercup: Let the cake cool in the pan on a wire rack for about 15-20 minutes before carefully inverting it onto the rack to cool completely. This is the hardest part – resisting!
Common Mistakes to Avoid
Even though this is an easy-peasy recipe, a few rookie errors can trip you up. Learn from my past kitchen mishaps!
- Overmixing the Batter: This is the cardinal sin of cake baking. Mixing too much develops the gluten in the flour, making your cake tough and dry. Mix until *just* combined, then walk away. Seriously.
- Not Greasing Your Pan Properly: A tragedy. Nothing worse than a perfect cake stuck firmly to the bottom of the pan. **Grease and flour generously!**
- Opening the Oven Door Constantly: I know, it smells amazing, and you want to peek. But every time you open that door, the oven loses heat, which can make your cake sink or bake unevenly. Practice patience!
- Slicing While Hot: Oh, the temptation! But slicing a warm cake often results in a crumbly, messy situation. Let it cool; it makes for cleaner slices and better texture.
Alternatives & Substitutions
Feel like getting a little adventurous? Here are some simple swaps and additions:
- Spices Galore: Want more warmth? Add a pinch of ground ginger or cardamom to your dry ingredients. Or even a touch of pumpkin pie spice blend for autumn vibes.
- Dairy-Free Option: Swap the regular milk for almond, soy, or oat milk. They all work beautifully in this recipe.
- Add-Ins: Fold in ½ cup of chopped walnuts or pecans (toast them first for extra flavor!), or even some dried cranberries for a chewy surprise. Do this right before pouring into the pan.
- Glaze It Up: While delicious on its own, a simple honey-lemon glaze takes it up a notch. Whisk together ½ cup powdered sugar, 2 tablespoons honey, and 1-2 tablespoons lemon juice until smooth. Drizzle over the cooled cake. *Chef’s kiss!*
FAQ (Frequently Asked Questions)
Got questions? I’ve got answers (and probably some sassy commentary).
- Can I use margarine instead of oil? Well, technically yes, but why hurt your soul like that? Oil gives you the ultimate moistness and less dense texture that we’re after here. Margarine just… isn’t the same.
- My cake looks pale, should I bake it longer? A rich, golden-brown top is ideal. If it’s getting too dark, tent it loosely with foil. If it’s pale but a skewer comes out clean, it’s probably done! Trust the skewer test.
- Can I make this ahead of time? Absolutely! This cake actually tastes *better* the next day, as the flavors meld and the honey goodness really sinks in. Store it airtight at room temperature.
- What kind of honey should I use? Any liquid honey works! Clover, wildflower, acacia, orange blossom – they all impart slightly different subtle flavors. Use what you love, or whatever’s lurking in your pantry.
- How long does this moist honey cake last? Covered tightly at room temperature, it’s fantastic for 3-4 days. In the fridge, it’ll happily hang out for about a week. **FYI, it freezes beautifully too!** Just wrap slices individually in plastic wrap, then foil.
Final Thoughts
And there you have it, superstar baker! A ridiculously moist, ridiculously delicious honey cake that will make you feel like a culinary genius, even if your greatest achievement today was successfully opening a jar of pickles. Go on, slice yourself a generous piece, grab a cuppa, and bask in the glory of your own baking prowess. You’ve earned it! Now go impress someone – or just yourself – with your new culinary skills. Happy baking, my friend!


