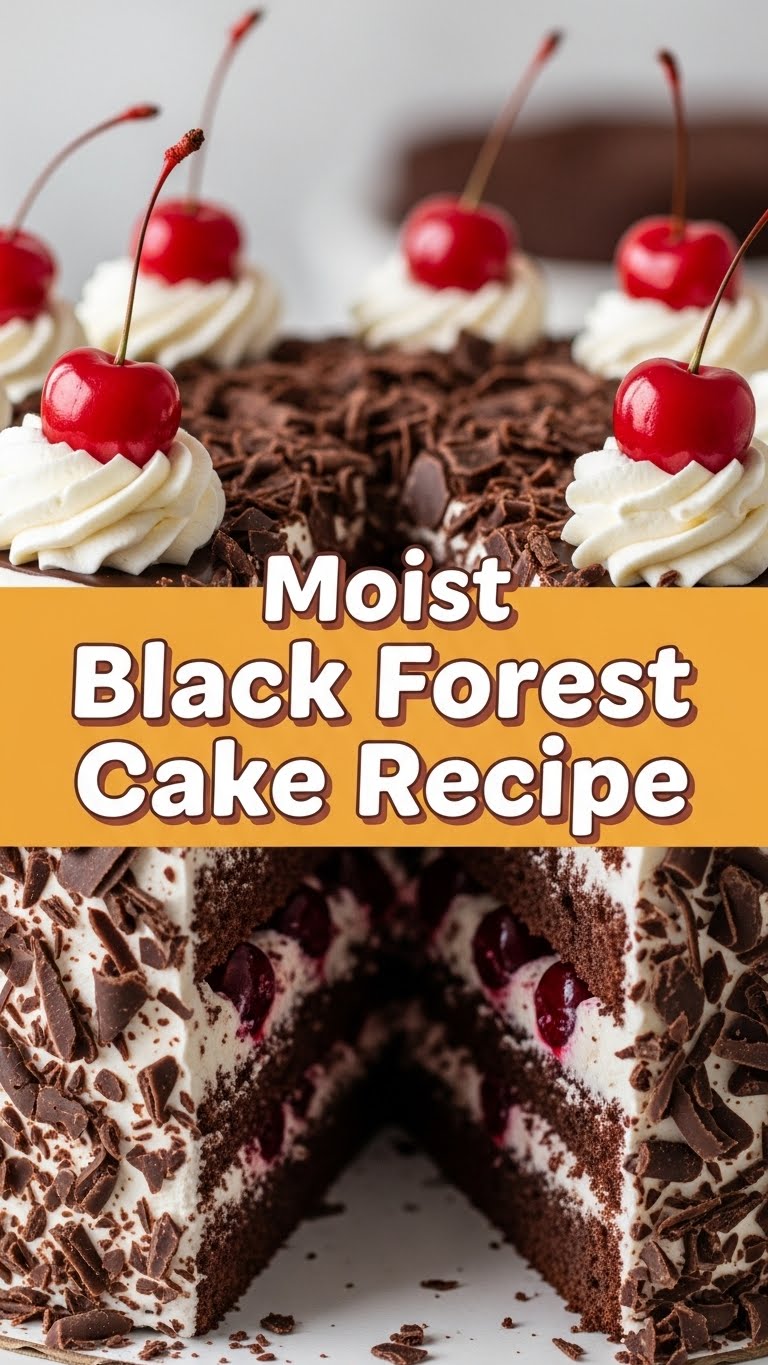
So, you’re dreaming of a dessert that’s rich, decadent, and screams “I’m fancy!” but also whispers “I was shockingly easy to make”? Oh, my friend, you’ve stumbled into the right corner of the internet. We’re about to tackle the legendary Black Forest Cake, but here’s the twist: it’s going to be so moist it practically melts, and honestly, you won’t need a culinary degree or a week off work to achieve it. Get ready to impress yourself (and maybe a few lucky taste-testers).
Why This Recipe is Awesome
Look, I get it. Black Forest Cake sounds intimidating. Layers! Whipped cream! Cherries! But hear me out: this recipe is practically **idiot-proof**. No, really. I, a person whose kitchen sometimes resembles a disaster zone, have made this successfully. It’s forgiving, it’s ridiculously flavorful, and the best part? It looks super impressive with minimal effort. Plus, it’s got chocolate and cherries, a combo so classic it practically high-fives your taste buds. This isn’t just a cake; it’s a moist, chocolatey, cherry-filled hug for your soul.
Ingredients You’ll Need
Time to gather our delicious arsenal. Don’t worry, nothing too exotic here. You probably have most of it lurking in your pantry already. (If not, a quick trip to the grocery store is in order – treat yourself!)
- **All-Purpose Flour:** The basic building block of cake dreams.
- **Unsweetened Cocoa Powder:** Go for a good quality one here; it makes a difference. We want rich chocolate, not just brown cake.
- **Granulated Sugar:** Sweetness, darling, sweetness!
- **Baking Soda & Baking Powder:** Our dynamic duo for lift. Don’t mix them up, they have different jobs!
- **Salt:** Just a pinch to make all those other flavors sing.
- **Eggs:** Room temperature, please! They mix better and give a better texture.
- **Buttermilk:** This is our secret weapon for MOISTNESS. If you don’t have it, a quick DIY: add a tablespoon of white vinegar or lemon juice to regular milk and let it sit for 5 minutes. Voila!
- **Vegetable Oil:** Another key player for that velvety, moist crumb.
- **Vanilla Extract:** Because everything is better with vanilla.
- **Hot Coffee:** Yes, coffee! It doesn’t make the cake taste like coffee, but it seriously deepens the chocolate flavor. Trust me on this one.
- **Cherry Filling:** A good quality canned or jarred cherry filling (the kind with whole or halved cherries in syrup). Or, if you’re feeling ambitious, pit some fresh ones!
- **Heavy Whipping Cream:** For that cloud-like, dreamy topping. Make sure it’s super cold.
- **Powdered Sugar (Confectioners’ Sugar):** For sweetening our whipped cream.
- **Shaved Chocolate (or chocolate curls):** For garnish. Because we’re fancy, remember?
Step-by-Step Instructions
Alright, apron on, good tunes playing, let’s get baking! This is surprisingly quick, so don’t blink.
- **Preheat Your Oven & Prep Pans:** First things first, get that oven to **350°F (175°C)**. Grease and flour two 8-inch round cake pans. Or, even better, line them with parchment paper circles. This is a game-changer for easy release.
- **Mix Dry Ingredients:** In a large bowl, whisk together the flour, cocoa powder, sugar, baking soda, baking powder, and salt. Give it a good whisk to make sure everything’s evenly distributed.
- **Combine Wet Ingredients:** In a separate medium bowl, whisk together the eggs, buttermilk, vegetable oil, and vanilla extract until well combined.
- **Introduce Wet to Dry:** Pour the wet mixture into the dry ingredients. Mix on low speed with an electric mixer (or by hand with a whisk) until just combined. Don’t overmix! **Overmixing is the enemy of moist cake.**
- **Add the Hot Coffee:** Slowly pour in the hot coffee. The batter will be thin, don’t panic! Mix until smooth.
- **Divide and Bake:** Divide the batter evenly between your prepared cake pans. Bake for 28-32 minutes, or until a wooden skewer inserted into the center comes out clean.
- **Cool Down:** Let the cakes cool in their pans for about 10-15 minutes before inverting them onto a wire rack to cool completely. **Patience is a virtue here!** Don’t try to frost warm cakes unless you enjoy a melted mess.
- **Whip the Cream:** While the cakes cool, pour the very cold heavy whipping cream into a large bowl. Add the powdered sugar. Beat with an electric mixer on high speed until stiff peaks form. Be careful not to overbeat, or you’ll have butter!
- **Assemble Your Masterpiece:** Once cakes are completely cool, place one layer on your serving plate. Spread about a third of your whipped cream on top, then spoon half of the cherry filling over the cream. Place the second cake layer on top. Repeat with another third of the whipped cream and the remaining cherry filling.
- **The Grand Finale:** Top the cake with the remaining whipped cream, spreading it evenly. Garnish with a generous sprinkle of shaved chocolate or chocolate curls. Maybe a few extra cherries for good measure.
Common Mistakes to Avoid
We all make mistakes, but let’s try to avoid these classic blunders, shall we?
- **Not Preheating the Oven:** Rookie mistake! Your cake needs a hot oven to rise properly and bake evenly.
- **Overmixing the Batter:** This is a biggie. Mixing too much develops the gluten, leading to a tough, dry cake. Mix until just combined, no more!
- **Not Using Room Temperature Ingredients:** Especially eggs and buttermilk. They emulsify better at room temp, giving you a smoother, more uniform batter.
- **Skipping the Hot Coffee:** Seriously, it’s not optional. It enhances the chocolate flavor without making it taste like coffee. Don’t deny your taste buds this joy.
- **Frosting a Warm Cake:** Unless you want a soupy, sliding disaster, let those cakes cool completely. IMO, this is where most newbie bakers go wrong.
Alternatives & Substitutions
Feeling rebellious? Or just missing an ingredient? Here are a few tweaks you can make:
- **No Buttermilk?** As mentioned, make your own: 1 tbsp white vinegar or lemon juice + enough regular milk to make 1 cup. Let it sit for 5 minutes. Easy peasy!
- **Fresh Cherries Instead of Canned:** Absolutely! Pit them, then simmer with a little sugar and a splash of water until softened. Let them cool before using. Way more effort, but super tasty.
- **Cherry Liqueur/Kirsch:** For an authentic Black Forest kick, you can drizzle a little Kirsch (cherry brandy) over the cake layers before adding the cream and cherries. Adds a lovely boozy note!
- **Different Fruit:** Not a cherry fan? (Gasp!) You could *technically* use raspberries or strawberries, but then it wouldn’t really be a Black Forest Cake, would it? It’d be more of a “Dark Forest Cake with Berries.” Still delicious, though!
- **Cream Cheese Frosting:** If whipped cream isn’t your jam, a cream cheese frosting would be decadent, but it won’t be traditional. It might also make it less “light and fluffy.”
FAQ (Frequently Asked Questions)
Got questions? I’ve got answers! (Mostly.)
- **Can I make this cake ahead of time?** Absolutely! The cake layers can be baked a day in advance and stored tightly wrapped at room temperature. The assembled cake is best eaten within 2-3 days, stored in the fridge. The longer it sits, the more the cherries will make the cake a bit soggy, but honestly, it probably won’t last that long.
- **Why hot coffee? Does it make the cake taste like coffee?** Nope! The hot coffee simply blooms the cocoa powder, intensifying that deep, dark chocolate flavor. It’s a flavor enhancer, not a flavor introducer.
- **My cake layers stuck to the pan! What went wrong?** Probably didn’t grease and flour (or parchment paper!) enough. Or, you tried to remove them when they were too hot. **Patience, my friend!**
- **Can I use frozen cherries?** You sure can! Just thaw them completely and drain off any excess liquid before using. We want juicy cherries, not watery cake.
- **What if I don’t have buttermilk?** See “Alternatives & Substitutions” above. Make your own! It’s super simple.
- **Why is my whipped cream not getting stiff?** Make sure your heavy cream is **super cold**! Even chill your bowl and beaters for 10-15 minutes beforehand. Warm cream just won’t whip properly.
- **Is this cake actually moist?** Honey, this cake is so moist, it practically moisturizes your soul. You’ll never go back to dry cake again.
Final Thoughts
So there you have it! Your very own, incredibly moist, surprisingly easy Black Forest Cake. You’ve conquered what some consider a baking Everest, and you probably had a little fun doing it. Now, go slice yourself a generous piece, grab a fork (or just dig in with your fingers, I won’t judge), and bask in the glory of your culinary triumph. You’ve earned every single delicious bite. Go on, show off a little. You’re basically a professional baker now. Enjoy!

