So, you’re eyeing that empty cake stand, but the thought of a complicated recipe makes you wanna just order takeout? Been there, baked that! (Or tried to, before accidentally creating a delicious but very dense brick.) But guess what? Today we’re ditching the takeout menu and whipping up something ridiculously easy, impossibly moist, and utterly delicious. Because life’s too short for dry cake, am I right?
Why This Recipe is Awesome
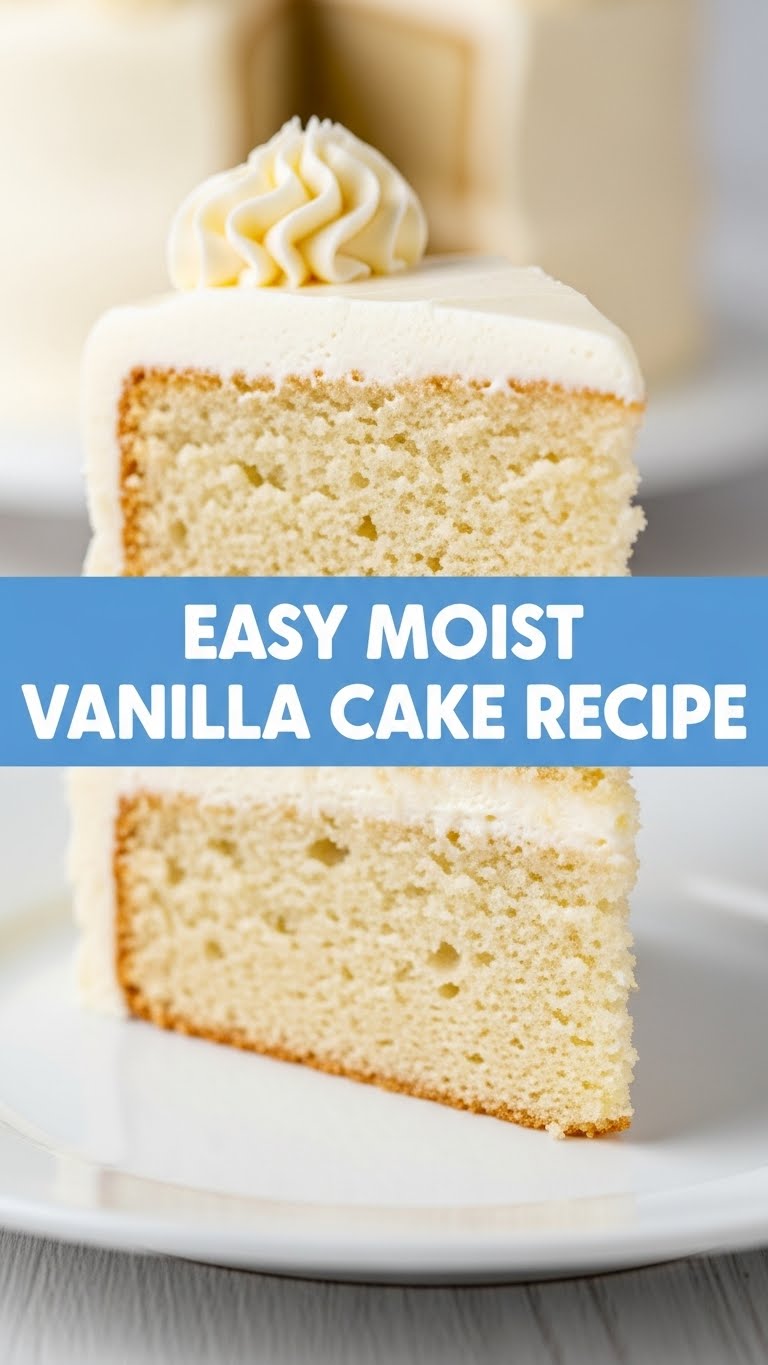
Listen, I get it. We all want that ‘homemade with love’ vibe without actually, you know, stressing ourselves out. This isn’t one of those fussy, 20-step recipes that require a culinary degree. Nope. This is *the* vanilla cake – the kind that makes people ask for the recipe, even though it’s so easy you’ll feel like you cheated the system. It’s got a super tender crumb, a delicate vanilla flavor that just screams comfort, and it stays moist for days (if it even lasts that long, which, let’s be real, it won’t).
It’s practically idiot-proof. Seriously, even I, a person who once set off a smoke detector by just *looking* at a toaster, can make this. And that’s saying something. Get ready to impress yourself, your friends, or just your sweet tooth, with minimal effort and maximum deliciousness.
Ingredients You’ll Need
Gather your troops! Make sure everything’s at room temperature for the best results – it really does make a difference!
- 1 ½ cups (180g) All-Purpose Flour: The basic building block. No need for fancy stuff unless you’re feeling extra.
- 1 ½ teaspoons Baking Powder: Our little lift-off agent. Don’t skip it unless you want a sad, flat disc.
- ¼ teaspoon Salt: Just a pinch, to make everything else pop and keep things from being *too* sweet.
- ½ cup (113g) Unsalted Butter: Softened, please! This is the queen of moistness. Don’t even *think* about cold butter, or we’ll have words.
- 1 cup (200g) Granulated Sugar: For that sweet, sweet goodness.
- 2 Large Eggs: Room temp, of course. Warm eggs mix better and prevent a curdled batter. Trust me on this one.
- 2 teaspoons Vanilla Extract: The star of the show! Use the good stuff, your taste buds will thank you. (Or vanilla bean paste if you’re feeling bougie.)
- ½ cup (120ml) Whole Milk: Also room temp. Adds to that luxurious texture. Any milk works, but whole milk is definitely the MVP here.
Step-by-Step Instructions
Alright, let’s get baking! Keep it chill, keep it fun.
- Preheat & Prep: First things first, turn your oven to **350°F (175°C)**. Grab an 8 or 9-inch round cake pan. Grease it thoroughly, then dust it lightly with flour. You can even line the bottom with parchment paper if you’re feeling fancy and want *zero* sticking drama.
- Dry Mix Magic: In a medium bowl, whisk together your flour, baking powder, and salt. Just a quick whisk to get everything combined. Set it aside for a hot minute.
- Cream Dream: In a larger bowl (or your stand mixer if you’re living the good life), beat your softened butter and granulated sugar together. You want this to get **light, fluffy, and pale yellow**. This usually takes about 3-5 minutes. This is where the magic happens, people! Don’t skimp on this step.
- Egg-cellent Addition: Add your eggs, one at a time, mixing well after each addition. Then, stir in that glorious vanilla extract. Scrape down the sides of the bowl to make sure everything’s getting cozy.
- Alternate & Combine: Now, we’re going to add the dry ingredients alternately with the milk. Start with about a third of the dry mix, gently mix until just combined. Then add half the milk, mix. Repeat with another third of the dry, the rest of the milk, and finally the last of the dry. **Mix only until just combined!** Overmixing is the enemy of a moist cake.
- Bake It Off: Pour your beautiful batter into your prepared cake pan. Give the pan a gentle tap or two on the counter to release any air bubbles. Pop it into your preheated oven and bake for about **28-32 minutes**. It’s done when a wooden skewer or toothpick inserted into the center comes out clean or with a few moist crumbs.
- Cool Down: Let the cake cool in the pan for about 10-15 minutes. This helps it firm up and prevents breakage. Then, carefully invert it onto a wire rack to cool completely. Patience, young grasshopper. It’s worth it!
Common Mistakes to Avoid
Nobody’s perfect, but we can avoid some classic cake-ruining blunders, right?
- Thinking you don’t need to preheat the oven. Rookie mistake! Seriously, that’s like trying to run a marathon without shoes. A properly preheated oven ensures even baking and a good rise.
- Using cold ingredients. I said it once, I’ll say it again: **room temp is your friend!** Cold eggs and butter lead to a lumpy, sometimes curdled batter. Nobody wants that.
- Overmixing the batter. Once you add the flour, treat it gently. Mix until *just* combined. Overmixing develops the gluten, making your cake tough and chewy instead of tender and moist. We want cake, not a rubber ball!
- Opening the oven door too early. Resist the urge to peek! Especially during the first 20 minutes. The sudden temperature drop can make your cake deflate. Let that cake rise in peace.
- Not greasing your pan properly. Unless you like cake glued to the pan (and who does?!), do it right. Grease thoroughly and dust with flour, or use parchment.
Alternatives & Substitutions
Feeling a little rebellious, or just missing an ingredient? Here are a few tweaks you can try:
- Butter: Can I use margarine instead of butter? Well, technically yes, but why hurt your soul like that? For the *best* flavor and texture, stick with real butter. IMO, it’s non-negotiable for a truly delicious vanilla cake.
- Milk: While whole milk gives the richest result, 2% or even a non-dairy milk (like almond or oat milk) can work in a pinch. Just know the texture might vary ever so slightly.
- Vanilla: If you’re feeling super fancy, swap out the vanilla extract for **vanilla bean paste**. It gives a deeper vanilla flavor and those gorgeous little vanilla speckles.
- Flour: Want to go gluten-free? A 1:1 gluten-free baking blend *might* work, but I haven’t personally tested it for this specific recipe, so proceed with caution, my friend.
- Add-ins: Feel free to fold in **sprinkles** at the very end of mixing for a fun birthday cake vibe, or even some mini chocolate chips if you’re feeling wild.
FAQ (Frequently Asked Questions)
Got questions? I got answers (hopefully).
- “My cake came out dry, what happened?” Oh no! Usually, a dry cake is either overbaked (watch that timer!) or you might have used too much flour. **FYI, measuring flour by weight (180g) is always more accurate than by volume!**
- “Can I make this into cupcakes?” Absolutely! This recipe makes about 12-14 cupcakes. Reduce the baking time to about 18-22 minutes, or until a toothpick comes out clean.
- “How do I know if my butter is soft enough?” You should be able to gently press your finger into it and leave a slight indentation without it melting or being mushy. If it’s rock hard, microwave it for 5-10 seconds at a time until perfect.
- “Can I double this recipe?” Yup, go for it! Just make sure you have two cake pans or bake in batches. You might need to adjust baking time slightly.
- “How long does this cake last?” Covered tightly at room temperature, it’s usually good for 2-3 days. In the fridge, it can last up to 5 days. But honestly, it rarely lasts that long in my house!
- “What kind of frosting should I use?” A classic vanilla buttercream is always a winner! A simple cream cheese frosting would also be divine. Go wild, it’s your cake!
Final Thoughts
See? I told you it was easy! Now you’ve got this gorgeous, moist vanilla cake just waiting to be devoured. Go on, pat yourself on the back. You totally nailed it. This isn’t just a cake; it’s a testament to your newfound (or rediscovered) baking prowess!
Serve it plain, with fresh berries, or go all out with your favorite frosting. Whatever makes your taste buds sing. You’ve earned this sweet victory. Now go impress someone—or yourself—with your new culinary skills. You’ve earned it!
