Alright, friend, let’s talk turkey. Specifically, the kind of turkey that makes your Aunt Mildred gasp in delight instead of politely chewing on a piece of cardboard. We’re talking **MOIST** turkey. The kind that practically melts in your mouth and makes you wonder if you’ve been eating Thanksgiving dinner wrong your entire life. (Spoiler alert: You probably have.)
Why This Recipe is Awesome
Because frankly, life’s too short for dry turkey. This isn’t just a recipe; it’s a trauma-healing experience for anyone who’s ever choked down a bite of overcooked poultry. Here’s the deal:
- It’s ridiculously simple. Like, “even I didn’t mess it up” simple.
- It practically guarantees a juicy bird. No more side-eyeing the host as you reach for the gravy boat a fifth time.
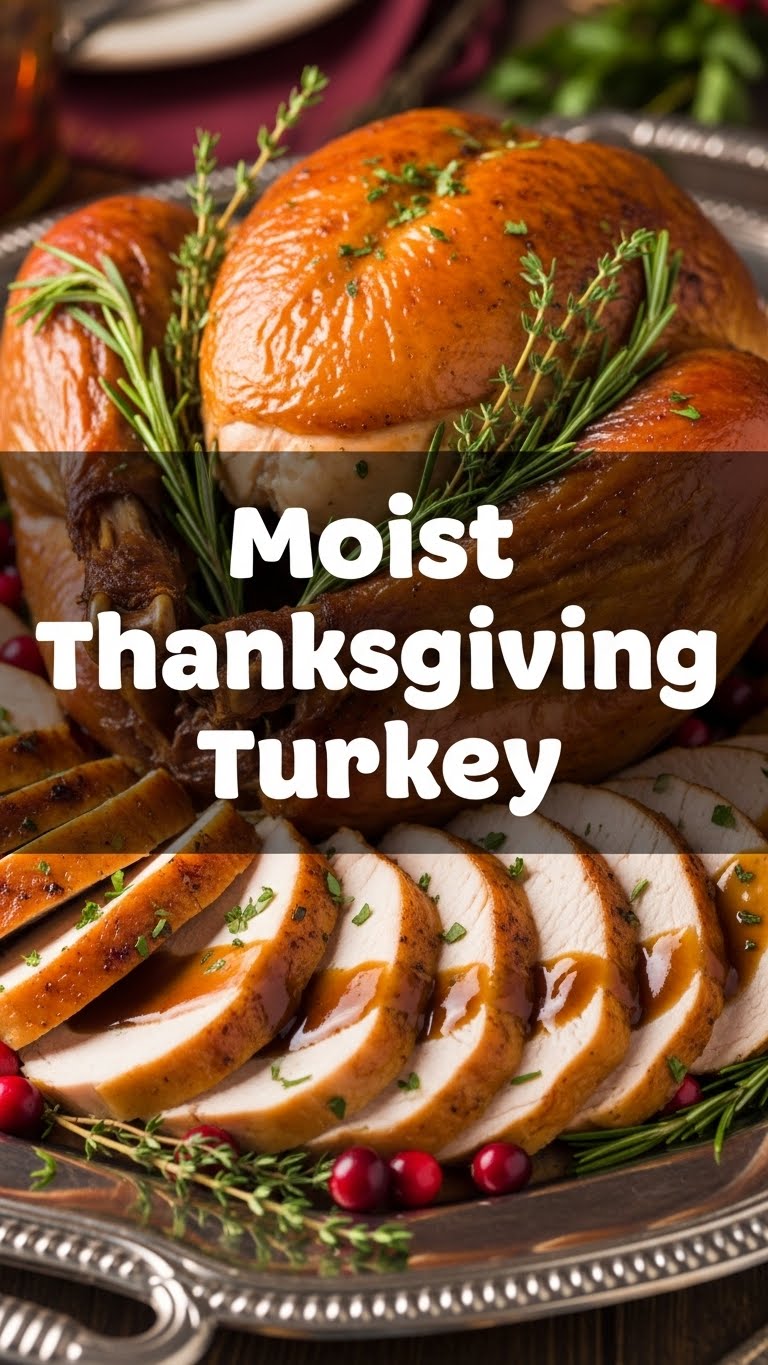
- The flavors are *chef’s kiss*. We’re talking golden, crispy skin and tender, aromatic meat.
- You’ll be the Thanksgiving hero. Prepare for compliments, accolades, and possibly a request to host every year. (Okay, maybe that last one’s not ideal, but the food will be worth it!)
Ingredients You’ll Need
Gather your troops, folks! We’re not reinventing the wheel here, just making it roll a lot smoother.
- **One Whole Turkey:** (12-16 lbs is a good size for most folks, but adjust as needed.) The star of the show! Make sure it’s thawed if frozen.
- **For the Brine (Don’t skip this, seriously):**
- **1 cup Kosher Salt:** Not table salt, unless you want a salt lick.
- **½ cup Granulated Sugar:** Balances the salt, adds a touch of sweetness.
- **1 Gallon Vegetable Broth or Water:** The liquid base for our magic potion.
- **A few Bay Leaves:** For that subtle, herby goodness.
- **1 tbsp Black Peppercorns:** Just a little kick.
- **Orange/Lemon halves (2-3 of each):** Squeezed, then tossed in. Citrus is key!
- **(Optional, but highly recommended) Fresh Rosemary & Thyme Sprigs:** Because we’re fancy like that.
- **For the Turkey Rub & Cavity:**
- **1 stick (½ cup) Unsalted Butter:** Softened. Because butter makes everything better, duh.
- **Fresh Rosemary & Thyme:** Chopped fine. Or just a generous sprinkle of dried if you’re in a pinch.
- **1 head Garlic:** Cloves smashed, not minced. We’re going for aroma, not garlic breath.
- **1 large Yellow Onion:** Quartered.
- **1 Lemon:** Halved.
- **Salt & Pepper:** To taste, or to just generously coat the bird.
Step-by-Step Instructions
Let’s get cooking! Follow these simple steps, and you’ll be basking in turkey glory.
- **Brine Time (The Night Before):** In a large pot or food-safe bucket, combine all your brine ingredients (salt, sugar, broth/water, bay leaves, peppercorns, citrus, herbs). Stir until salt and sugar dissolve. Submerge your turkey completely. If it floats, weigh it down with a plate. Cover and **refrigerate for 12-24 hours.** This is the secret sauce, folks!
- **Pat, Pat, Pat (The Big Day):** Remove turkey from brine, discard brine. Rinse turkey thoroughly inside and out with cold water. **THIS IS CRUCIAL:** Pat the turkey *super* dry with paper towels. We want crispy skin, not soggy skin.
- **Butter Up, Buttercup:** In a small bowl, mix the softened butter with chopped rosemary and thyme, plus a generous pinch of salt and pepper. Gently separate the skin from the breast meat with your fingers (it’s easier than it sounds, promise!) and rub about half the butter mixture directly onto the meat under the skin. Then rub the rest all over the outside of the turkey.
- **Aromatics In:** Stuff the cavity with the smashed garlic, quartered onion, and halved lemon. Don’t pack it too tight, we want air circulation.
- **Roast Away!** Preheat your oven to **425°F (220°C)**. Place the turkey, breast-side up, on a rack in a large roasting pan. Roast for 30 minutes at this high temperature to get that golden-brown skin.
- **Lower & Slow:** Reduce oven temperature to **325°F (160°C)**. Continue roasting, basting every hour or so with pan juices (though honestly, with the brine and butter, it’s less critical for moisture and more for color).
- **The Finish Line:** Total cooking time will vary based on turkey size (approx. 13-15 minutes per pound). The turkey is done when a meat thermometer inserted into the thickest part of the thigh (without touching bone) reads **165°F (74°C)**.
- **Rest, You Deserve It (And So Does the Turkey):** This is just as important as cooking! Remove turkey from oven, tent loosely with foil, and let it **rest for at least 20-30 minutes** before carving. This allows the juices to redistribute, ensuring every slice is perfectly moist.
- **Carve & Conquer:** Carve your masterpiece and prepare for a standing ovation!
Common Mistakes to Avoid
We all make mistakes, but let’s try to avoid these turkey-day blunders, shall we?
- **Skipping the Brine:** Seriously, don’t. It’s the MVP for moisture. You wouldn’t skip the coffee on a Monday, would you?
- **Not Patting it Dry:** If your turkey isn’t bone-dry before it goes in the oven, you’ll end up steaming the skin instead of crisping it. Sad!
- **Overcooking:** The biggest culprit of dry turkey. **Invest in a good meat thermometer**, it’s your best friend here. Don’t rely on pop-up timers. They lie.
- **Not Letting it Rest:** Carving immediately after cooking is a one-way ticket to dry-ville. All those glorious juices will just run out onto your cutting board instead of staying in the meat. **Be patient!**
- **Stuffing the Cavity with Actual Stuffing:** Not only does it make the turkey cook unevenly, but it’s also a food safety no-no unless you cook the stuffing to a super high internal temp, which often means overcooking the turkey. Stick to aromatics!
Alternatives & Substitutions
Life happens, and sometimes you gotta adapt. Here are a few ways to tweak this recipe without losing the magic:
- **No Time for Wet Brine? Try a Dry Brine!** Rub the turkey all over with a generous mix of salt, pepper, and herbs the day before, then refrigerate uncovered. It still draws out moisture and seasons the meat beautifully, without the giant bucket hassle.
- **No Fresh Herbs?** Dried herbs are totally fine! Just use about a third of the amount of fresh herbs, as they’re more concentrated.
- **Butter Alternative?** While butter is superior (IMO), you can use olive oil mixed with herbs for the rub. It won’t be quite as rich, but it’ll still help with browning and moisture.
- **Different Aromatics:** Feel free to swap out the lemon/onion/garlic for things like apples, carrots, celery, or even some fresh sage. Go wild (within reason)!
FAQ
Got questions? I probably do too, but here are some common ones people ask!
- **”Do I *really* need to brine?”** Yes. Full stop. It’s the secret sauce to a moist, flavorful turkey. Trust me on this one.
- **”Can I use a pre-brined turkey?”** If your turkey package says “pre-brined,” “kosher,” or “enhanced with a solution,” then you can skip the brining step. Otherwise, brine away!
- **”What if my turkey doesn’t fit in my fridge for brining?”** Get a clean, food-grade cooler and fill it with your brine and turkey. Add plenty of ice to keep it below 40°F (4°C).
- **”My turkey skin isn’t browning! Help!”** Make sure your oven was preheated properly and that first blast of high heat is crucial. If it’s still pale towards the end, you can crank the heat back up to 400°F (200°C) for the last 15-20 minutes, keeping a close eye on it.
- **”Can I make gravy from these drippings?”** Absolutely! Those pan drippings, especially with all the butter and aromatics, will make an incredibly flavorful gravy. Just remember to deglaze the pan!
- **”How long does leftover turkey last?”** About 3-4 days in the fridge. Perfect for sandwiches, soups, or just sneaking bites at 2 AM.
Final Thoughts
There you have it, future turkey maestro! This recipe is your ticket to a stress-free (or at least less stressful) Thanksgiving where everyone actually *enjoys* the main event. You’ve got the tools, you’ve got the know-how. Now go forth and conquer that bird! Don’t overthink it, have fun, and remember that even if it’s not “perfect,” it’s homemade, and that’s what truly counts. Now go impress someone—or yourself—with your new culinary skills. You’ve earned it!


