Ever had one of those days where you just *need* something decadent, but the thought of a complicated recipe makes you want to curl up with a bag of chips instead? Yeah, me too. But what if I told you there’s a way to get that rich, moist, show-stopping Red Velvet Cake without selling your soul to the baking gods? Oh, it’s true. And guess what? We’re about to make it happen, my friend. Let’s bake some happiness!
Why This Recipe is Awesome
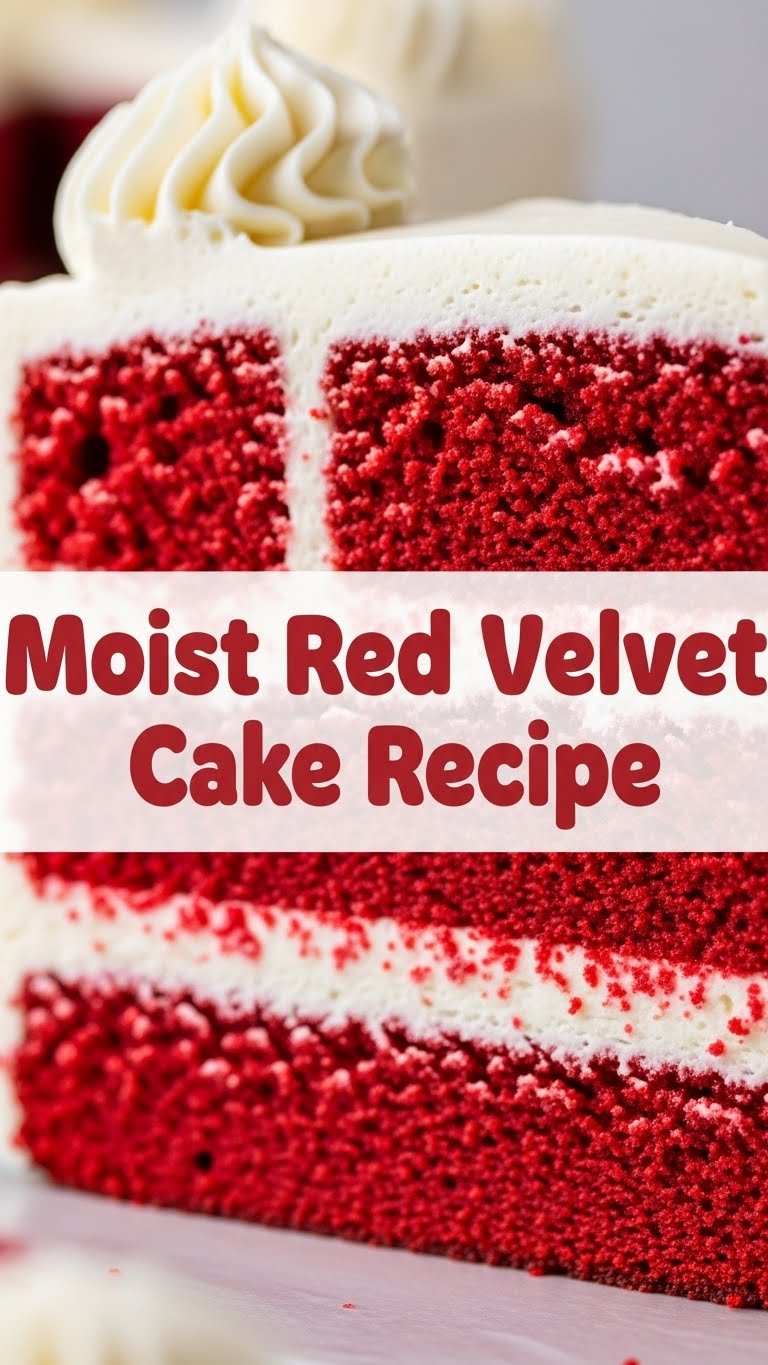
Alright, so why this particular Red Velvet recipe, out of a gazillion online? Well, for starters, it’s ridiculously easy. Like, “I can do this after two glasses of wine” easy. It’s also **idiot-proof** – seriously, even I didn’t mess it up, and my kitchen sometimes looks like a crime scene after baking. This cake comes out unbelievably moist (we’re talking melt-in-your-mouth levels), boasts that iconic vibrant red hue, and pairs perfectly with the essential tangy cream cheese frosting (which we’ll touch on, don’t you worry). Plus, it looks super fancy without requiring a culinary degree. Prepare to impress everyone, including yourself!
Ingredients You’ll Need
- All-purpose flour: About 2 ½ cups. The backbone of our cakey dreams.
- Granulated sugar: 1 ½ cups. Because sweet dreams are made of sugar.
- Unsweetened cocoa powder: 2 tablespoons. Just a hint for depth, not chocolate overload.
- Baking soda: 1 teaspoon. Our trusty leavening agent.
- Salt: 1 teaspoon. Don’t skip it; it brings out all the flavors!
- Unsalted butter: ½ cup (1 stick), softened. Room temp, please!
- Large eggs: 2, at room temperature. Happy chickens, happy cake.
- Red food coloring: 1-2 ounces (liquid). This is where the magic happens! Go bold or go home.
- Vanilla extract: 1 teaspoon. Always.
- Buttermilk: 1 cup, at room temperature. This is key for that signature moistness and tang, **do not substitute lightly!**
- White vinegar: 1 teaspoon. Reacts with the baking soda for extra lift. Science!
For the Cream Cheese Frosting (because what’s Red Velvet without it?):
- Cream cheese: 8 ounces (1 block), softened. Full-fat for the win!
- Unsalted butter: ½ cup (1 stick), softened.
- Powdered sugar: 3-4 cups, sifted. To avoid lumps!
- Vanilla extract: 1 teaspoon. More vanilla, please.
Step-by-Step Instructions
- First things first: Preheat your oven to 350°F (175°C). Seriously, **preheat that oven like it owes you money.** Grease and flour two 9-inch round cake pans, or line them with parchment paper. This prevents cake-to-pan emotional attachment.
- In a large bowl, whisk together the flour, sugar, cocoa powder, baking soda, and salt. Make sure there are no lumpy surprises hiding in there.
- In a separate, smaller bowl, combine the red food coloring and vanilla extract. This helps ensure even color distribution later.
- Now, back to a big bowl (or stand mixer): Cream the softened butter until it’s light and fluffy. Add the eggs one at a time, mixing well after each addition. Scrape down the sides of the bowl.
- Slowly pour the red food coloring and vanilla mixture into the butter and egg mixture, beating until fully combined and beautifully red.
- In a measuring cup, gently stir together the buttermilk and white vinegar. This concoction is about to do some heavy lifting!
- Time to combine the dry and wet stuff! Add about a third of the dry ingredients to the red butter mixture, mix until just combined. Then add half of the buttermilk mixture, mix. Repeat, ending with the dry ingredients. **Be super gentle here; overmixing is the enemy of moist cake.** Mix until just combined, no more!
- Divide the batter evenly between your two prepared cake pans. Give them a gentle tap on the counter to release any air bubbles.
- Bake for 25-30 minutes, or until a toothpick inserted into the center comes out clean. Ovens vary, so keep an eye on ’em!
- Let the cakes cool in their pans for about 10-15 minutes before inverting them onto a wire rack to cool completely. And I mean **completely**! Impatience leads to frosting disasters.
- For the Frosting: While the cakes are chilling, beat the softened cream cheese and butter together until smooth and creamy. Gradually add the sifted powdered sugar, one cup at a time, until well combined. Stir in the vanilla extract. Beat on high for a minute or two until light and fluffy. Don’t overbeat, or it might get too thin.
- Once your cakes are totally cool, frost them generously. Stack ’em up, spread that glorious cream cheese goodness, and maybe add a few crumbs for decoration if you’re feeling fancy.
Common Mistakes to Avoid
- Overmixing the Batter: Seriously, it’s not a race or a workout. Overmixing develops the gluten too much, leading to a tough, dense cake. Mix until just combined, and then walk away!
- Not Using Room Temperature Ingredients: Cold butter and eggs don’t emulsify properly, leading to a lumpy, inconsistent batter. Plan ahead, friend!
- Eyeballing Ingredients: Baking is more science than art. Get those measurements right, especially for flour and leavening agents.
- Opening the Oven Door Too Soon: Curiosity killed the cat and deflated many a cake. Resist the urge to peek for at least 20 minutes!
- Forgetting to Cool Completely: Frosting a warm cake is like trying to ice a melting snowman. It just won’t work. **Be patient!**
Alternatives & Substitutions
Okay, so maybe you’re out of buttermilk or have dietary restrictions. No stress, we can tweak this a bit!
- No Buttermilk? No Problem (mostly): If you’re in a pinch, you can make your own “sour milk” by adding 1 tablespoon of white vinegar or lemon juice to a measuring cup, then filling the rest of the cup with regular milk (any fat percentage is fine, but whole milk is best). Let it sit for 5-10 minutes until it looks slightly curdled. It’s not *exactly* buttermilk, but it’ll do the trick!
- Dairy-Free/Vegan? You can absolutely swap regular butter for a good quality plant-based butter stick (like Miyoko’s or Earth Balance sticks). For the eggs, flax eggs (1 tbsp ground flaxseed + 3 tbsp water per egg, let sit for 5 mins) can work, though the texture might be slightly denser. For the frosting, use dairy-free cream cheese and plant-based butter.
- Less Food Coloring? Your cake, your rules! Just know it might turn out more maroon or brownish-red. If you’re using gel food coloring, FYI, it’s way more concentrated, so start with less and add until you hit your desired shade.
FAQ (Frequently Asked Questions)
- Can I use margarine instead of butter?
- Well, technically yes, but why hurt your soul like that? Butter just tastes better and gives a richer flavor and texture. Margarine can work, but for a treat like this, splurge on the good stuff, IMO.
- Why is my cake not very red?
- Did you skimp on the food coloring? Or maybe you used a different brand? Some brands are more potent than others. Also, using natural cocoa powder vs. Dutch-processed can affect the final color slightly. More red, less brown!
- Can I make this into cupcakes?
- Heck yes, you can! Just line a muffin tin with liners and fill them about two-thirds full. The baking time will be shorter, usually around 18-22 minutes. Keep an eye on them!
- My frosting is too thin/thick. Help!
- If it’s too thin, try adding more sifted powdered sugar a tablespoon at a time until it thickens up. If it’s too thick, add a tiny splash of milk or heavy cream until it reaches your desired consistency. Don’t go overboard!
- How long does Red Velvet Cake last?
- Covered, at room temperature, it’ll last a day or two. In the fridge, it’s good for up to 5 days. But let’s be real, with how delicious this is, it probably won’t last more than a day in your house.
Final Thoughts
So, there you have it! Your very own, incredibly moist, vibrantly red, and ridiculously delicious Red Velvet Cake. You just whipped up something truly special and probably made your kitchen smell amazing. Don’t be shy about showing it off – or, you know, just eating the whole thing yourself. No judgment here. Now go impress someone—or yourself—with your new culinary skills. You’ve earned it!

