Alright, chocolate lovers and kitchen enthusiasts! Let’s be honest – is there anything more satisfying than watching someone’s face light up when they bite into a moist slice of chocolate cake? Especially when that cake has been lovingly drenched in syrup? If you’re nodding your head while possibly already drooling, this recipe is about to become your new best friend. The best part? You don’t need a culinary degree to nail this one!
Why This Recipe is Awesome
First off, this chocolate cake with syrup isn’t just another dessert – it’s practically therapy in a baking pan. What makes it stand out from the crowd of basic chocolate cakes?
For starters, the syrup keeps this cake ridiculously moist for days (if it somehow lasts that long). It’s also surprisingly forgiving – even if you’re the type who normally burns water. Plus, it gives you that “I’m-a-fancy-baker” cred without requiring any actual fancy skills. Win-win-win!
Oh, and did I mention it works equally well for “I need chocolate NOW” emergencies and “I want to impress my in-laws” situations? Talk about versatile!
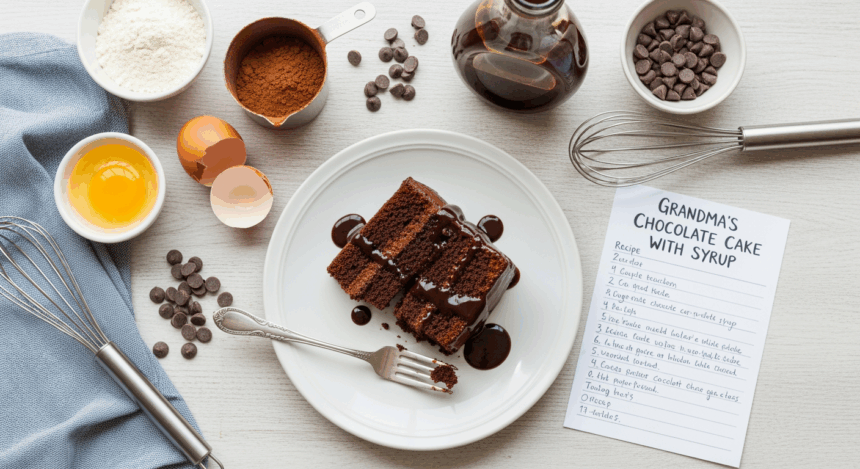
Ingredients You’ll Need
For the cake:
- 2 cups all-purpose flour (the regular stuff, nothing fancy)
- 1¾ cups granulated sugar (yes, that much – we’re not making a salad here)
- ¾ cup unsweetened cocoa powder (the darker, the better for chocolate bragging rights)
- 2 teaspoons baking soda (not baking powder – they’re different, trust me)
- 1 teaspoon baking powder (see above)
- 1 teaspoon salt (to make the sweet even sweeter, it’s science)
- 2 eggs (room temperature, because cold eggs are party poopers)
- 1 cup buttermilk (no buttermilk? Keep reading, I’ve got you covered)
- ½ cup vegetable oil (makes it moist – sorry if you hate that word)
- 2 teaspoons vanilla extract (the real stuff, not that imitation nonsense)
- 1 cup hot coffee or hot water (coffee enhances chocolate flavor like magic)
For the syrup:
- ¾ cup sugar (more sugar, more happiness)
- ½ cup water
- ¼ cup cocoa powder (optional, for extra chocolate intensity)
- 1 tablespoon vanilla extract
- 2 tablespoons butter (makes everything better)
Step-by-Step Instructions
- Prep your battlestation. Preheat your oven to 350°F (175°C). Grease and flour a 9×13 inch baking pan or two 9-inch round pans. Pro tip: line with parchment paper if you’re paranoid about sticking (I always am).
- Mix the dry ingredients. In a large bowl, whisk together flour, sugar, cocoa, baking soda, baking powder, and salt until well combined. No electric mixer needed – we’re keeping it simple!
- Add the wet team. Add eggs, buttermilk, oil, and vanilla. Beat with a mixer on medium speed for about 2 minutes. Your batter will look thick and slightly lumpy – that’s normal!
- Coffee time. Stir in the hot coffee (or water). Don’t panic when the batter gets super thin – it’s supposed to happen. It’s basically cake soup at this point.
- Bake it till you make it. Pour into prepared pan(s) and bake for 30-35 minutes for a 9×13, or 25-30 minutes for round pans. The cake is done when a toothpick inserted in the center comes out clean-ish (a few moist crumbs are fine).
- Syrup magic. While the cake bakes, combine sugar, water, and cocoa powder (if using) in a small saucepan. Bring to a simmer, stirring until sugar dissolves. Remove from heat and stir in vanilla and butter. Let cool slightly.
- The poke-and-soak. When the cake comes out, let it cool for 10 minutes, then use a fork to poke holes all over it. Slowly pour the warm syrup over the cake, letting it soak in. This is oddly satisfying, like bubble wrap popping.
- Patience, grasshopper. Let the cake cool completely before serving. I know it’s tempting to dive right in, but the syrup needs time to work its magic throughout the cake.
Common Mistakes to Avoid
Skipping the poking step: Unless you want all that delicious syrup pooling on top instead of soaking in, don’t forget to aggressively poke that cake. Consider it therapeutic.
Opening the oven repeatedly to “check”: I get it, you’re excited. But every time you open that door, you drop the temperature and mess with the rising process. Your cake will collapse faster than my motivation to exercise.
Using cold ingredients: Room temperature eggs and buttermilk blend better. Science says so. And who are we to argue with science?
Overmixing the batter: This isn’t a workout session. Once everything’s incorporated, stop mixing. Overmixed cake = tough cake = sad baker.
Rushing the cooling process: Pouring syrup on a too-hot cake means the syrup might not distribute evenly. Patience pays off in cake dividends.
Alternatives & Substitutions
No buttermilk? Make your own by adding 1 tablespoon of lemon juice or vinegar to 1 cup of milk. Let it sit for 5 minutes until it looks slightly curdled (appetizing, I know).
Coffee alternatives: Not a coffee fan? Use hot water instead. But FYI, you won’t taste the coffee – it just makes the chocolate flavor pop. If you’re feeling adventurous, hot chocolate works too.
Syrup variations: Add a splash of bourbon, rum, or Kahlúa to the syrup for an adult version. You can also infuse the syrup with mint, orange zest, or cinnamon for a flavor twist.
Dietary needs: For a dairy-free version, use plant-based milk with vinegar for the buttermilk substitute and plant-based butter. For gluten-free, a 1:1 gluten-free flour blend usually works, but the texture might be slightly different.
FAQ (Frequently Asked Questions)
How long will this cake stay fresh?
Thanks to the magical moisture-locking powers of the syrup, this cake stays fresh for up to 5 days at room temperature in an airtight container. But let’s be real – it’s never going to last that long.
Can I freeze this cake?
Absolutely! Freeze individual slices or the whole shebang for up to 3 months. Thaw overnight in the fridge, and it’ll taste almost as good as day one. Almost.
Do I really need to use coffee in the batter?
No one’s forcing you, but coffee enhances chocolate’s flavor without making the cake taste like a mocha. If you skip it, you’re leaving chocolate flavor on the table. But it’s your kitchen, your rules.
Can I use a box mix instead?
Sure, if you want to take the express lane. Prepare the box mix according to package directions, then follow the syrup steps. I won’t tell the baking police.
What if my cake sinks in the middle?
First, take a deep breath – it happens to the best of us. Second, that’s what frosting (or extra syrup) was invented for! Fill that crater with deliciousness and call it a “syrup reservoir.” Problem solved.
Can I add frosting too?
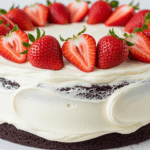
You beautiful overachiever! Yes, you can add frosting on top of this already decadent cake. A simple chocolate ganache or cream cheese frosting would take this into dessert hall-of-fame territory.
Final Thoughts
There you have it – a chocolate cake that’s practically swimming in syrup and guaranteed to make you the hero of any gathering (or solo Netflix marathon, no judgment here).
Remember, baking is part science, part art, and part delicious experiment. If something doesn’t turn out perfect the first time, you still end up with chocolate – and that’s never really a failure, is it?
Now go preheat that oven and channel your inner chocolatier! Your taste buds are about to throw you a thank-you party. And if anyone asks for the recipe, you can decide whether to share or just smile mysteriously while accepting their compliments. You’ve earned both options!

