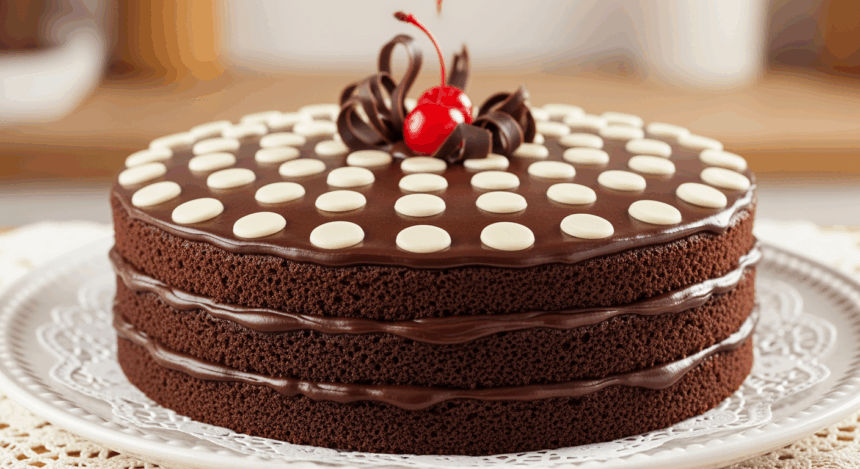
You know that moment when you suddenly need a showstopper dessert but don’t want something that screams “I spent six hours watching YouTube tutorials”? Enter the Chocolate Cake with White Polka Dots – the dessert equivalent of wearing polka dots to a funeral. It’s unexpected, slightly rebellious, and guaranteed to make people forget whatever awkward thing you said earlier at the party.
Why This Recipe is Awesome
Let’s be real – polka dots on a cake is basically fashion-forward baking. This isn’t just another chocolate cake recipe your aunt keeps sending you on Facebook. This cake brings legitimate joy to the table because:
1. It looks fancy but requires approximately zero artistic talent
2. The contrast of dark chocolate and white dots makes people think you understand design principles
3. It’s literally impossible to mess up the polka dots – the more random, the more “intentional” they look
4. When someone asks, “Did you make this yourself?” you can say “Obviously” while flipping your hair dramatically
Ingredients You’ll Need
For the Chocolate Cake:
- 2 cups all-purpose flour (the regular stuff, nothing fancy)
- 1¾ cups granulated sugar (aka the good stuff)
- ¾ cup unsweetened cocoa powder (the darker, the better – like your soul after 2020)
- 1½ teaspoons baking powder (the unsung hero)
- 1½ teaspoons baking soda (not the one from your fridge that’s absorbing weird smells)
- 1 teaspoon salt (just a pinch, we’re not preserving meat here)
- 2 eggs (room temperature, not straight from the refrigerator, you monster)
- 1 cup milk (cow, almond, oat – whatever floats your boat)
- ½ cup vegetable oil (keeps it moist – sorry if you hate that word)
- 2 teaspoons vanilla extract (the real stuff, not that imitation nonsense)
- 1 cup hot coffee (or hot water if you’re boring)
For the White Polka Dots:
- 8 oz white chocolate chips (or a bar chopped up while stress-eating half of it)
- 2 tablespoons heavy cream (the stuff that makes everything better)
- Optional: white candy melts (for the lazy amongst us – no judgment)
For the Chocolate Frosting:
- 1 cup unsalted butter (softened, not melted into oblivion)
- 3½ cups powdered sugar (measured chaotically, as the baking gods intended)
- ½ cup cocoa powder (for that double chocolate commitment)
- ¼ cup milk (approximately – let’s be honest, you’ll eyeball it)
- 1 teaspoon vanilla extract (the aromatic lifesaver)
- Pinch of salt (to make your sweet tooth question everything)
Step-by-Step Instructions
1. Prep your battle station
Preheat your oven to 350°F (175°C). Grease and flour two 9-inch round cake pans, or use parchment paper if you’re fancy (or just hate cleaning). Pro tip: spray the pans with cooking spray before putting parchment down. You’re welcome.
2. Mix the dry ingredients
In a large bowl, whisk together flour, sugar, cocoa powder, baking powder, baking soda, and salt. Make it rain with these ingredients, but maybe don’t actually throw them or you’ll be finding cocoa powder in your hair three days later.
3. Add the wet team
Add eggs, milk, oil, and vanilla to your dry ingredient bowl. Mix until just combined – we’re making cake, not building biceps with overmixing. Then, while questioning your life choices, slowly add the hot coffee. The batter will be thin. Don’t panic. This is normal.
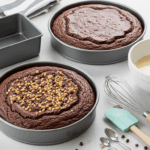
4. Bake like you mean it
Pour the batter evenly into your prepared pans. Bake for 30-35 minutes, or until a toothpick inserted in the center comes out clean. If you don’t have toothpicks, a spaghetti noodle works too. Don’t use your finger. That’s just dumb.
5. Cool your jets (and your cakes)
Let the cakes cool in the pans for 10 minutes before removing to a wire rack to cool completely. If you try to frost them while warm, you’ll create a melty disaster that even your dog will judge you for.
6. Make the frosting
Beat the butter until it’s fluffy and questioning its purpose in life. Gradually add powdered sugar, cocoa powder, milk, vanilla, and salt. Beat until smooth and spreadable. If it’s too thick, add more milk. If it’s too thin, add more powdered sugar. Baking is just solving one problem after another.
7. Assemble the cake
Place one cake layer on your serving plate. Slather a generous amount of frosting on top. Add the second layer and frost the top and sides. Make it as neat or messy as your personality demands. There are no frosting police here.
8. Create the polka dots
Melt white chocolate with heavy cream in 30-second bursts in the microwave, stirring between each burst until smooth. Let it cool slightly, then transfer to a piping bag with a small round tip (or just use a ziplock bag with the corner snipped off because who actually has piping bags just lying around?). Pipe dots of various sizes all over the cake. The more random, the more it looks like you planned it.
9. Chill out
Refrigerate the cake for about 30 minutes to set the dots. This also gives you time to clean your kitchen tornado or just sit down and question why you didn’t just buy a cake instead.
Common Mistakes to Avoid
1. Overmixing the batter – You’re making cake, not cement. Gentle folding is key unless you want a chocolate brick.
2. Skipping the hot coffee – “I don’t want my cake to taste like coffee!” Trust me, Karen, it won’t. The coffee enhances the chocolate flavor. If you skip it, you’ll have a cake that whispers chocolate instead of shouting it.
3. Frosting a warm cake – Unless you’re going for that “melted snowman” aesthetic, wait until the cake is completely cool. I mean completely. Not “eh, good enough” cool.
4. Making the white chocolate too hot – Microwave in short bursts or you’ll end up with scorched, unusable white chocolate and deep emotional damage.
5. Being a perfectionist with the dots – The beauty of polka dots is their random placement. If you try to make them perfectly spaced, you’ll end up throwing the cake against a wall. Ask me how I know.
Alternatives & Substitutions
No coffee in the house? Use hot water instead. You’ll lose some depth of flavor, but it’s not the end of the world.
Want to get fancy? Add a teaspoon of espresso powder to the hot water. It’s like coffee’s concentrated, overachieving cousin.
Hate measuring? For the white dots, just buy pre-made white candy melts. Melt, pipe, done. Sometimes the lazy way is the smart way, IMO.
Need a different look? Reverse it! Make a white cake with chocolate polka dots. Just be prepared for people to ask if you were going for a cow theme.
Dairy-free? Use coconut milk and vegan butter substitutes. The cake will never know the difference, though your texture might be slightly different.
FAQ (Frequently Asked Questions)
Can I make this cake ahead of time?
Is procrastination your middle name too? You can make this cake 1-2 days in advance. Keep it refrigerated and bring to room temperature before serving. The polka dots actually look better on day two – like how we all need a day to pull ourselves together.
Will the white chocolate dots melt at room temperature?
Not unless your room is weirdly hot. If you’re serving this cake in a sauna or the actual sun, then yes, you might have a problem. Otherwise, you’re golden.
Can I use a box mix instead?
Look, I’m not the cake police. If you want to use a box mix, go for it. The polka dots will still make it look impressive. Your secret is safe with me.
How do I get the dots perfectly round?
You don’t. That’s the beauty of it. Some will be round, some will be blob-shaped, and all of them will be “intentionally artistic.” If anyone questions it, just say “it’s deconstructed” with a straight face.
My white chocolate seized up! What happened?
You got water in it, didn’t you? Even a drop of water makes white chocolate throw a tantrum. Start over, making sure your bowl and utensils are completely dry. And maybe don’t cry directly over the bowl this time.
Can I freeze leftover cake?
“Leftover cake” – that’s cute. But yes, if such a mythical thing exists, you can freeze individual slices wrapped in plastic wrap and foil for up to 3 months. Thaw in the refrigerator overnight when the cake cravings hit.
Final Thoughts
This polka dot cake is basically the dessert equivalent of showing up to a party in a tux t-shirt: it’s fun, slightly ridiculous, but somehow still impressive. Whether you’re making it for a birthday, a Tuesday night, or just because the existential dread was getting to you, this cake delivers.
Remember, the beauty of this cake is in its imperfections. The more relaxed you are about the process, the better it turns out – which is the exact opposite of most things in life. So embrace the chaos, enjoy the process, and when someone asks for your secret, just wink mysteriously and change the subject.
Now go forth and create your spotted masterpiece! And if it all goes terribly wrong, just crumble it up, add some frosting, call them “cake pops” and pretend that was the plan all along. Baking is 90% confidence and 10% actually knowing what you’re doing anyway.
