Let me guess – someone’s having a birthday, you volunteered to bake a cake, and now you’re frantically searching for a recipe that won’t make you look like a complete disaster in front of your friends? Been there! Luckily, this chocolate cake with striped candles recipe is basically foolproof, and those fancy-looking striped candles will distract everyone if the cake isn’t exactly Food Network material. Let’s do this!
Why This Recipe is Awesome
First off, this chocolate cake requires zero fancy equipment or pastry school skills. It’s what I call a “reputation-saver” – the kind of recipe that makes people go “Wow, you MADE this?” while you nod mysteriously like some culinary genius. The chocolate flavor is deep enough to make people think you spent way more effort than you actually did. And those striped candles? They’re basically the party outfit that takes this cake from “nice” to “remember when you made that AMAZING cake?”
Ingredients You’ll Need
For the cake:
- 2 cups all-purpose flour (the regular stuff, not that fancy organic spelt your health-conscious friend recommended)
- 2 cups granulated sugar (yes, TWO cups – this isn’t diet food, people)
- 3/4 cup unsweetened cocoa powder (the darker, the better)
- 2 teaspoons baking soda (not baking powder – they’re different, trust me)
- 1 teaspoon salt (to make the sweet sweeter, science!)
- 2 large eggs (room temperature if you’re feeling fancy)
- 1 cup buttermilk (regular milk with a splash of vinegar works in a pinch)
- 1/2 cup vegetable oil (makes it moist – sorry if you hate that word)
- 2 teaspoons vanilla extract (the real stuff, not the imitation garbage)
- 1 cup hot coffee (or hot water if you don’t want the birthday person bouncing off walls)
For the frosting:
- 1/2 cup butter, softened (like your heart will be when everyone compliments your cake)
- 2/3 cup unsweetened cocoa powder
- 3 cups powdered sugar (yes, THREE)
- 1/3 cup milk (approximately – we’ll play it by ear)
- 1 teaspoon vanilla extract
- A pinch of salt (trust me on this)
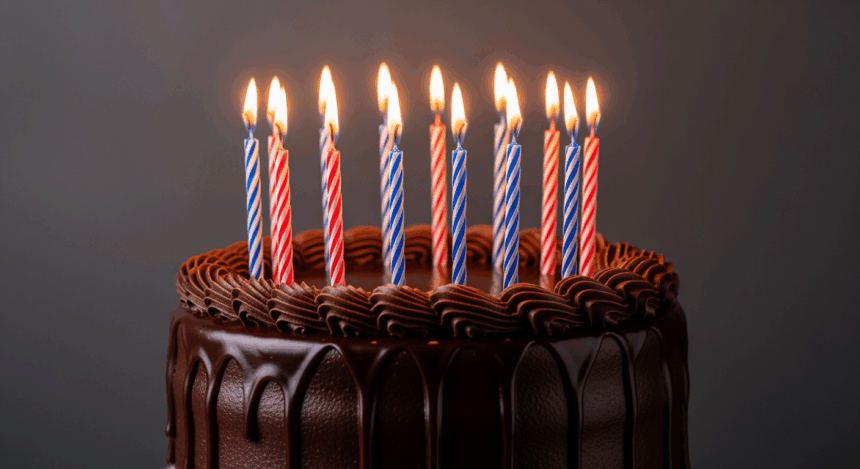
- 8-12 striped candles (the real MVPs of this operation)
Step-by-Step Instructions
- Prep your battlestation. Preheat oven to 350°F (175°C). Grease and flour two 9-inch round cake pans. Pro tip: cut little parchment circles for the bottoms. Your future self will thank you during cake removal.
- Mix the dry team. In a large bowl, whisk together flour, sugar, cocoa, baking soda, and salt. Make a little well in the center like you’re creating a chocolate volcano.
- Assemble the wet crew. Add eggs, buttermilk, oil, and vanilla to your volcano crater. Mix until just combined – we’re not trying to win an arm-wrestling competition here.
- Add the secret weapon. Stir in that hot coffee (or water). Yes, the batter will be ridiculously runny. No, you didn’t mess up. This is how we get moisture, people!
- Bake to perfection. Pour batter evenly into your prepared pans and bake for 30-35 minutes. The cake is done when a toothpick inserted in the center comes out with a few moist crumbs (not wet batter).
- Cool your jets. Let cakes cool in pans for 10 minutes, then flip onto wire racks to cool completely. Patience, grasshopper – frosting warm cake is a rookie disaster.
- Make the frosting. Beat butter until creamy, add cocoa powder, then gradually mix in powdered sugar, milk, vanilla, and salt until you reach spreadable consistency. If it’s too thick, add milk one teaspoon at a time. Too thin? More powdered sugar!
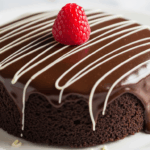
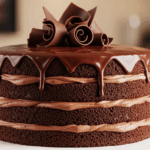
- Assemble your masterpiece. Place one cake layer on your serving plate, spread a generous layer of frosting, top with second layer, then frost the whole shebang. Get creative or just smear it on – it’ll taste amazing either way.
- Candle strategy. Right before serving, place those striped candles in an artistic arrangement (or just stick them wherever, I’m not judging). Light ’em up, sing off-key, and bask in the glory of being the cake hero.
Common Mistakes to Avoid
Let’s avoid some classic cake catastrophes, shall we?
- Opening the oven door too early. Your cake will sink faster than your heart when your ex texts “we need to talk.”
- Skipping the parchment paper. And then wondering why half your cake is stuck to the pan. Live and learn.
- Frosting a warm cake. Unless “melted avalanche” is the aesthetic you’re going for.
- Forgetting to count candles. Nothing says “I care” like putting 29 candles on a 30-year-old’s cake. Double-check the math, folks.
- Trying to make this “healthier.” It’s a birthday cake, not a kale smoothie. Some things are sacred.
Alternatives & Substitutions
Not everyone’s pantry is fully stocked, and sometimes you need to improvise:
- No buttermilk? Mix 1 tablespoon of lemon juice or vinegar with enough regular milk to make 1 cup. Let it sit for 5 minutes to get all curdled and weird-looking.
- Gluten-free friend? Substitute a 1:1 gluten-free flour blend. The cake might be slightly less fluffy, but hey, it’s the thought that counts.
- No coffee? Hot water works fine, but you’ll miss that extra depth of flavor. IMO, even instant coffee is better than nothing.
- Vegan needs? Replace eggs with flax eggs (1 tablespoon ground flaxseed + 3 tablespoons water per egg) and use plant milk with a splash of vinegar for the buttermilk. Vegan butter for the frosting, obvs.
- Striped candles MIA? Any candles will work, but you can jazz up plain ones by painting thin stripes with food coloring (let them dry before using).
FAQ (Frequently Asked Questions)
Can I make this cake in advance?
Absolutely! The cake layers can be baked up to 2 days ahead. Wrap them well in plastic wrap once completely cooled and store at room temperature. Frost the day of your celebration for maximum freshness points.
Will this recipe work as cupcakes?
You bet your sweet measuring cups it will! Fill cupcake liners about 2/3 full and bake for approximately 18-22 minutes. You’ll get about 24 cupcakes, perfect for those “I don’t want to share my slice” people.
Can I use Dutch-process cocoa instead of regular?
Technically, this recipe works best with natural cocoa because of the baking soda, but honestly? I’ve used Dutch-process in a pinch and lived to tell the tale. The cake might be slightly less fluffy but still delicious.
Why coffee in a chocolate cake?
Coffee enhances chocolate flavor without making the cake taste like your morning brew. It’s like chocolate’s hype man – you don’t really notice it, but it’s doing important work behind the scenes.
My frosting looks grainy! What happened?
Sounds like your butter wasn’t soft enough or you didn’t beat it long enough before adding the other ingredients. Quick fix: warm the bowl slightly over simmering water for a few seconds, then beat again until smooth.
How do I stop candles from dripping colored wax all over my masterpiece?
Stick your striped candles in the freezer for 30 minutes before using them. Cold candles drip less. Also, don’t light them until right before the big singing moment.
Final Thoughts
Remember, the whole point of making a birthday cake is to celebrate someone special – and nothing says “I value you as a human” quite like homemade chocolatey goodness topped with festive striped candles. Even if your cake leans slightly to one side or your frosting job wouldn’t win any beauty contests, it’ll still taste amazing and create that moment of birthday magic.
Now go forth and bake! May your cake rise evenly, your frosting spread smoothly, and your candles stand tall without dropping wax on your culinary creation. You’ve got this – and if anyone complains, just remind them that the alternative was a store-bought cake from the grocery store refrigerator case. That usually shuts ’em up.
