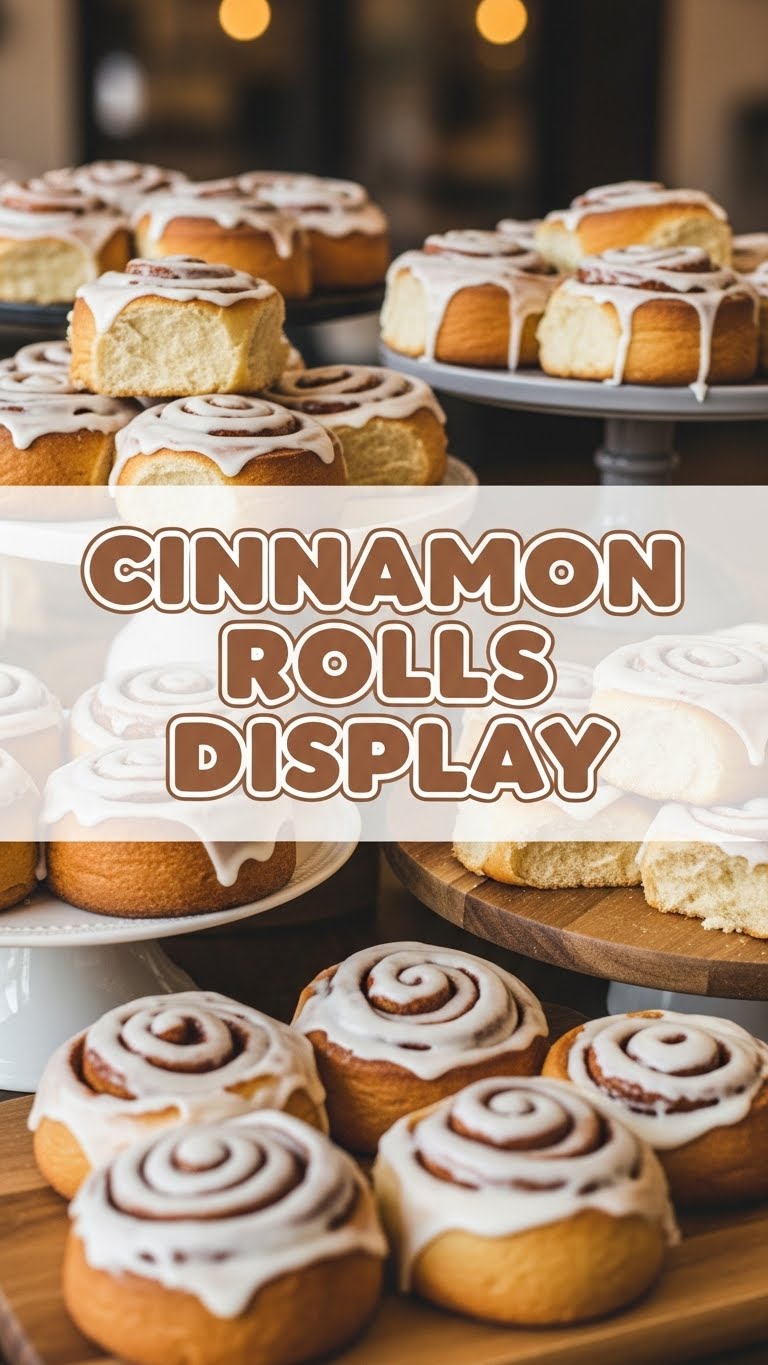
So, you’ve got a hankering for something ridiculously delicious, warm, and comforting, but also want to look like you just graduated from patisserie school, even if your actual skill level hovers somewhere around “can successfully operate a toaster”? Same, friend, same. We’re not making cinnamon rolls from scratch today (unless you *want* to, you overachiever, you). We’re taking the glorious shortcut of canned cinnamon rolls and transforming them into a show-stopping display that’ll fool even the most discerning foodie. Get ready to embrace your inner culinary wizard, with minimal actual wizardry required.
Why This Recipe is Awesome
Because let’s be real, life’s too short for complicated baking *every single time*. This “recipe” isn’t about making the rolls; it’s about **making them shine**. We’re talking about taking those humble, ready-to-bake disks of joy and elevating them into a masterpiece. It’s idiot-proof, even on a Monday morning when your brain hasn’t fully booted up yet. You get all the ooey-gooey goodness, plus the satisfaction of presenting something that looks like it took hours, but actually took… well, less than that. And honestly, who doesn’t love a good magic trick?
Ingredients You’ll Need
Gather ’round, fellow culinary tricksters! Here’s what you’ll need to turn basic into brilliant:
- 1-2 tubes (8-count) of Refrigerated Cinnamon Rolls: The ultimate cheat code. Don’t be shy, grab your favorite brand. We’re not judging.
- 1/4 cup Unsalted Butter: Because everything’s better with butter. Your rolls deserve it.
- 1/4 cup Brown Sugar (packed): For that extra caramel-y goodness that makes people go, “Mmm, what’s that secret ingredient?”
- 1/2 teaspoon Ground Cinnamon: Just a little extra punch. It’s in the name, after all!
- 1/4 cup Chopped Pecans or Walnuts (optional, but highly recommended): For crunch, texture, and making it look extra fancy.
- 1 (8 oz) block Cream Cheese (softened): For our *superior* extra frosting. Don’t even think about skipping this.
- 2 cups Powdered Sugar: The secret to silky smooth frosting.
- 1-2 tablespoons Milk or Cream: To get that frosting to the perfect drizzly consistency.
- 1 teaspoon Vanilla Extract: Because vanilla makes everything taste like a hug.
- A Beautiful Serving Platter or Cutting Board: This is where the “display” part really comes in! Presentation is key!
Step-by-Step Instructions
- Prep Your Rolls: Preheat your oven to the temperature specified on your cinnamon roll package (usually 375°F or 190°C). Lightly grease a baking dish or line a baking sheet with parchment paper. Arrange the rolls without crowding them.
- Bake to Golden Perfection: Bake the cinnamon rolls according to package directions. Keep an eye on them—they should be golden brown and puffed up, but **don’t overbake them**! You want that soft, tender center.
- Make the Extra Goo: While the rolls are baking, melt the 1/4 cup butter in a small saucepan. Stir in the brown sugar and extra cinnamon. Let it bubble gently for about a minute until slightly thickened. If using nuts, stir them in now.
- Whip Up the Cream Cheese Frosting: In a medium bowl, beat the softened cream cheese until smooth. Add the powdered sugar, milk/cream, and vanilla extract. Beat until light, fluffy, and absolutely dreamy. Add more milk/cream if you prefer a thinner, drizzly consistency, or more powdered sugar if you want it thicker.
- Drizzle and Dollop: Once the rolls are out of the oven, immediately pour or spoon your brown sugar-butter mixture over them. Let it seep into all those delicious crevices. Then, generously dollop or drizzle your homemade cream cheese frosting over the warm rolls. The warmth will slightly melt it, creating an even more irresistible glaze.
- Arrange for Applause: Carefully transfer your glorious cinnamon rolls to your chosen serving platter or cutting board. Arrange them artfully! Stack them, spread them out, add a sprig of mint if you’re feeling extra fancy. **Let them cool for just a few minutes** before serving, but they’re best warm!
Common Mistakes to Avoid
We’ve all been there. Learn from my past kitchen mishaps (so you don’t have to):
- Not Preheating the Oven: Rookie mistake! Your rolls won’t bake evenly, and you’ll end up with dense, sad rolls. **Always preheat!**
- Overbaking Them: You want soft, pillowy rolls, not hard pucks. Watch them like a hawk, especially towards the end of the baking time. A little underdone is better than overdone for these beauties.
- Skipping the Extra Frosting/Goo: The canned rolls usually come with a pathetic little packet of glaze. That’s fine for Tuesday morning, but for a “display”? Nah. **Our homemade frosting and butter goo are non-negotiable for max deliciousness.**
- Frosting Straight Out of the Oven: If you immediately drench super-hot rolls in cold frosting, it’ll just melt into a puddle. Let them cool for about 5-10 minutes so the frosting adheres nicely, but still gets a little melty.
- Cramming Them on a Small Plate: Remember, it’s a *display*. Give your glorious creation room to breathe and shine!
Alternatives & Substitutions
Feeling creative? Here are a few ways to jazz things up:
- Nutty About Nuts: Not a pecan fan? Swap them for walnuts, almonds, or even toasted coconut flakes!
- Fruity Freshness: Add some fresh berries (raspberries, blueberries) or thinly sliced bananas to the top *after* frosting for a pop of color and freshness.
- Caramel Craze: Drizzle a little store-bought caramel sauce over the top along with your frosting for an extra layer of decadence. Seriously good.
- Spice It Up: A tiny pinch of nutmeg or cardamom in your homemade cream cheese frosting can add a lovely depth of flavor.
- Maple Magic: Swap some of the milk in your cream cheese frosting for maple syrup for a delicious maple-cream cheese vibe. FYI, this is a game-changer.
FAQ (Frequently Asked Questions)
- Can I use margarine instead of butter? Well, technically yes, but why hurt your soul like that? Butter just tastes better, IMO. Go for the good stuff.
- How do I store leftovers? Pop ’em in an airtight container at room temperature for a day, or in the fridge for up to 3 days. They’re usually best within 24 hours.
- Can I make the extra frosting ahead of time? Absolutely! Make it a day or two in advance and store it in an airtight container in the fridge. Let it come to room temperature and give it a quick whip before using.
- What if my rolls stick to the pan? A good non-stick spray or parchment paper is your best friend. If they’re a little stubborn, gently loosen the edges with a thin spatula.
- Can I add coffee to the frosting? Ooh, you’re adventurous! Yes, a teaspoon of espresso powder dissolved in the milk for the frosting would be divine for a mocha kick.
- What’s the best way to reheat them? A quick zap in the microwave for 15-30 seconds (don’t overdo it!) or a few minutes in a preheated oven (around 300°F/150°C) will bring them back to life.
- Do I *have* to share? Legally? No. Morally? Maybe. Emotionally? Good luck with that. You made them look so good, everyone will want a piece!
Final Thoughts
See? You’re a culinary genius! Who knew making something look this good could be so delightfully easy? This “Cinnamon Rolls Display” isn’t just a treat for your taste buds, it’s a treat for your eyes, and a testament to your ability to elevate the everyday. Now go impress someone—or yourself—with your new culinary skills. You’ve earned it, you magnificent baker, you!

