So you’re staring at a giant batch of homemade cinnamon rolls, or maybe you went a little wild at the bakery, and now you’re wondering, ‘Can I save these beauties for later without them turning into hockey pucks?’ Oh, honey, you’ve come to the right place. Because yes, you absolutely **can** freeze cinnamon rolls. And I’m about to show you how to be a time-traveling pastry wizard.
Why This Process is Awesome
Okay, ‘recipe’ might be a strong word for ‘shoving things into a freezer,’ but trust me, this process is pure genius. Why? Because it means **fresh-baked goodness whenever your heart desires**, without the actual ‘baking for hours’ part. Plus, it totally makes you look like you have your life together when you pull out a perfect, warm cinnamon roll at 7 AM on a Tuesday. It’s basically meal prep for your soul. And it’s so idiot-proof, even I haven’t messed it up. Yet.
Ingredients You’ll Need
- Your glorious cinnamon rolls: Already baked or unbaked, your call! (We’ll cover both.)
- Plastic wrap: The clingy kind.
- Aluminum foil: For double protection, because we care about these rolls.
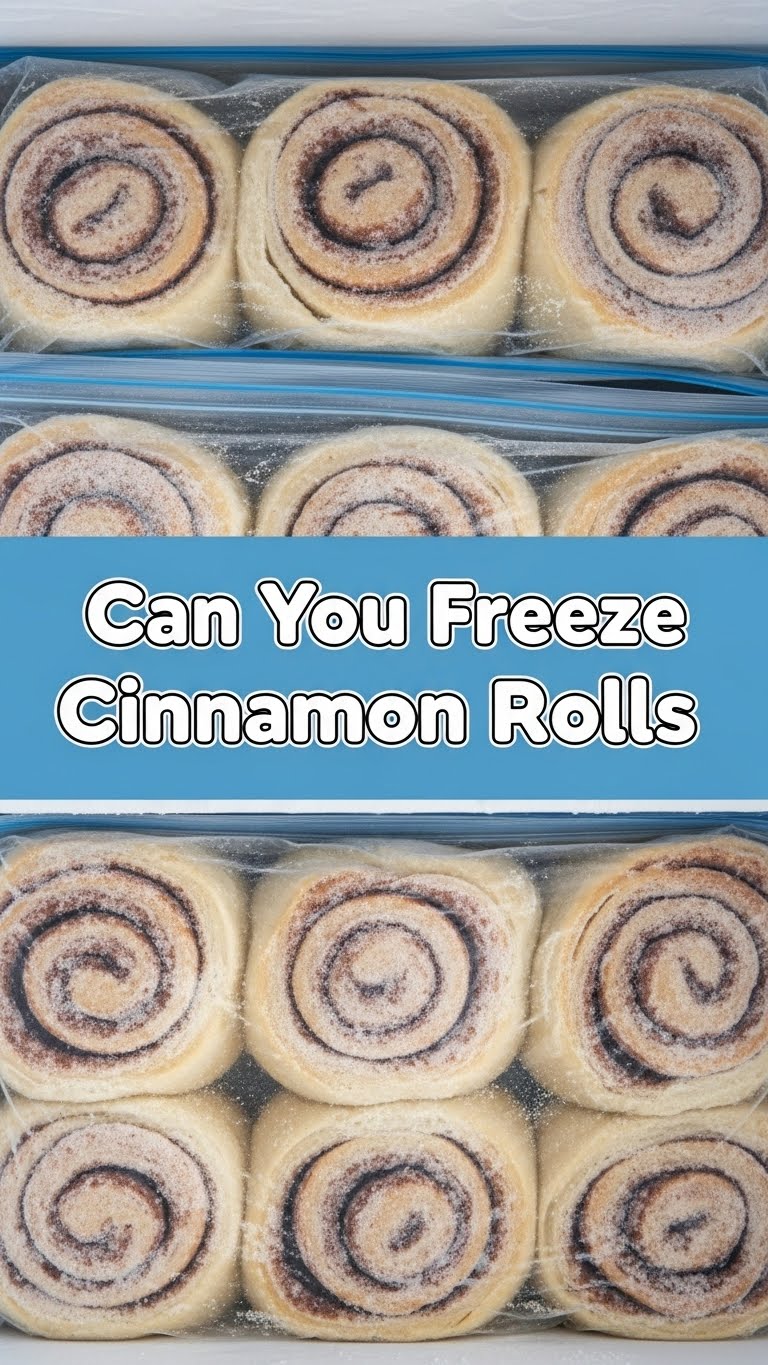
- Freezer bags or airtight containers: Your choice, as long as it seals tight.
- A freezer: Obvs. Preferably one with space, unlike mine which is 90% mystery meat and forgotten ice cream tubs.
Step-by-Step Instructions
Freezing Baked Cinnamon Rolls (The “Leftover Life Hack”):
- First things first: Let those rolls **cool completely**. I mean it. Warm rolls = condensation = soggy mess. We don’t want soggy.
- If they’re already frosted, chill them in the fridge until the frosting is firm. This prevents sticky situations later.
- Wrap each individual roll *tightly* in plastic wrap. Like you’re swaddling a very delicious, sugary baby.
- Next, give them a second layer of protection: wrap them again in aluminum foil. This is your freeze-burn prevention shield.
- Pop the double-wrapped rolls into a large freezer bag or an airtight container. Squeeze out as much air as possible if using a bag.
- **Label and date it!** Seriously, future you will thank present you. Into the freezer they go, for up to 1-2 months.
Freezing Unbaked Cinnamon Rolls (The “Future Baker” Move):
- Prepare your cinnamon roll dough right up to the point of the second rise. Instead of letting them rise, cut them and place them in your baking dish.
- Cover the dish *very tightly* with plastic wrap, then a layer of aluminum foil.
- Stick the whole darn dish in the freezer. They’ll keep for a month or so.
- To bake from frozen: When ready to bake, transfer the frozen rolls to the fridge the night before. In the morning, let them sit at room temperature for 1-2 hours to finish their second rise (they might take longer than usual). Then bake as normal! Or, if you’re brave, you can let them rise at room temp for 3-5 hours on the day you plan to bake.
Reheating Your Frozen Baked Rolls (The “Instant Gratification” Method):
- When the craving strikes, pull out as many rolls as you want.
- For a quick fix (microwave): Unwrap a roll, microwave for 20-30 seconds. Check, then microwave in 10-second bursts until warm and gooey. Be careful not to overcook, or they’ll get tough.
- For oven-fresh goodness: Preheat your oven to 350°F (175°C). Unwrap the rolls, place them on a baking sheet, and cover loosely with foil. Bake for 15-20 minutes, or until warmed through. This is, IMO, the best way to get that ‘just baked’ vibe back.
- If they weren’t frosted initially, now’s the time to drizzle on that glorious glaze!
Common Mistakes to Avoid
- **Freezing warm rolls:** We talked about this. Don’t do it. Patience, grasshopper.
- **Skipping the double wrap:** Thinking one layer is enough? That’s how freezer burn happens, my friend. Don’t let your rolls suffer.
- **Forgetting to label:** Trust me, that mystery loaf in the back of the freezer could be anything from ancient bread to a pet rock. Label!
- **Over-microwaving:** You want warm and soft, not rubbery and sad. Go slow.
- **Freezing rolls *with* soggy fruit filling:** Some fruit fillings can get super watery upon thawing. Stick to classic cinnamon goodness for freezing, unless you know your filling holds up well.
Alternatives & Substitutions
- **Different glazes:** Freezing plain rolls means you can get creative with your glaze *after* reheating! Cream cheese, vanilla bean, maple bacon (yes, really!), or even a simple powdered sugar glaze with a splash of milk. The world is your oyster… or, well, your roll.
- **Make it mini:** Freeze smaller “mini” cinnamon rolls. They thaw faster and are perfect for portion control (or, let’s be real, eating three instead of one giant one).
- **Add-ins for unbaked:** Feel free to sprinkle in some chopped nuts (pecans, walnuts), raisins, or even mini chocolate chips before freezing the unbaked rolls. Just remember some additions might affect texture slightly after thawing.
- **Air fryer reheating:** Got an air fryer? Unwrap your frozen baked roll, pop it in for 3-5 minutes at 300°F (150°C). It’s surprisingly effective for a quick re-crisp!
FAQ (Frequently Asked Questions)
- Can I freeze cinnamon rolls with cream cheese frosting already on them? Technically, yes! But for the best texture, I’d recommend freezing them unfrosted and adding the frosting *after* reheating. Cream cheese frosting can sometimes get a little weird (crumbly or watery) after thawing.
- How long do frozen cinnamon rolls last? For best quality, aim for 1-2 months. They’re usually safe to eat longer, but after that, they might start getting a bit dry or develop freezer burn.
- Do I have to thaw them before reheating? Nope! For baked rolls, you can reheat straight from frozen in the oven or microwave. For unbaked, you *do* need to thaw and let them rise before baking.
- Can I freeze store-bought canned cinnamon rolls? You betcha! Just follow the “freezing unbaked rolls” instructions for best results. They’re designed for easy baking, so they usually freeze well too.
- What if I only want to freeze half a batch? Go for it! This method works whether you’re saving one roll or twenty. Just follow the individual wrapping steps.
- Will they taste as good as fresh? Okay, let’s be real, nothing beats straight-out-of-the-oven fresh. BUT, reheating properly gets them *incredibly* close. Warm, gooey, and smelling amazing. You’ll barely notice the difference, especially after you slather on that frosting!
Final Thoughts
See? Not so scary, right? You’re now officially equipped to tackle the monumental task of preserving deliciousness for future you. No more sadness over stale pastries or the dread of a cinnamon roll-less morning. Now go impress someone—or yourself—with your new culinary time-bending skills. You’ve earned it! And maybe save me one?


