So, you’ve been dreaming of those giant, gooey, magical cinnamon rolls from Magic Kingdom, but a trip to Disney World isn’t in the budget this week, huh? Same, friend, same. Well, dust off your apron, because we’re about to bring a little bit of that theme park magic right into your kitchen. No lines, no scorching Florida sun, just pure, unadulterated cinnamon roll bliss. Get ready to impress yourself (and anyone lucky enough to be in your vicinity).
Why This Recipe is Awesome
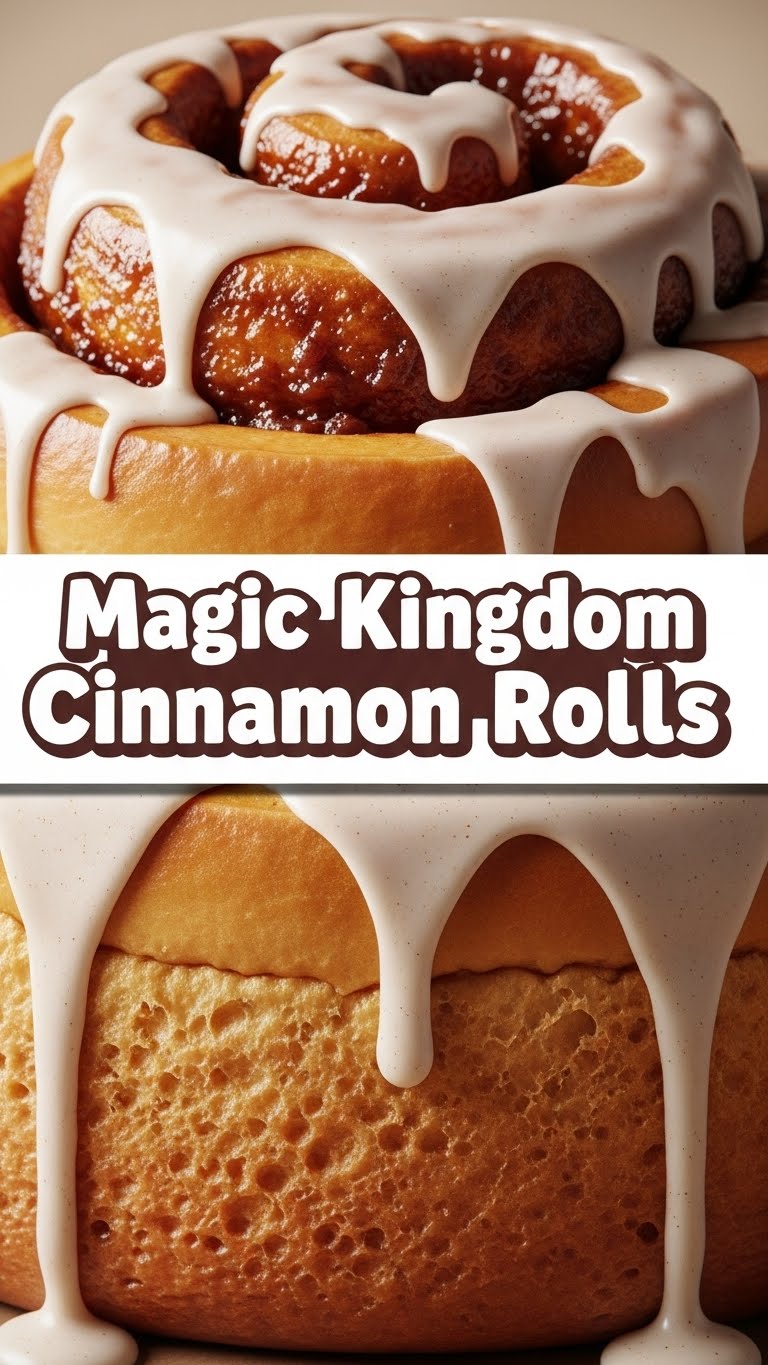
Okay, so why bother with this recipe? Because it’s practically magic, that’s why! You get that Disney-level satisfaction without the theme park price tag or the insane lines. Plus, it’s pretty much **idiot-proof**. Seriously, if I can make these without burning down the kitchen, you’re golden. We’re talking fluffy, tender rolls drenched in a sweet, gooey cinnamon filling and topped with the most luscious icing. It’s the kind of treat that makes you close your eyes and do a little happy dance. And trust me, your taste buds will thank you.
Ingredients You’ll Need
Gather ’round, brave bakers! Here’s your shopping list for culinary greatness:
- All-Purpose Flour: About 4-5 cups. Unless you’re feeling fancy (don’t), regular ol’ AP flour works best.
- Granulated Sugar: ½ cup for the dough, plus 1-2 tablespoons for the yeast. Sweeten your life, literally.
- Instant or Active Dry Yeast: 2 ¼ teaspoons (one packet). This is where the magic happens, folks.
- Warm Milk: 1 cup (whole milk, please!). Warm, full-fat if you’re not messing around. Adds richness, baby!
- Melted Butter: ½ cup (1 stick). **Real butter**, melted and cooled slightly. Don’t even think about margarine for the rolls themselves. For the frosting, maybe, but why compromise?
- Large Eggs: 2, lightly beaten. Happy chickens make happy rolls.
- Salt: 1 teaspoon. Just a pinch. Balances the sweet, like a culinary superhero.
- For the Filling:
- ½ cup (1 stick) softened butter
- 1 cup packed light brown sugar
- 2 tablespoons ground cinnamon
- (The holy trinity of deliciousness)
- For the Icing:
- 2 cups powdered sugar
- ¼ cup (½ stick) softened butter
- 3-4 tablespoons milk or heavy cream
- 1 teaspoon vanilla extract
- (The crown jewel that seals the deal)
Step-by-Step Instructions
- Get the Yeast Party Started: In a large bowl (or stand mixer bowl), combine the warm milk (think bathwater temp, not lava!), 1 tablespoon of sugar, and your yeast. Give it a gentle stir and let it hang out for 5-10 minutes. It should get nice and foamy; that’s how you know it’s alive and ready to party.
- Mix the Dough Magic: Add the remaining ½ cup of sugar, melted butter, beaten eggs, and salt to your bubbly yeast mixture. Stir it all up. Then, gradually add the flour, about a cup at a time, mixing until a shaggy dough forms.
- Knead It Like You Mean It: If you have a stand mixer, use the dough hook and knead on medium speed for about 5-7 minutes. If you’re going old-school, turn the dough out onto a lightly floured surface and knead by hand for 8-10 minutes. You want a smooth, elastic dough that springs back when poked.
- Let it Rise (Part 1): Lightly grease a clean bowl, place your dough in it, and turn it over once to coat. Cover the bowl with plastic wrap or a clean kitchen towel. Find a warm, draft-free spot (like a slightly warm oven that’s turned off) and let it rise for 1-1.5 hours, or until it has happily doubled in size.
- Roll with It: Once risen, gently punch down the dough to release the air. Turn it out onto a lightly floured surface and roll it into a large rectangle, roughly 12×18 inches.
- Spread the Love (Filling): In a small bowl, cream together the softened butter, brown sugar, and cinnamon for the filling. Spread this glorious mixture evenly over your dough rectangle, going all the way to the edges.
- Roll ‘Em Up & Slice: Starting from one of the long sides, tightly roll the dough into a log. Once rolled, use a sharp knife or (my secret weapon) unflavored dental floss to slice the log into 12-15 rolls, about 1 ½ inches thick.
- Let ‘Em Rise Again (Part 2): Arrange the cut rolls in a lightly greased 9×13 inch baking dish. Don’t crowd them too much, they need space to grow! Cover the dish again and let them rise in a warm spot for another 30-45 minutes, or until puffy.
- Bake ‘Em Up Golden: While the rolls are on their second rise, preheat your oven to 375°F (190°C). Once risen, pop them in the oven and bake for 20-25 minutes, or until they’re beautifully golden brown and smell absolutely irresistible.
- Whip Up the Icing: While the rolls are baking (or cooling slightly), prepare the icing. In a medium bowl, whisk together the powdered sugar, softened butter, milk/cream, and vanilla extract until smooth and creamy. If it’s too thick, add a tiny bit more milk; too thin, add more powdered sugar.
- Frost & Devour: As soon as the rolls come out of the oven, slather that glorious icing generously over the warm cinnamon rolls. The warmth will make the icing melt ever-so-slightly, creating that perfect gooey finish. Now, try not to eat the whole pan in one sitting!
Common Mistakes to Avoid
- Killing the Yeast: Water too hot? Yeast dies. Too cold? Yeast sleeps forever. **Aim for lukewarm**, like a baby’s bath.
- Not Kneading Enough: A lazy dough equals tough, dense rolls. Get those arms moving, or let your stand mixer do the work! Kneading develops the gluten for that fluffy texture.
- Overcrowding the Pan: Give those beauties room to grow! If they’re too squished, they won’t rise properly or bake evenly.
- Underbaking: Pale rolls are sad rolls. Bake until they’re a lovely golden brown. A little color means flavor!
- Forgetting the Icing: This is a non-negotiable, people. The icing is half the fun (and probably 75% of the flavor, IMO).
Alternatives & Substitutions
Feeling a little rebellious? Here are some simple tweaks:
- Milk: Any milk works (skim, almond, oat), but **whole milk is superior** for richness and that classic texture. Just sayin’.
- Butter: Can you use margarine for the rolls? Technically yes, but your rolls will judge you. For the icing, it’s more forgivable if you’re in a pinch, but butter always wins for flavor.
- Spice it Up: Add a pinch of nutmeg or cardamom to the cinnamon filling if you’re feeling adventurous and want to level up the spice game.
- Cream Cheese Frosting: Upgrade your icing game with cream cheese for extra tang and decadence. Just swap half the butter in the icing for cream cheese.
- Gluten-Free Flour: You *can* try a 1:1 gluten-free baking flour blend, but GF baking is a different beast. Expect a different texture, and perhaps a slightly longer rise time. Don’t say I didn’t warn you!
FAQ (Frequently Asked Questions)
- My dough isn’t rising! What gives? Ah, the age-old question! Most likely culprit: your yeast is either dead (too old, water too hot) or just sleepy (water too cold). Check the expiration date, ensure your milk is lukewarm, and give it a good 10 minutes to foam up.
- Can I make these ahead of time? YES! This is a game-changer. After placing the cut rolls in the baking dish, cover tightly with plastic wrap and refrigerate overnight (up to 12-18 hours). In the morning, pull them out and let them come to room temp and rise for about an hour before baking.
- How do I store leftovers? If there are any leftovers (highly doubtful), store them in an airtight container at room temperature for a couple of days. Pop them in the microwave for 15-20 seconds to warm them up and bring back that gooey goodness!
- Can I freeze them? Absolutely! You can freeze the unbaked rolls (cover tightly with foil once in the pan) and bake later, or freeze individual baked and frosted rolls. Thaw overnight and warm gently.
- What if I don’t have a stand mixer? No problem! Get your knead on, literally. Hand kneading works just as well; it just takes a little more elbow grease and a few extra minutes. It’s a great arm workout, FYI.
- Is it really like Magic Kingdom’s? Pretty darn close, honestly. With a sprinkle of your own pixie dust and a happy heart, you’ll be transported straight to Main Street, U.S.A.
Final Thoughts
See? Not so scary, right? You just whipped up a batch of those iconic Magic Kingdom cinnamon rolls in your own kitchen! That’s practically a superpower. Now go impress someone—or yourself, because let’s be real, you deserve all the praise—with your new culinary skills. You’ve earned it, you baking wizard! Don’t forget to share (or don’t, I won’t tell).


