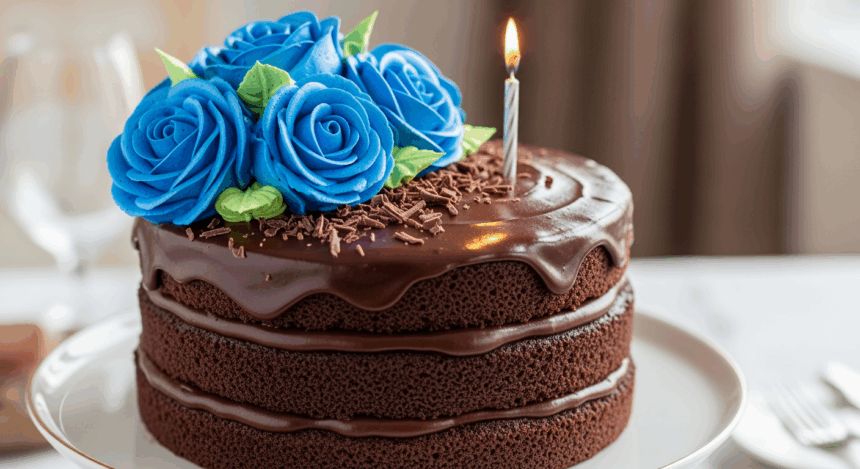
Listen up, cake lovers! So you’ve been tasked with making a birthday cake that doesn’t just taste amazing but looks Instagram-worthy too? I got you. This chocolate cake with blue roses is like the mullet of desserts – business-class chocolate richness with a party of blue buttercream roses on top. Perfect for when you want people to think you spent hours slaving away (spoiler alert: you didn’t).
Why This Recipe is Awesome
First off, this cake is basically foolproof. Like, “I once burned cereal” level foolproof. The chocolate cake itself is so moist (sorry if you hate that word) that it’s practically impossible to dry out. And those blue roses? They look professional but can be piped by anyone who can hold a bag without having a seizure. The real magic happens when you cut into it – that contrast between rich chocolate inside and vibrant blue decoration outside makes people gasp every dang time.
Plus, you can make the cake layers a day ahead, which means less birthday-day panic and more time for, you know, actually enjoying yourself.
Ingredients You’ll Need
For the Chocolate Cake:
- 2 cups all-purpose flour (the regular boring kind, nothing fancy)
- 2 cups granulated sugar (because birthdays aren’t the time for restraint)
- 3/4 cup unsweetened cocoa powder (the darker the better, just like my soul)
- 2 teaspoons baking soda (the magic fizz that makes it all work)
- 1 teaspoon baking powder
- 1 teaspoon salt
- 1 cup buttermilk (regular milk with a tablespoon of lemon juice works too, you rebel)
- 1/2 cup vegetable oil (keeps it moist for days)
- 2 large eggs (room temperature, not straight from the fridge, you monster)
- 2 teaspoons vanilla extract (the real stuff, not that imitation nonsense)
- 1 cup hot coffee (or hot water if caffeine makes you twitch)
For the Blue Buttercream Roses:
- 1 cup unsalted butter, softened (leave it out for an hour, don’t try to microwave it)
- 4 cups powdered sugar (also called confectioner’s sugar because fancy)
- 1/4 cup heavy cream (makes it extra smooth and pipe-able)
- 1 teaspoon vanilla extract
- Pinch of salt (trust me on this one)
- Blue gel food coloring (the gel kind, not the liquid stuff that’ll turn your frosting into sad blue soup)
Step-by-Step Instructions
Cake Magic Time:
- Preheat your oven to 350°F (175°C). Don’t skip this step! Grease and flour two 9-inch round cake pans. If you’re fancy, line them with parchment paper circles.
- In a large bowl, whisk together all the dry ingredients: flour, sugar, cocoa powder, baking soda, baking powder, and salt. Mix them like you’re trying to integrate a dysfunctional family – thoroughly but gently.
- Add buttermilk, oil, eggs, and vanilla to the dry ingredients. Beat with an electric mixer on medium speed for about 2 minutes. Your batter should look glossy and your kitchen should smell like heaven.
- Stir in the hot coffee (or water). Don’t panic! The batter will be thin. This is normal and leads to super moist cake. Think of it as cake soup that magically transforms in the oven.
- Pour the batter evenly into your prepared pans. Bake for 30-35 minutes or until a toothpick inserted in the center comes out mostly clean with a few crumbs.
- Let the cakes cool in pans for 10 minutes, then transfer to wire racks to cool completely. Patience is a virtue here – if you frost a warm cake, you’ll have a buttercream disaster on your hands.
Blue Rose Buttercream Adventure:
- Beat the softened butter until creamy and pale yellow. About 3 minutes of mixer time should do it.
- Add powdered sugar one cup at a time, beating well after each addition. If your kitchen doesn’t look like it’s been hit by a sugar snowstorm, you’re doing it right.
- Pour in heavy cream, vanilla, and salt. Beat until fluffy and smooth. This could take 2-3 minutes. You want it light but firm enough to hold its shape.
- Add blue gel food coloring a little at a time until you reach your desired shade. Remember: you can always add more color, but you can’t take it away. Start with tiny amounts!
- Fill a piping bag fitted with a 1M or 2D tip (the rose-making tips). If you don’t have a piping bag, a zip-top bag with the corner snipped works in a pinch.
Assembly (Where the Magic Happens):
- Place one cake layer on your serving plate. Spread a layer of buttercream (save the blue stuff for decorating).
- Top with the second cake layer. Frost the entire cake with a thin layer of white buttercream as a crumb coat. Chill for 15 minutes.
- Add another layer of white buttercream, smoothing the sides and top.
- Now for the blue roses: Starting at the bottom edge, pipe swirls by squeezing the bag while making a spiral motion. Alternate sizes for a natural look. Continue around the bottom and then add some to the top.
- Chill the cake for 15 minutes to set the decorations. Then stand back and admire your handywork before someone demands a slice.
Common Mistakes to Avoid
Don’t rush the cooling process. I know you’re excited to frost that bad boy, but warm cake + buttercream = sliding disaster. Nobody wants a cake avalanche.
Going overboard with food coloring. Unless “Smurf Explosion” is your intended theme, add the blue gel color gradually. You can always add more, but you can’t un-blue it once it looks radioactive.
Forgetting to level your cakes. If your cakes have domed tops, slice them off with a serrated knife. Otherwise, your layer cake will look like it’s wearing an ill-fitting hat.
Overmixing the cake batter. Mix until just combined after adding the flour. This isn’t a stress-relief exercise – your cake will get tough if you beat it to death.
Alternatives & Substitutions
Not a coffee fan? Hot water works fine, but you’ll miss out on that depth of chocolate flavor. FYI, the cake doesn’t taste like coffee – it just makes the chocolate more chocolatey. Mind-blowing, I know.
Dairy-free options: Use almond milk + vinegar instead of buttermilk, and plant-based butter for the frosting. The cake will still be delicious, just slightly different in texture.
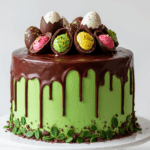
Color alternatives: Not feeling blue? Go wild with any color you want for those roses. Pink, purple, rainbow – whatever floats your celebratory boat. Green roses look a bit alien, though. Just saying.
Time-saver: In a pinch, you could use boxed chocolate cake mix. I’ll judge you silently, but your guests probably won’t know the difference after a few birthday drinks.
FAQ (Frequently Asked Questions)
Can I make this cake ahead of time?
Absolutely! The cake layers can be made a day or two ahead and wrapped in plastic wrap. The fully decorated cake is best within 24 hours, though it’ll stay fresh for up to 3 days in the fridge. Just bring it to room temperature before serving so you’re not serving people chocolate ice blocks.
Do I really need that much sugar in the frosting?
Technically no, but also yes. You need enough powdered sugar for the buttercream to hold its shape. If you reduce it too much, your roses will look more like sad blue puddles. However, you can reduce by about 1/2 cup without disaster striking.
My roses look more like blobs. What went wrong?
Probably your buttercream consistency. If it’s too soft, chill it for 10-15 minutes. If it’s too stiff, add a tiny bit more cream. Also, practice a few roses on wax paper before attacking the cake. Nobody needs that kind of pressure straight out the gate.
Can I freeze this cake?
The unfrosted cake layers freeze beautifully for up to 2 months. The fully decorated cake? Not so much. Freezing and thawing can make the colors bleed and the texture weird. Do you really want to serve a cake that looks like it had an identity crisis?
Why did my cake sink in the middle?
You either opened the oven too early (patience, grasshopper), your leavening agents were old, or you overbeat the batter. Also, make sure your oven is actually at the temperature it claims to be – oven thermometers don’t lie, but oven displays often do.
Final Thoughts
There you have it – a chocolate cake that tastes like a dream and looks like you paid someone professional to make it. The combination of rich chocolate with those eye-catching blue roses is guaranteed to make the birthday person feel special (or at least well-fed).
Remember, baking is supposed to be fun! If your roses look more abstract than botanical, just call it “artistic interpretation” and own it. The cake police aren’t going to show up at your door, I promise.
Now go forth and create your masterpiece! And if anyone asks for your secret, just wink mysteriously and change the subject. Baker’s privilege. You’ve earned it with those beautiful blue roses and that decadent chocolate cake!
