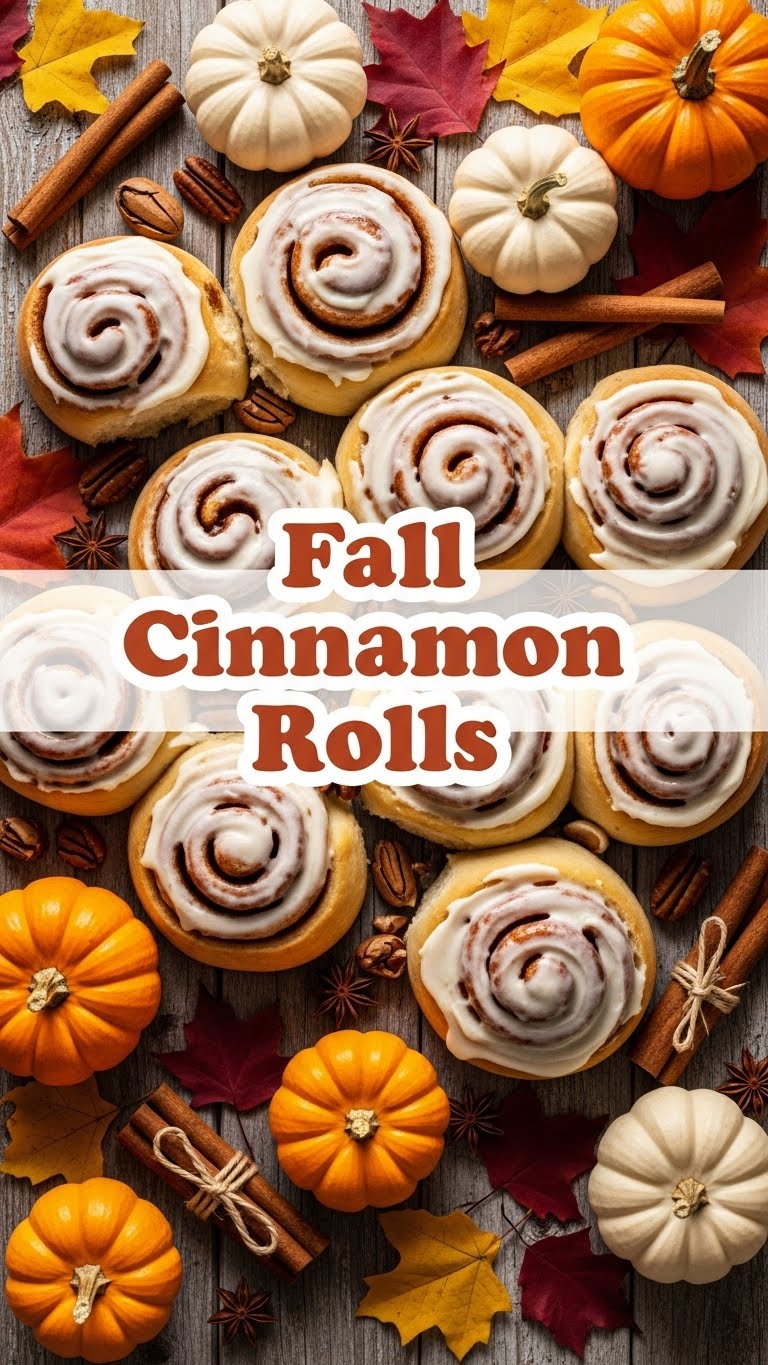
So, you’ve been eyeing those impossibly fluffy, gooey, cinnamon-swirled rolls at your favorite bakery, huh? And then you thought, “I could *totally* make those… if I had endless hours and zero fear of messing up yeast.” Well, friend, buckle up! We’re about to make magic, and by magic, I mean ridiculously good homemade cinnamon rolls without the usual kitchen drama. Promise!
Why This Recipe is Awesome
This isn’t one of those recipes where you need a PhD in baking or a stand mixer that costs more than your first car. Nope! This baby is **foolproof**. Seriously, if I can make these without summoning a kitchen demon, you can too. We’re talking fluffy, gooey, cinnamon-sugar perfection that’ll make your house smell like a dream and your taste buds sing. Plus, the bragging rights? Priceless. It’s easy enough for a beginner but delicious enough to impress even the snobbiest pastry connoisseur. You’re welcome.
Ingredients You’ll Need
Get ready to gather your deliciousness!
For the Dough:
- 1 cup Warm Milk: Not hot, not cold. Just cozy warm, like a hug. About 105-115°F (40-46°C).
- 2 ¼ teaspoons Active Dry Yeast: That’s one standard packet. These little guys make the magic happen. Don’t skip them, unless you’re aiming for sad, dense bricks.
- ¼ cup Granulated Sugar: For a little sweetness in the dough and to feed our yeast buddies.
- ⅓ cup Unsalted Butter, melted: Because butter makes everything better. Period.
- 1 Large Egg: A binder, a friend. Helps with richness and structure.
- 3 cups All-Purpose Flour (plus more for dusting): The main event! Don’t be afraid to add a little more if your dough is super sticky.
- 1 teaspoon Salt: Just a pinch to balance all that glorious sweetness.
For the Filling:
- ½ cup Brown Sugar, packed: Deep, molasses-y goodness. Crucial for that signature sticky swirl.
- 2 tablespoons Ground Cinnamon: The star of the show! Don’t be shy.
- ⅓ cup Unsalted Butter, softened: Spreadable happiness. Make sure it’s nice and soft for easy spreading.
For the Cream Cheese Frosting:
- 4 oz Cream Cheese, softened: The tangy counterpoint to all that sweet. Make sure it’s truly soft!
- ¼ cup Unsalted Butter, softened: More butter, because we’re not quitting now.
- 1 ½ cups Powdered Sugar: The fine stuff, for silky smooth frosting.
- ½ teaspoon Vanilla Extract: A splash of pure joy.
- Pinch of Salt: Just a tiny bit to cut the sweetness and make the flavors pop. Trust me on this one.
Step-by-Step Instructions
- **Activate the Yeast:** In a large bowl, whisk together the warm milk, yeast, and 1 teaspoon of the granulated sugar. Let it sit for 5-10 minutes until it gets foamy. If it doesn’t foam, your yeast might be dead (sad face). Try again with fresh yeast!
- **Mix the Dough:** Add the remaining granulated sugar, melted butter, and egg to the yeast mixture. Whisk well. Gradually add the flour and salt, mixing with a spoon or spatula until a shaggy dough forms.
- **Knead It Out:** Turn the dough out onto a lightly floured surface. Knead for 5-8 minutes until it’s smooth and elastic. It should spring back when you gently poke it. **Don’t over-flour!** A slightly sticky dough is better than a dry, tough one.
- **First Rise:** Lightly grease a large bowl with oil. Place the dough in the bowl, turning it once to coat. Cover the bowl with plastic wrap or a clean kitchen towel. Let it rise in a warm place for 1-1.5 hours, or until it has doubled in size. This is where patience pays off!
- **Make the Filling:** While the dough is rising, mix the brown sugar and cinnamon in a small bowl. Set aside.
- **Roll It Out:** Once risen, gently punch down the dough to release the air. Turn it out onto a lightly floured surface. Roll it into a large rectangle, roughly 12×18 inches (30×45 cm).
- **Spread the Goodness:** Evenly spread the softened butter over the entire dough rectangle, leaving a small border on one of the long edges. Then, sprinkle the brown sugar-cinnamon mixture all over the butter.
- **Roll ‘Em Up:** Starting from one of the long edges, tightly roll the dough into a log. **Keep it snug!** A tight roll means beautiful swirls.
- **Slice & Dice:** Use a sharp knife or, even better, unflavored dental floss, to cut the log into 12 equal rolls. For the dental floss trick, slide it under the log, cross the ends over the top, and pull to slice cleanly.
- **Second Rise:** Arrange the rolls in a lightly greased 9×13 inch (23×33 cm) baking pan. Leave a little space between them. Cover the pan loosely with plastic wrap or a kitchen towel. Let them rise again for another 30-45 minutes, or until noticeably puffy.
- **Bake Time!** Preheat your oven to 375°F (190°C) about 15 minutes before the second rise is done. Bake the rolls for 20-25 minutes, or until golden brown on top and cooked through.
- **Frosting Time:** While the rolls are cooling slightly (they should still be warm, not piping hot), whip up your frosting. In a medium bowl, beat together the softened cream cheese and softened butter until smooth and creamy. Gradually add the powdered sugar, vanilla extract, and pinch of salt, beating until light and fluffy.
- **Slather & Serve:** Generously spread the frosting over the warm (but not scalding hot!) cinnamon rolls. The warmth will slightly melt the frosting, making it extra gooey and delicious. Devour immediately!
Common Mistakes to Avoid
- **Killing the Yeast:** Water too hot (above 120°F/49°C)? Your yeast is dead. Too cold? Your yeast is sleepy and won’t activate. **Aim for lukewarm**, like a baby’s bath.
- **Over-flouring:** Adding too much flour results in dry, tough rolls that lack that signature fluff. Add flour *gradually* and stop when the dough is still slightly tacky but manageable.
- **Not Kneading Enough:** Your dough needs a good workout to develop gluten, which gives cinnamon rolls their structure and chewiness. Under-kneaded dough will be dense.
- **Not Letting it Rise Enough:** Patience, young padawan! Rushing the rise times means less fluffy, less airy rolls. Give them their full time.
- **Rolling Too Loosely:** If your log isn’t rolled tightly, your beautiful swirls will unravel or be gappy. Nobody wants that.
- **Overbaking:** Dry rolls are a tragedy. Keep an eye on them; they should be golden brown, not dark brown and crispy.
Alternatives & Substitutions
Feeling a little rebellious, or just missing an ingredient? I got you!
- **Dairy-Free?** You can totally make these! Use a plant-based milk (almond or oat work great) and a good quality vegan butter for both the dough and filling/frosting.
- **No Brown Sugar?** While brown sugar gives that deep, caramel-y flavor, you can use granulated sugar for the filling in a pinch. It’ll still be sweet, just a slightly different vibe.
- **No Cream Cheese for Frosting?** A simple powdered sugar glaze (powdered sugar, a splash of milk, and vanilla) works wonders too! Or, if you’re feeling fancy, make a simple vanilla buttercream.
- **Feeling Extra?** Add some chopped nuts (pecans or walnuts are divine) to the filling. A little orange zest mixed into the filling or frosting can also add a lovely bright note. Go wild, my friend!
FAQ (Frequently Asked Questions)
Got questions? I’ve got answers (mostly humorous ones).
- “Can I make these ahead of time?” Oh yes, you brilliant planner! Assemble the rolls in the pan, cover tightly, and refrigerate overnight. In the morning, pull them out an hour before baking to let them warm up and proof a bit more. Best decision ever for a lazy weekend morning!
- “My dough isn’t rising, what gives?” Probably dead yeast, or your kitchen is too cold. Yeast loves warmth! Ensure your milk is the right temp and try to find a cozy spot for rising (like a slightly warm oven, turned OFF!).
- “How do I store leftovers?” *Leftovers?* What are those? Kidding! Cover them tightly at room temperature for a day or two, or pop them in the fridge for up to 5 days. Reheat gently in the microwave or oven for that fresh-baked feel.
- “Can I use margarine instead of butter?” Well, technically yes, but why hurt your soul like that? Butter is king for flavor, richness, and texture. **IMO**, stick with butter for the ultimate cinnamon roll experience.
- “Is kneading by hand really necessary?” You *can* use a stand mixer with a dough hook for about 5-7 minutes. But hand-kneading is meditative, satisfying, and gets you those bicep gains. Your call!
- “Can I freeze them?” Absolutely! You can freeze baked and frosted rolls (wrap individually) or even freeze the unbaked rolls in the pan (cover tightly) for later. Thaw overnight in the fridge before baking/reheating.
- “What if I don’t have enough frosting?” Blasphemy! Just kidding. If you run out, make more. Or embrace the lightly frosted look. Just don’t skimp on the cinnamon filling!
Final Thoughts
Look at you, a cinnamon roll guru! You’ve conquered yeast, embraced butter, and emerged victorious with a tray of golden, gooey goodness. You’ve earned every single glorious bite of those warm, sweet, sticky spirals. Now go impress someone – or, let’s be real, devour them all yourself. Keep baking, you magnificent human!


