So you’re craving something tasty but too lazy to spend forever in the kitchen, huh? Same. And you’ve got those tubes of cinnamon rolls staring at you from the fridge, just begging for a glow-up? My friend, you’ve come to the right place. We’re about to turn those basic beauties into something that’ll make people wonder if you secretly went to pastry school.
Why This Recipe is Awesome
Look, we all know those canned cinnamon rolls are… fine. They get the job done. But ‘fine’ isn’t what we aim for, is it? We want ‘OMG, give me another one!’ This recipe is awesome because it takes minimal effort for maximum deliciousness. It’s basically a magic trick for your taste buds. Plus, it’s pretty much **idiot-proof**. Even I, who once burned water (true story), can nail this. It’s perfect for impressing brunch guests, bribing your kids, or just treating yourself to something utterly decadent without the hassle of making dough from scratch. Win-win-win, if you ask me!
Ingredients You’ll Need
- **One tube of store-bought cinnamon rolls** (the ones with the icing already included, obvi). Don’t get fancy, just grab your favorite.
- **1/4 cup unsalted butter**, melted. Because everything’s better with butter. Don’t even try to argue.
- **1/4 cup packed light brown sugar**. The cozy, caramel-y goodness.
- **1 teaspoon ground cinnamon**. For that extra *oomph* of spice.
- **1/2 teaspoon vanilla extract**. It makes everything smell and taste amazing. Trust me on this one.
- **A splash of milk or cream** (for the icing). Just a tablespoon or two, to loosen things up.
Step-by-Step Instructions
- **Preheat your oven** to the temperature specified on your cinnamon roll package. Don’t skip this. Rookie mistake, my friend.
- **Prep your baking dish.** Lightly grease a small baking dish (an 8×8 inch square or similar size works great).
- **Unroll those bad boys.** Pop open your tube of cinnamon rolls and separate them. Lay them flat in your prepared baking dish.
- **Whip up the magic topping.** In a small bowl, combine the melted butter, brown sugar, and cinnamon. Stir until it’s a glorious, sticky paste.
- **Drizzle the goodness.** Spoon this irresistible brown sugar mixture evenly over the tops of your cinnamon rolls. Get into all the nooks and crannies!
- **Bake ’em ’til golden.** Pop the dish into your preheated oven and bake for the time recommended on the package, maybe adding 2-5 extra minutes until they’re beautifully golden brown and bubbly. Keep an eye on them so they don’t burn.
- **Perfect the icing.** While they’re baking, grab the included icing packet. Snip off the corner and squeeze it into a small bowl. Add a splash (about 1-2 tablespoons) of milk or cream and whisk until smooth and a little runny. This makes it easier to drizzle and gives it a homemade vibe.
- **Frost and devour.** Once the rolls are out of the oven and still warm, generously drizzle your revamped icing over them. Serve immediately and watch them disappear.
Common Mistakes to Avoid
- **Not preheating your oven.** Seriously, just do it. Cold ovens lead to sad, unevenly baked rolls.
- **Overbaking.** Keep an eye on them! They go from perfectly golden to charred quicker than you can say ‘cinnamon’. A little extra bake time is fine for that crispy top, but don’t push it.
- **Skipping the milk in the icing.** That thick, clumpy icing from the package is a travesty. A little milk makes it smooth and dreamy.
- **Being shy with the brown sugar topping.** This is where the magic happens. Don’t skimp!
- **Trying to save them for later.** These are best eaten warm, fresh from the oven. If you *must* save them (why, though?), reheat gently in the microwave or oven.
Alternatives & Substitutions
Feeling adventurous? Here are a few ways to tweak this recipe:
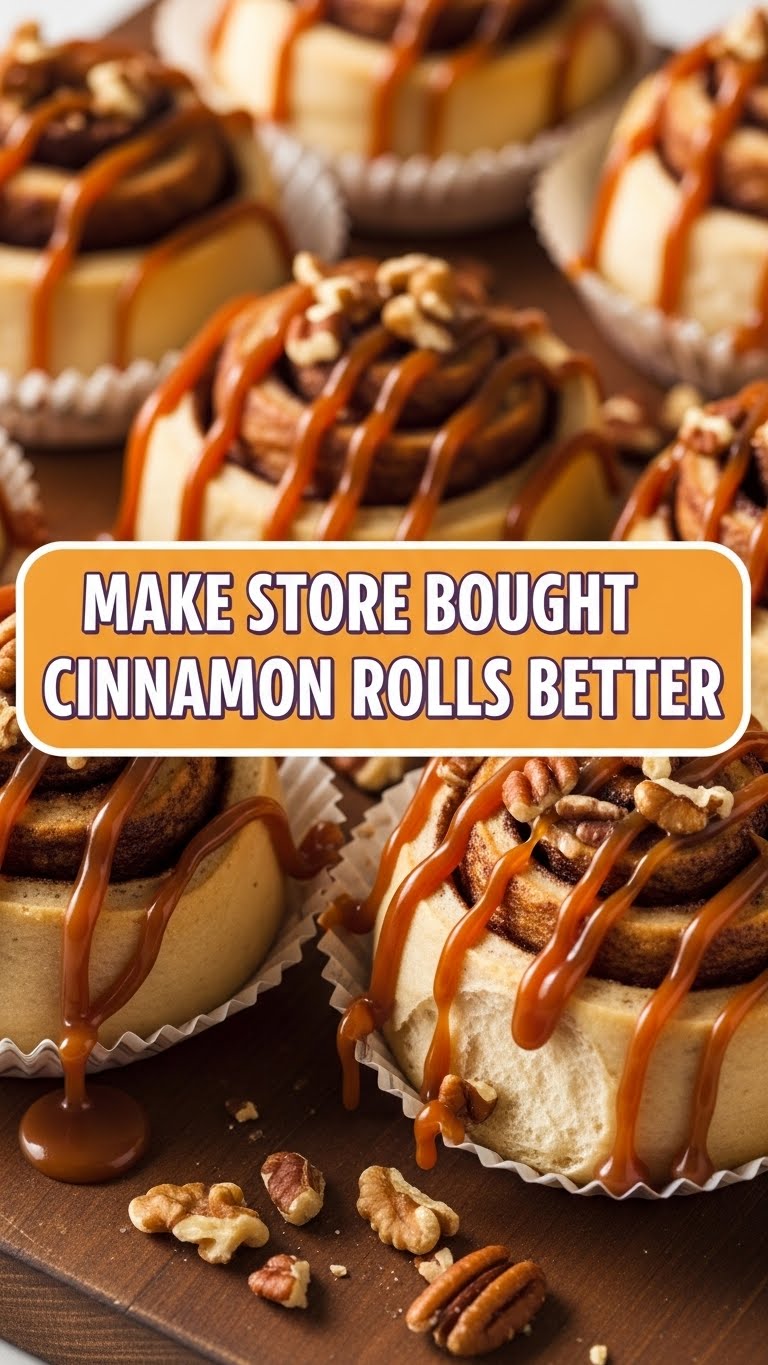
- **Nutty goodness:** Sprinkle some chopped pecans or walnuts over the brown sugar mixture before baking for a delightful crunch. Totally worth the extra effort, IMO.
- **Cream cheese icing upgrade:** Ditch the included icing entirely and whip up your own simple cream cheese frosting. A block of cream cheese, a little butter, powdered sugar, and vanilla – boom! Game changer.
- **Fruit explosion:** Add a thin layer of finely diced apples or a handful of berries (blueberries, raspberries) over the rolls before the brown sugar mixture. Baked apples in there? *Chef’s kiss!*
- **Spiced up:** A pinch of nutmeg or cardamom in your brown sugar mixture can add another layer of warm spice.
- **Espresso kick:** Add a tiny dash of instant espresso powder to your brown sugar mixture or even to the icing for a subtle coffee note. Mmm, sophisticated.
FAQ (Frequently Asked Questions)
- **Can I use unsalted butter?** Well, technically yes, but why hurt your soul like that? Salted butter adds a nice balance. If you only have unsalted, a tiny pinch of salt with your brown sugar mixture wouldn’t hurt.
- **What if I don’t have brown sugar?** Granulated sugar will work in a pinch, but the brown sugar really gives it that deep, caramel-y flavor. It’s worth a quick trip to the store, FYI.
- **My rolls look a little dry after baking. What gives?** You probably overbaked them a smidge. Or your oven runs hot. Next time, try checking them a few minutes earlier. The extra topping and improved icing should still rescue them!
- **Can I make these ahead of time?** You *can* prep them the night before and pop them in the fridge, then bake in the morning. Just be aware the baking time might be a bit longer from cold. But honestly, they’re so quick, just make ’em fresh!
- **How long do leftovers last?** If there ARE leftovers (a big IF), store them in an airtight container at room temp for a day or two, or in the fridge for up to 4 days. Reheat gently.
- **What kind of baking dish should I use?** An 8×8 inch square or a 9-inch round cake pan is usually perfect for a standard tube of 8-9 rolls. Just make sure they fit snugly but aren’t squished.
Final Thoughts
And there you have it, my friend! You’ve just elevated those humble canned cinnamon rolls into a breakfast (or dessert, no judgment here!) masterpiece. See? I told you it was easy. Now go impress someone—or yourself—with your new culinary skills. You’ve earned it! Grab a cup of coffee, kick back, and enjoy the fruits (or rather, the rolls) of your minimal labor. You’re basically a gourmet chef now. Don’t forget to tell me how it goes!


