So you’re craving something tasty but too lazy to spend forever in the kitchen, huh? Same. And you’ve got that jar of sourdough discard staring at you, silently judging every time you open the fridge? Oh, honey, I’ve been there. But what if I told you we could transform that neglected bubbly goo into the most glorious, pillowy, cinnamon-swirled rolls you’ve ever had? And, plot twist, it’s actually kinda easy. Let’s make some magic, shall we?
Why This Recipe is Awesome
Okay, first things first: This isn’t your grandma’s hour-long kneading, multiple-rise-session, “I need a degree in baking” kind of recipe. This is the “I want cinnamon rolls and I want them NOW (or at least, soonish)” recipe. It’s awesome because:
- It uses up that sourdough discard you feel guilty about. No waste, big win!
- The discard adds a subtle tang that elevates the flavor without screaming “SOURDOUGH!” It’s like a secret flavor weapon.
- It’s practically idiot-proof. Seriously, even I didn’t mess it up, and my kitchen has seen some things.
- The texture is next-level fluffy and tender. You’ll wonder why you ever bought those dry, sad rolls from a can.
- It makes your house smell like a warm, sugary hug. Best air freshener ever, IMO.
Ingredients You’ll Need
Gather your troops! Most of these are probably lounging in your pantry right now.
- For the Dough:
- 1 cup Sourdough Discard: Straight from the fridge is fine! No need for it to be active or fed.
- 1/2 cup Milk: Any kind will do. Whole milk makes them extra rich, because why not?
- 1/4 cup Granulated Sugar: Just enough sweetness to balance the tang.
- 1/4 cup Unsalted Butter: Melted, then cooled a bit. Don’t scramble your egg!
- 1 large Egg: Room temperature is always best, FYI.
- 1 tsp Salt: Crucial for flavor, don’t skip it!
- 2 1/2 cups All-Purpose Flour: Give or take, depending on your discard’s hydration.
- 2 1/4 tsp Instant Yeast (1 standard packet): Optional, but highly recommended for a quicker, fluffier rise with discard. If you’re feeling brave and patient, you can omit it, but expect a longer proof.
- For the Filling:
- 1/2 cup Unsalted Butter: Softened, so it’s spreadable. Don’t melt it!
- 1/2 cup Brown Sugar: Light or dark, your call.
- 2 tbsp Ground Cinnamon: Or more, if you’re a cinnamon fiend like me.
- For the Cream Cheese Frosting (the best part!):
- 4 oz Cream Cheese: Softened. The full-fat stuff, please.
- 1/4 cup Unsalted Butter: Also softened.
- 1 1/2 cups Powdered Sugar: Sifted, if you’re fancy and hate lumps.
- 1 tsp Vanilla Extract: The good stuff.
- 1-2 tbsp Milk or Cream: To thin it out to your desired consistency.
Step-by-Step Instructions
Alright, apron on, good tunes playing, let’s get sticky!
- Whisk the Wet Stuff: In a large bowl, combine your sourdough discard, warm milk, melted butter, sugar, egg, and salt. Give it a good whisk until everything is happy and combined. If using yeast, sprinkle it in now and let it hang out for 5 minutes until foamy.
- Add the Flour: Gradually add the flour, mixing with a wooden spoon or your hands (my preferred method for maximum doughy connection!) until a shaggy dough forms.
- Knead It Out: Turn the dough out onto a lightly floured surface. Knead for about 5-7 minutes. You want it smooth and elastic. It might be a little sticky – that’s okay! Resist the urge to add too much flour.
- First Rise: Place the dough in a lightly oiled bowl, turning once to coat. Cover with plastic wrap or a damp towel and let it rise in a warm place for 1-2 hours, or until roughly doubled in size. If you skipped the yeast, this could take 4-8 hours, or even overnight in the fridge. Patience is a virtue!
- Roll It Out: Once risen, punch down the dough gently. Flour your counter lightly and roll the dough into a large rectangle, about 18×12 inches.
- Spread the Love: In a small bowl, mix your softened butter, brown sugar, and cinnamon for the filling. Spread this glorious mixture evenly over your dough rectangle, leaving about a 1/2-inch border on one of the long sides.
- Roll and Slice: Starting from the long side opposite the clean border, tightly roll up the dough. Once rolled, use a sharp knife or even unflavored dental floss (seriously, try it!) to slice the log into 12 equal rolls.
- Second Rise: Arrange the rolls in a lightly greased 9×13-inch baking dish. Cover again and let them rise for another 30-60 minutes, or until puffy and close to doubling.
- Bake ‘Em Up: While they’re on their second rise, preheat your oven to 375°F (190°C). Once ready, bake for 20-25 minutes, or until they’re golden brown and smell absolutely irresistible.
- Whip the Frosting: While the rolls are baking or cooling slightly, beat together the cream cheese and butter until smooth. Gradually add the powdered sugar, then the vanilla. Add milk or cream, one tablespoon at a time, until you reach your desired drizzly or spreadable consistency.
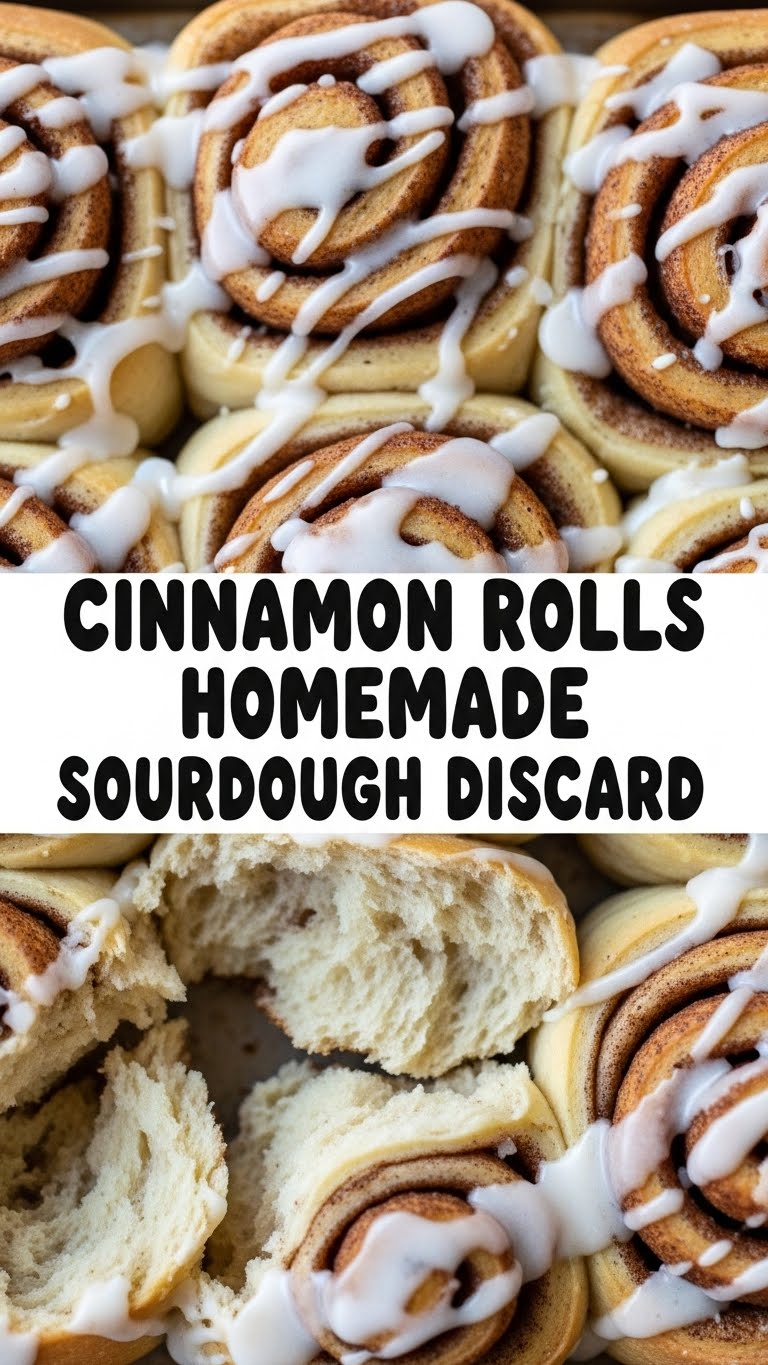
- Frost and Devour: Let the rolls cool for just a few minutes, then slather them generously with that heavenly cream cheese frosting. Serve warm and watch them disappear!
Common Mistakes to Avoid
We all make mistakes, but let’s try to minimize the carnage, shall we?
- Ignoring Your Yeast: If you’re using instant yeast, don’t just dump it in cold milk. A little warmth wakes it up. If it doesn’t get foamy (if you’re proofing it separately), your yeast might be dead. Get new yeast!
- Over-Flouring the Dough: “A little sticky” is usually a good thing for soft rolls. Adding too much flour makes them tough and dry. Fight the urge to make it totally non-sticky.
- Not Letting Them Rise Enough: This is a sourdough discard recipe, so the rises won’t be as aggressive as a 100% yeasted dough. But still, give them time! Under-risen rolls are dense and sad.
- Overbaking: Keep an eye on them! They should be golden, not mahogany. Overbaked rolls are dry rolls. Nobody wants that.
- Frosting Cold Rolls: This isn’t a crime, but it’s a missed opportunity! Frost them while they’re still warm (but not piping hot) so the frosting melts a little and gets into all those nooks and crannies. Pure bliss.
Alternatives & Substitutions
Feeling adventurous? Or just out of something crucial? Here are a few ideas:
- Dairy-Free? Swap the milk for any plant-based milk (almond, oat, soy). Use vegan butter sticks (the kind that bakes well) for both the dough and the filling. For the frosting, try a vegan cream cheese and vegan butter blend.
- Flour Power: You can experiment with up to 50% whole wheat flour for a nuttier flavor, but they might be a bit denser. Bread flour will give you a chewier roll.
- Filling Fun: Add some chopped pecans or walnuts to the cinnamon sugar mix for extra crunch. A little orange zest in the filling or frosting can really brighten things up!
- Simpler Glaze: If cream cheese isn’t your jam (or you’re out), a simple powdered sugar glaze (powdered sugar + a splash of milk/water/lemon juice) is still delicious.
FAQ (Frequently Asked Questions)
Got questions? I’ve got answers (mostly, don’t test me on astrophysics).
- Can I use margarine instead of butter? Well, technically yes, but why hurt your soul like that? Butter just tastes better, period. For the frosting, it’s a firm no from me.
- My discard isn’t super active, will this still work? Yes! That’s the beauty of using *discard*. The yeast (if you added it) will do most of the heavy lifting for the rise. The discard is mostly for flavor and tenderness here.
- Can I make these ahead of time? Absolutely! After placing the sliced rolls in the baking dish for their second rise (step 8), cover them tightly and refrigerate overnight (up to 12-18 hours). Pull them out about an hour before baking to come to room temp, then bake as usual.
- How long do they last? On your counter, covered, maybe 2-3 days before they start to dry out. In your belly? About 2 minutes.
- Can I freeze these? Yep! You can freeze unbaked rolls (arrange in a foil pan, cover tightly, bake from frozen or thaw first). Or, freeze baked and frosted rolls individually wrapped. Thaw and gently warm them for a quick treat.
- What if my dough is too sticky to handle? A little extra flour on your hands and work surface can help, but remember, **resist over-flouring the dough itself**. A bench scraper is your best friend here!
Final Thoughts
So there you have it, friend! You’ve just conquered the world of homemade sourdough discard cinnamon rolls. Seriously, take a bow. Your kitchen smells amazing, your tummy is about to be very happy, and that sourdough discard jar is feeling a whole lot lighter. Now go impress someone—or yourself—with your new culinary skills. You’ve earned it! Don’t forget to snap a pic before they vanish!


