So you’re craving something warm, gooey, and utterly delicious but the thought of spending hours kneading dough makes your soul shrivel? Girl, I feel you. We’re talking about those dreamy, cinnamon-swirled beauties, but with a hack that’ll make you feel like a culinary genius without actually breaking a sweat. Yep, we’re talking **Cinnamon Rolls, Bread Maker Style!**
Why This Recipe is Awesome
Okay, let’s be real. This recipe is awesome because it basically does all the heavy lifting for you. That tricky, sticky, “did I knead it enough?” dough part? Handled by a machine! It’s practically idiot-proof. Seriously, even I, someone who once tried to microwave an egg in its shell (don’t ask), managed to pull this off beautifully. You get all the homemade comfort without the carpal tunnel syndrome from kneading. Plus, the smell alone will make your neighbors think you’ve suddenly become Martha Stewart, but shhh, it’s our little secret.
Ingredients You’ll Need
Get ready to gather your culinary arsenal. Nothing fancy, just good old-fashioned deliciousness:
- **For the Dough (Bread Maker Magic):**
- **¾ cup Warm Milk:** Not scalding, not cold. Just cozy warm. Think bathwater for your yeast.
- **2 ½ tbsp Granulated Sugar:** Sweetness for the dough, and a little love for the yeast.
- **2 ¼ tsp Active Dry Yeast (or 1 packet):** The little magic makers that make everything fluffy.
- **¼ cup Melted Unsalted Butter:** Because everything’s better with butter. Duh.
- **1 Large Egg:** Whisked. Gives the dough structure and richness.
- **3 cups All-Purpose Flour:** The backbone of our rolls.
- **½ tsp Salt:** Don’t skip it! It balances the sweetness.
- **For the Cinnamon Filling (The Gooey Goodness):**
- **½ cup Softened Unsalted Butter:** Again with the butter! It’s crucial for that melt-in-your-mouth experience.
- **¾ cup Packed Light Brown Sugar:** That deep, molasses-y sweetness.
- **1 ½ tbsp Ground Cinnamon:** The star of the show!
- **For the Cream Cheese Icing (The Crown Jewel):**
- **4 oz Cream Cheese:** Softened. Take it out of the fridge ahead of time, no one likes lumpy icing.
- **¼ cup Softened Unsalted Butter:** Surprise! More butter!
- **1 ½ cups Powdered Sugar (Confectioners’ Sugar):** Sifted, if you’re feeling fancy, to avoid lumps.
- **1 tsp Vanilla Extract:** The soul of dessert.
- **1-2 tbsp Milk (or heavy cream):** To reach your desired consistency.
Step-by-Step Instructions
Alright, let’s get this party started. Seriously, it’s easier than deciding what to watch on Netflix.
- **Bread Maker Prep:** First things first, get your bread machine pan ready. Pour in the warm milk, then sprinkle in the sugar, and finally, the yeast. Let it hang out for about 5-10 minutes until it looks a bit foamy – that means your yeast is alive and kicking!
- **Add the Wet Stuff:** Next, add the melted butter and the whisked egg to the pan. Don’t worry if it looks a little weird; it’ll all come together.
- **Layer the Dry Stuff:** Now, gently add the flour, making a little mound over the wet ingredients. On top of the flour, sprinkle the salt. Try to keep the salt away from the yeast at first, they’re not besties yet.
- **Dough Cycle Time!** Pop the pan into your bread maker, close the lid, and select the **”Dough”** cycle. Hit start and let your machine do its glorious thing. Go put your feet up, you’ve earned it! This usually takes about 1.5 to 2 hours.
- **Filling Frenzy:** While the dough is doing its magic, prepare your filling. In a small bowl, mix together the softened butter, brown sugar, and cinnamon until it forms a lovely, spreadable paste. Set aside.
- **Roll It Out:** Once the dough cycle is complete, carefully remove the dough from the bread machine pan. It should be wonderfully soft and elastic. Lightly flour a clean surface (your counter is fine!) and your rolling pin. Roll the dough into a large rectangle, about 18×12 inches. Aim for an even thickness.
- **Spread the Love:** Evenly spread your cinnamon-sugar filling all over the dough rectangle, leaving a small border (about half an inch) on one of the long edges. This helps seal the roll later.
- **Roll ‘Em Up:** Starting from one of the long edges (the one *without* the border), carefully and tightly roll the dough into a log. The tighter you roll, the prettier your swirls will be! Once rolled, pinch the seam closed along the bottom.
- **Slice and Dice:** Using a sharp knife or, even better, unflavored dental floss (seriously, it cuts so cleanly!), slice the log into 12 equal rolls, about 1 ½ inches thick each.
- **Pan It Up:** Lightly grease a 9×13 inch baking pan. Arrange your rolls in the pan, leaving a little space between them – they’re going to grow!
- **Second Rise (The Chill Part):** Cover the pan loosely with plastic wrap or a clean kitchen towel. Let the rolls rise in a warm spot for another 30-45 minutes, or until they look puffy and nearly doubled in size. This is crucial for fluffy rolls!
- **Bake Away!** Preheat your oven to 375°F (190°C). Once preheated and the rolls have risen, bake them for 20-25 minutes, or until they’re golden brown and baked through.
- **Icing on the Cake (Er, Roll):** While the rolls are baking, whip up your icing! In a medium bowl, beat the softened cream cheese and butter together until smooth. Gradually add the powdered sugar, mixing until well combined. Stir in the vanilla extract. Add milk one tablespoon at a time until you reach your desired drizzly (or spreadable) consistency.
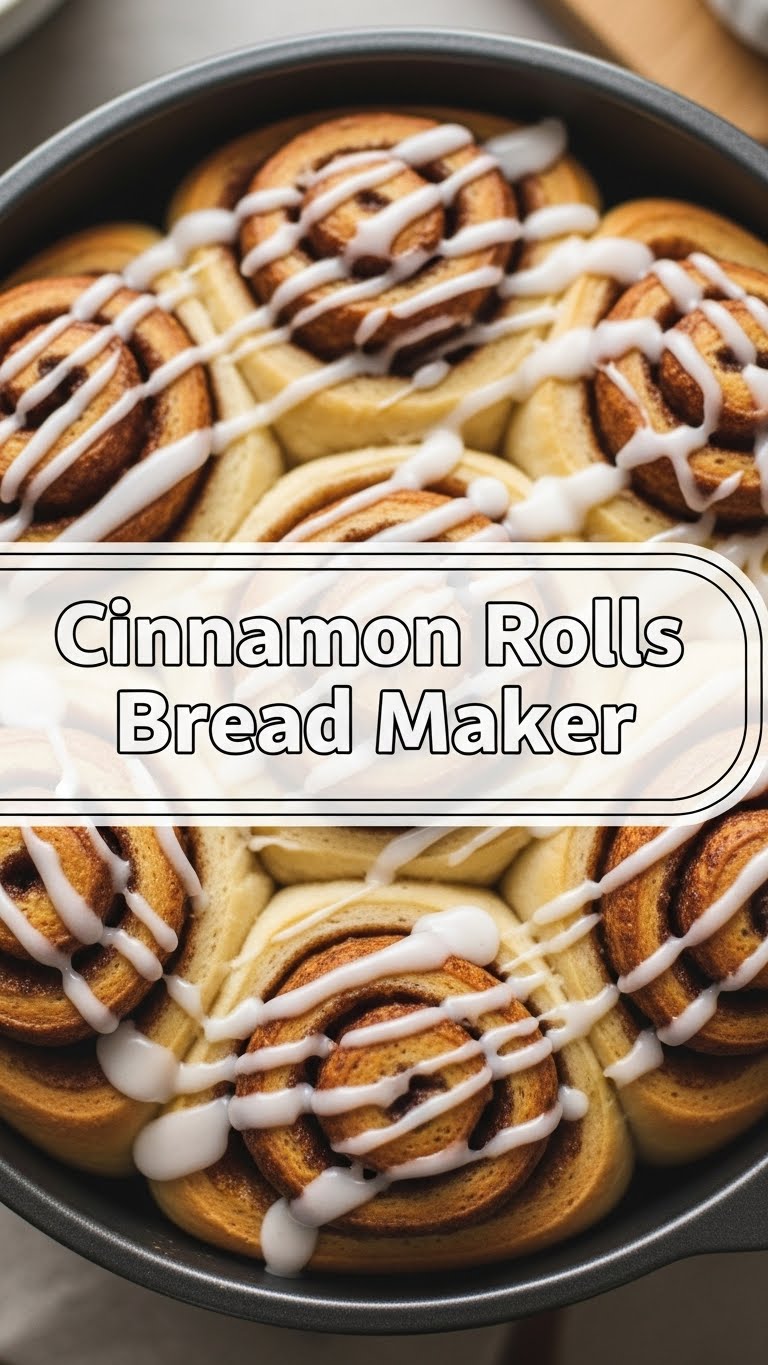
- **Frost and Devour:** As soon as the rolls come out of the oven, slather them with that glorious cream cheese icing. Don’t wait for them to cool down completely; warm rolls absorb the icing better. Now, go forth and conquer your craving!
Common Mistakes to Avoid
Look, we all make mistakes. But let’s try to avoid these rookie errors, okay?
- **Water Temperature Woes:** Using water that’s too hot will kill your yeast (RIP), and too cold won’t activate it. Remember, cozy bathwater for the yeast!
- **Not Greasing the Pan:** Thinking you can skip this step? Nope! Your beautiful rolls will stick like glue. **Always grease your baking pan.**
- **Over-flouring Your Surface:** While you need some flour to prevent sticking, too much will make your dough tough. Use just enough to keep it from grabbing.
- **Rolling Too Loosely:** A loose roll means sad, unraveling swirls. You want those layers tight and defined, so **roll that dough tightly!**
- **Impatience with the Second Rise:** Skipping or shortening the second rise results in dense, hockey-puck-like rolls. Let them puff up; it’s worth the wait, promise!
- **Overbaking:** Burnt bottoms are a no-go. Keep an eye on them towards the end. Golden brown is the goal, not charcoal.
Alternatives & Substitutions
Feeling a little adventurous or missing an ingredient? Here are some tweaks:
- **Milk:** Don’t have whole milk? Skim milk works, but whole or 2% gives a richer dough. You could even try a non-dairy milk like almond or oat, though the texture might be slightly different.
- **Butter:** For the dough and filling, use unsalted so you can control the salt content. If you only have salted, just reduce the added salt in the dough by about ¼ tsp. Margarine? Well, technically yes, but why hurt your soul like that? Butter is king, IMO.
- **Yeast:** Instant yeast can be used directly with the dry ingredients without proofing, but I still like to give it a little head start with the warm milk and sugar just to be sure it’s active.
- **Icing Variations:** Craving something different? Add a little lemon zest to the cream cheese icing for a tangy kick. Or, skip the cream cheese entirely and make a simple powdered sugar glaze with milk and vanilla.
- **Nutty Crunch:** For an extra layer of texture, sprinkle some finely chopped pecans or walnuts over the cinnamon filling before rolling. Yum!
FAQ (Frequently Asked Questions)
- **”My bread maker dough cycle takes FOREVER, can I rush it?”**
Nah, don’t mess with perfection! The “Dough” cycle is designed to properly knead and proof the dough. Rushing it will just result in sad, dense rolls. Let the machine do its thing; patience is a virtue, especially when cinnamon rolls are involved. - **”Can I make these ahead of time?”**
Absolutely! After you’ve placed the cut rolls in the baking pan (step 10), cover them tightly with plastic wrap and refrigerate overnight (up to 12-18 hours). In the morning, pull them out, let them come to room temperature and rise for about 1-2 hours, then bake as usual. **Best. Morning. Ever.** - **”My rolls didn’t rise, what went wrong?”**
Bummer! Most likely, your yeast wasn’t active. This usually happens if your milk was too hot (killing the yeast) or too cold (not activating it), or if your yeast was old/expired. Always check the expiration date on your yeast! - **”What’s the best way to store leftovers?”**
Leftover cinnamon rolls (if such a magical thing exists) can be stored in an airtight container at room temperature for a day or two, or in the fridge for up to 4-5 days. Reheat gently in the microwave for a few seconds to bring back that gooey goodness. - **”Can I freeze the baked rolls?”**
You bet! Once baked and cooled (unfrosted is best for freezing, but frosted works too), wrap them individually in plastic wrap, then place in a freezer-safe bag or container for up to a month. Thaw at room temp, then warm gently and frost if you haven’t already.
Final Thoughts
So there you have it! The secret to ridiculously easy, unbelievably delicious homemade cinnamon rolls, all thanks to your trusty bread maker. No more excuses for not having fresh-baked goodness in your life. This recipe is a game-changer for lazy bakers (like us!). Now go impress someone—or yourself—with your new culinary skills. You’ve earned it!


