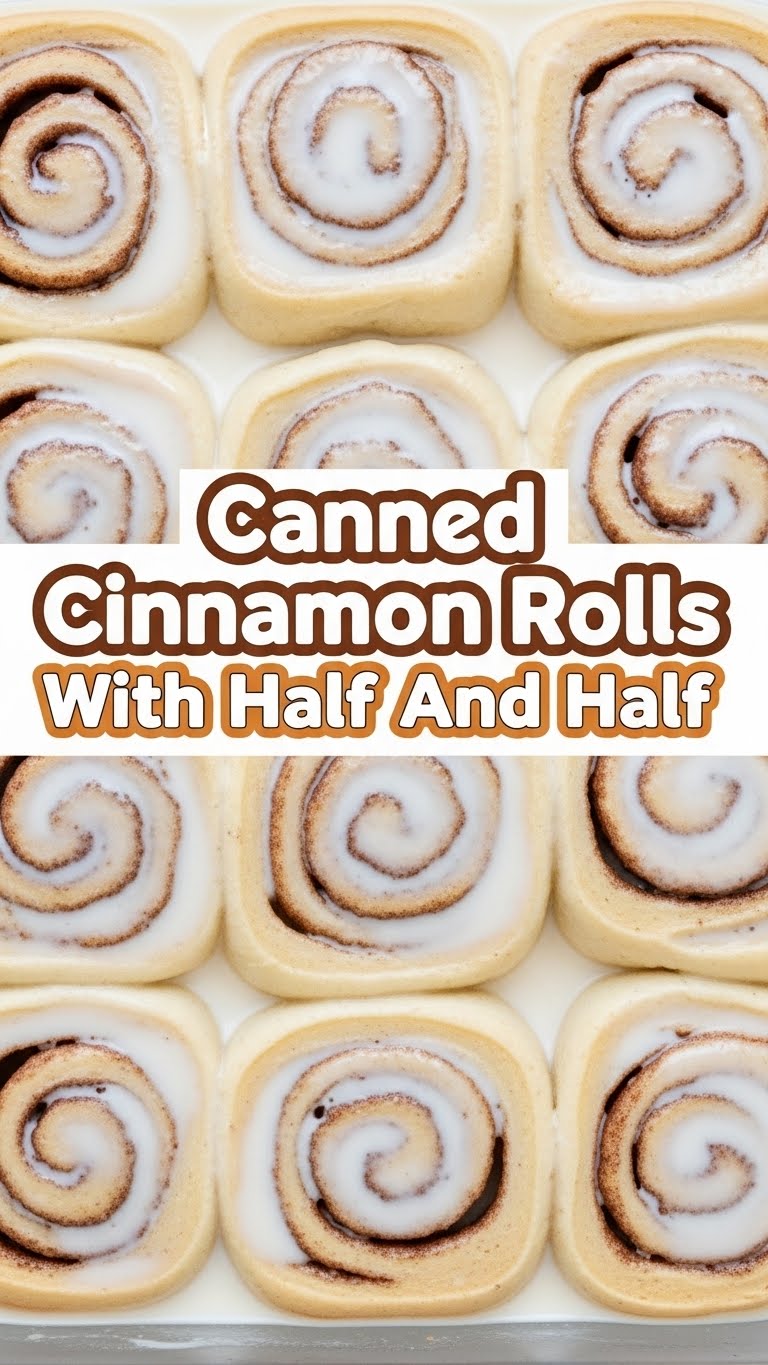
So you’re craving something tasty but too lazy to spend forever in the kitchen, huh? Same. We’ve all been there: staring into the abyss of your fridge, wondering if a granola bar counts as dinner, then remembering that glorious cylindrical tube of pure potential chilling in the dairy aisle. Yes, I’m talking about canned cinnamon rolls! But hold up, buttercup, we’re not just baking them as-is. Oh no, we’re about to give those humble rolls a glow-up with a little half & half magic that’ll make them taste like they came from a fancy bakery, not a can. Get ready for ooey-gooey perfection without the “I spent all day baking” lie.
Why This Recipe is Awesome
Because it’s practically idiot-proof, even I didn’t mess it up! Seriously, this isn’t some complex sourdough starter situation. This is pure, unadulterated comfort food that requires minimal effort but delivers maximum “OMG, you made these?!” reactions. It’s perfect for lazy weekend mornings, impromptu brunch with friends (who will think you’re a culinary genius), or just a Tuesday when you need a hug in dessert form. It elevates basic canned rolls to a whole new level of richness and gooey goodness, transforming them from “meh” to “more, please!”
Ingredients You’ll Need
Gather ’round, my friend. Here’s what you’ll need for this ridiculously easy yet ridiculously delicious upgrade. Hint: you probably have most of it already.
- 1 (12.4 oz) can of Refrigerated Cinnamon Rolls: The star of our show, our main squeeze. Any brand works, but you know which one you usually grab.
- ½ cup Half & Half: This is our secret weapon, the magic potion that makes everything dreamy. Don’t skimp!
- ¼ cup Unsalted Butter: Melted, please. Because everything is better with butter, it’s a scientific fact.
- ¼ cup Packed Light Brown Sugar: For that extra caramelized sweetness. Brown sugar just hits different, doesn’t it?
- ½ teaspoon Vanilla Extract: A little splash of liquid gold to really bring out those cozy flavors.
- Pinch of Salt: Just a tiny bit, to balance all that glorious sweetness. Flavor pro-tip, right there.
- The Icing Packet (from the cinnamon rolls): Don’t toss it! We’ll use this bad boy to finish things off.
Step-by-Step Instructions
Okay, ready to become a breakfast legend? Let’s do this!
- Preheat & Prep: First things first, crank that oven to 375°F (190°C). Then, grab an 8×8 or 9×9 inch baking dish and give it a quick spray with non-stick cooking spray. We don’t want any sticky situations!
- Unroll the Goodness: Pop open that can of cinnamon rolls. Try not to jump when it makes that dramatic *POP* sound. Separate the rolls and arrange them snugly in a single layer in your prepared baking dish. Don’t worry if they’re a little squished; they’re friends in there.
- Whip Up the Magic Sauce: In a small bowl, whisk together the melted butter, half & half, brown sugar, vanilla extract, and that tiny pinch of salt until everything is combined and the sugar starts to dissolve. This is where the real transformation happens, folks.
- Pour & Soak: Gently pour this glorious mixture evenly over the cinnamon rolls in the dish. Make sure every roll gets a good soak. This is what’s going to make them ridiculously moist and gooey.
- Bake It Till It’s Golden: Slide that dish into your preheated oven. Bake for about 20-25 minutes, or until the rolls are beautifully golden brown and puffed up, and the sauce is bubbly and caramelized around the edges. Keep an eye on them—ovens vary!
- Frost Away: Once they’re out of the oven, let them cool for just a minute or two. While they’re still warm, open up that little packet of icing that came with the rolls. Drizzle or spread it generously over the top. The warmth of the rolls will help the icing melt into every nook and cranny.
- Serve & Devour: Grab a spatula and serve these beauties immediately! They’re best enjoyed warm and fresh. Prepare for sighs of pure delight.
Common Mistakes to Avoid
Listen, we’re all human. But let’s try to avoid these little mishaps to ensure maximum deliciousness, shall we?
- Skipping the Preheat: Thinking you don’t need to preheat the oven? Rookie mistake! An un-preheated oven leads to uneven baking and sad, dense rolls. Always preheat!
- Under-Soaking: Don’t be shy with that half & half mixture. If you don’t pour enough over the rolls, they won’t get that ultimate gooey texture. Every roll deserves a good bath.
- Overcrowding the Pan: While they like to be snug, don’t try to cram too many rolls into too small a pan. They need a little room to breathe and puff up.
- Burning the Edges: Keep an eye on them, especially towards the end of baking. If they start browning too quickly, you can loosely tent the dish with foil.
- Eating Them All Yourself: Okay, not a mistake, but definitely something to consider sharing! (Or not, I won’t judge.)
Alternatives & Substitutions
Feeling a little experimental? Here are some simple tweaks you can make to this already fantastic recipe. Live a little!
- Milk instead of Half & Half: If you don’t have half & half, whole milk can work, but FYI, it won’t be quite as rich or thick. Heavy cream would be even more decadent, if you’re really feeling fancy!
- Maple Syrup Swap: Out of brown sugar? You can substitute with maple syrup (about ⅓ cup for ¼ cup brown sugar) for a slightly different, but equally delicious, flavor profile.
- Spice It Up: Add a pinch of cinnamon or a tiny dash of nutmeg to your half & half mixture for an extra layer of cozy spice.
- Cream Cheese Frosting Upgrade: If you want to ditch the provided icing packet, whip up a simple homemade cream cheese frosting for an even more luxurious finish. It’s totally worth the extra minute, IMO.
- Add-ins: Feel free to sprinkle some chopped pecans or walnuts over the rolls before baking for a nutty crunch. Or even a few chocolate chips for a sweet surprise!
FAQ (Frequently Asked Questions)
Got questions? I’ve got (casual) answers!
- Can I use whole milk instead of half & half? Well, technically yes, but why hurt your soul like that? It’ll still be good, just not as *luxe* and rich. Go for the half & half if you can!
- Do I have to use brown sugar? Nah, you could use granulated sugar, but the brown sugar gives it that deeper, more caramelized flavor that’s just superior. Trust me on this one.
- Can I make these ahead of time? You can assemble them in the dish the night before, pour the mixture over, cover, and refrigerate. Just pull them out about 30 minutes before baking to let them come to room temp, then bake as usual. Freshly baked is always best, though!
- What if I don’t have vanilla extract? It’s okay, the world won’t end. They’ll still be delicious, but vanilla just adds that extra warmth and depth of flavor. It’s a nice touch if you have it.
- How do I know when they’re perfectly done? Look for golden brown tops, puffed-up centers, and a bubbly, slightly thickened sauce around the edges. When in doubt, a quick poke with a toothpick (if it comes out mostly clean, you’re golden!).
- Can I add nuts or dried fruit? Absolutely! Go nuts (pun intended). Sprinkle some pecans, walnuts, or even dried cranberries over the rolls before baking for extra texture and flavor.
Final Thoughts
And there you have it! Your ticket to ridiculously delicious, almost-homemade cinnamon rolls with minimal effort. Who knew a simple can and a few pantry staples could create such magic? Now go impress someone—or yourself—with your new culinary skills. You’ve earned that extra gooey bite. You’re basically a professional baker now, so pat yourself on the back! Enjoy!

