Ever had one of those days where your soul just screams for something warm, gooey, and absolutely smothered in cream cheese frosting? Like, not just *any* sweet treat, but the kind that makes you question all your life choices before this very moment? If you’re nodding furiously, welcome, friend. You’ve officially entered the “I deserve five-star cinnamon rolls and I deserve them *now*” club. And guess what? We’re making them. From scratch. Without breaking a sweat (or your sanity). Let’s do this!
Why This Recipe is Awesome
Okay, so why *this* recipe, you ask? Because, my dear friend, it’s basically magic. Seriously. First off, it’s idiot-proof. Even if your culinary adventures usually end in a smoke detector concert, you’ll nail these. I did, and that’s saying something. Secondly, these aren’t just cinnamon rolls; they’re a fluffy, buttery, cinnamony hug for your taste buds. They’re so good, you might actually side-eye that Cinnabon you used to adore. No offense to them, but homemade is always better, IMO. Plus, the satisfaction of pulling these golden beauties out of your own oven? Priceless.
Ingredients You’ll Need
Get ready to assemble your delicious arsenal! Most of these are probably chilling in your pantry already. If not, time for a quick raid on your local grocery store.
For the Dough:
- 1 cup Warm Milk (around 105-115°F / 40-46°C – think warm bathwater, not scalding lava)
- 2 ¼ teaspoons Active Dry Yeast (that’s one packet, if you’re keeping it simple)
- ¼ cup Granulated Sugar (to wake up that yeast and sweeten the deal)
- 1 large Egg (room temperature, please and thank you)
- ¼ cup Unsalted Butter, melted (but not screaming hot, okay? Just melted)
- ½ teaspoon Salt (don’t skip this, it makes a difference!)
- 3 cups All-Purpose Flour (plus a little extra for dusting, ’cause flour gets everywhere)
For the Filling:
- ½ cup Unsalted Butter, softened (let it hang out on the counter for a bit)
- ¾ cup Packed Light Brown Sugar (the stickier, the better)
- 2 tablespoons Ground Cinnamon (the star of the show, obviously)
For the Cream Cheese Icing:
- 4 ounces Cream Cheese, softened (again, room temp is your friend!)
- ¼ cup Unsalted Butter, softened (sensing a pattern here?)
- 1 ½ cups Powdered Sugar (also known as confectioners’ sugar)
- ½ teaspoon Vanilla Extract (a little dash of happy)
- 1-2 tablespoons Milk or Cream (just enough to get that perfect drizzly consistency)
Step-by-Step Instructions
Alright, apron on, good vibes only! Let’s get these rolls rolling.
- Activate Your Yeast: In a large bowl, pour your warm milk. Sprinkle the yeast over it, then add the ¼ cup granulated sugar. Give it a gentle stir and let it sit for about 5-10 minutes. It should get nice and frothy – that means your yeast is alive and ready to party! If it looks sad and flat, your yeast might be expired. Sorry, bud.
- Mix the Wet Stuff: Into your frothy yeast mixture, crack in the egg and pour in the melted butter. Whisk it all together until it’s well combined.
- Combine Dry & Wet: Add the salt and 2 cups of the flour to the wet ingredients. Mix with a wooden spoon until just combined. Gradually add the remaining 1 cup of flour, a little at a time, until a soft, shaggy dough forms.
- Knead It Out: Turn the dough out onto a lightly floured surface. Knead for about 5-7 minutes. You’re looking for a smooth, elastic ball. Don’t over-knead! We want tender rolls, not jawbreakers.
- First Rise: Lightly grease your large bowl with a tiny bit of oil or cooking spray. Place the dough ball in, flip it once to coat, then cover with plastic wrap or a clean kitchen towel. Let it rise in a warm spot for 1 to 1.5 hours, or until it has roughly doubled in size. This is where the magic really starts!
- Prep the Filling: While your dough is rising, mix the softened butter, brown sugar, and cinnamon in a small bowl until it forms a lovely paste.
- Roll ‘Em Out: Once your dough has risen, punch it down gently (satisfying, right?). Turn it out onto a lightly floured surface and roll it into a large rectangle, about 12×18 inches. Aim for an even thickness.
- Spread the Love: Evenly spread your cinnamon-sugar filling over the entire surface of the dough rectangle, leaving a small border (about half an inch) on one of the long edges.
- Roll It Up: Starting from the long edge *opposite* the border, carefully roll the dough into a tight log. Try to keep it as snug as possible to prevent gaps.
- Slice & Dice: Now for the fun part! Use a very sharp knife or, even better, a piece of unwaxed dental floss (slide it under, cross the ends, pull!) to cut the log into 12 equal slices, each about 1.5 inches thick.
- Second Rise: Arrange the rolls in a lightly greased 9×13-inch baking dish. Cover again and let them rise in a warm spot for another 30-45 minutes. They should look puffy and cozy. Preheat your oven to 375°F (190°C) towards the end of this rise.
- Bake ‘Em: Pop the rolls into your preheated oven and bake for 20-25 minutes, or until they’re golden brown and smell absolutely divine. If they start browning too quickly, you can loosely tent them with foil.
- Whip Up the Icing: While the rolls are baking (or cooling slightly), combine the softened cream cheese, softened butter, powdered sugar, and vanilla extract in a medium bowl. Beat with an electric mixer until smooth and creamy. Add milk or cream, 1 tablespoon at a time, until you reach your desired drizzly consistency.
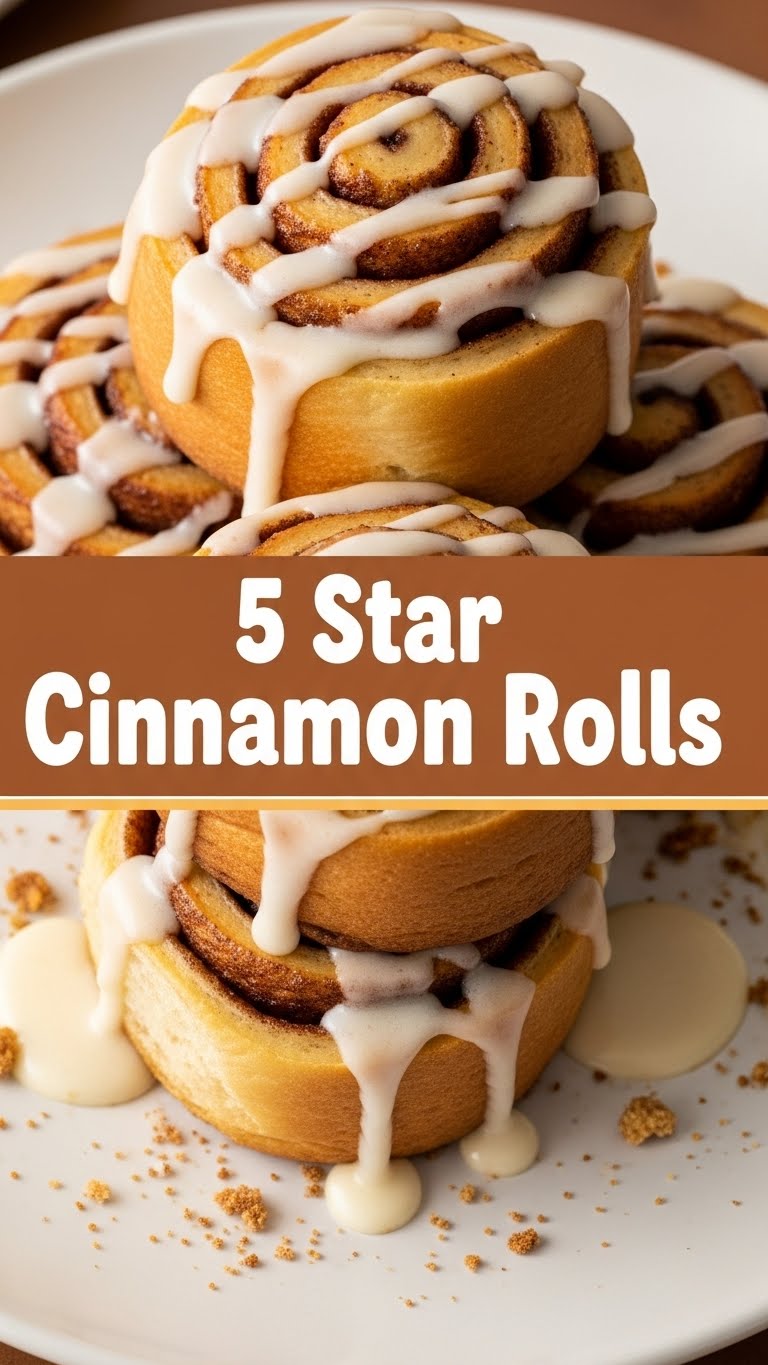
- Frost & Devour: Let the rolls cool for about 5-10 minutes (just enough so the icing doesn’t melt into oblivion, but they’re still warm and inviting). Generously spread or drizzle the cream cheese icing over the warm rolls. Serve immediately and watch them disappear!
Common Mistakes to Avoid
We’ve all been there, staring at a culinary disaster and wondering where we went wrong. Here are a few traps to gracefully sidestep:
- Cold Ingredients for Icing: Seriously, if your butter and cream cheese aren’t at room temp, your icing will be lumpy. Lumpy icing is sad icing. Don’t be sad.
- Too Hot Milk for Yeast: Remember that warm bathwater analogy? If your milk is too hot, it’ll kill your yeast. Dead yeast means flat, dense rolls. We want fluffy!
- Skipping the Second Rise: “I’m in a hurry!” you might think. Don’t. That second rise is crucial for light, airy rolls. Patience, my friend, is a virtue in baking.
- Over-Baking: Keep an eye on those beauties! They should be golden brown, not dark brown. Over-baked rolls are dry rolls, and no one wants that.
- Not Spreading the Filling to the Edges: You want cinnamon-sugar goodness in every bite, right? Don’t be shy with that filling!
Alternatives & Substitutions
Feeling adventurous? Or just realized you’re out of one tiny thing? No worries, we can usually make it work!
- Milk: Any dairy milk (whole, 2%, skim) works great. If you’re dairy-free, unsweetened almond milk or oat milk are excellent substitutes. The rolls might be slightly less rich, but still delish.
- Butter: For the dough and filling, margarine *can* work, but let’s be real, butter is king. For the icing, stick to real butter for that authentic cream cheese frosting taste. Margarine can make it taste a bit… off.
- Icing Shortcut: If cream cheese isn’t your jam (or you’re out), a simple glaze of powdered sugar and a splash of milk/water/vanilla will also be yummy. Not “five-star” level, but definitely “I’m-craving-sugar-now” level.
- Add-ins: Want to jazz things up? Sprinkle some chopped pecans or walnuts over the filling before rolling. A little orange zest in the dough or icing adds a lovely brightness.
FAQ (Frequently Asked Questions)
Got questions? I’ve got (casual) answers!
- “Can I make the dough ahead of time?” Absolutely! After the first rise, punch down the dough, form it into a log, slice it, and place the unbaked rolls in the pan. Cover tightly with plastic wrap and refrigerate overnight (up to 24 hours). The next morning, pull them out, let them come to room temp and rise for about an hour, then bake as usual. Genius, right?
- “My yeast didn’t get frothy. What happened?” Oh dear. This usually means your milk wasn’t warm enough (yeast stayed asleep) or it was too hot (you accidentally murdered it). Or, your yeast is just past its prime. Unfortunately, you’ll need to start over with fresh yeast and properly warmed milk.
- “How do I store leftover cinnamon rolls?” Ha! “Leftover.” If you manage to have any, keep them in an airtight container at room temperature for a day or two, or in the fridge for up to 5 days. Reheat gently in the microwave for that fresh-baked feel.
- “Can I freeze these cinnamon rolls?” You bet! You can freeze the baked and iced rolls (individually wrapped) for up to a month. Thaw at room temp, then microwave briefly. You can also freeze the unbaked rolls after the second rise. Wrap them well, freeze, then bake from frozen, adding about 10-15 minutes to the bake time.
- “Why are my rolls so dry?” Rookie mistake, but fixable next time! Usually, it’s either over-baking (keep an eye on that golden color!) or not enough butter/filling. Don’t skimp on the good stuff!
- “Do I really need room temperature butter for the icing?” Yes! Yes, you do. It’s the secret to smooth, lump-free, dreamy icing. Otherwise, you’ll be fighting little butter chunks, and that’s just no fun.
Final Thoughts
And there you have it, folks! Your very own, absolutely divine, five-star cinnamon rolls, made by your own two awesome hands. You’ve conquered yeast, you’ve mastered the roll, and you’re now officially a cinnamon roll guru. Go forth and share these fluffy clouds of joy with your loved ones, or hoard them all for yourself – no judgment here! You’ve earned every single bite. Now, go impress someone (or yourself!) with your new culinary superpowers. You’ve got this!


