So, you’re scrolling through recipes, craving something warm, gooey, and utterly delicious, but the thought of a complicated baking project makes you want to curl up with a bag of chips instead? Yeah, been there, done that, bought the T-shirt. But what if I told you there’s a cinnamon roll recipe – a *Butternut Bakery* style one, mind you – that’s so straightforward, so utterly foolproof, it’s practically magic? Get ready, friend, because your kitchen is about to smell like heaven, and your taste buds are about to throw a party.
Why This Recipe is Awesome
Okay, let’s be real. Cinnamon rolls can be intimidating. All that yeast, all that rising, all that potential for a sad, flat, dense disaster. But this one? This is the friendliest cinnamon roll recipe you’ll ever meet. It’s like the chill, laid-back cousin of those fussy, high-maintenance bakery rolls. We’re talking maximum flavor, minimum fuss. It’s designed for people who want to look like a baking superstar without actually, you know, being a baking superstar.
Plus, it’s got that “Butternut Bakery” vibe, which means it’s extra fluffy, extra gooey, and probably made with a generous sprinkle of love (and butter, obviously). It’s the perfect recipe for a lazy Sunday, a “treat yourself” Tuesday, or any day ending in “y” when you just need a hug in food form. You seriously can’t mess this up, even if you try. (Don’t try, though. Just follow the steps.)
Ingredients You’ll Need
Gather ’round, future baking champions! Here’s your shopping list for deliciousness. Nothing too wild, I promise!
- For the Dough:
- 1 cup (240ml) warm milk (around 105-115°F/40-46°C) – not too hot, don’t kill the yeast babies!
- 2 ¼ teaspoons active dry yeast (one packet, for the non-bakers) – the magic ingredient!
- ¼ cup (50g) granulated sugar – for a little sweetness, and to feed the yeast.
- 1 large egg – room temp, because happy eggs make happy dough.
- ¼ cup (57g) unsalted butter, melted – liquid gold, basically.
- ½ teaspoon salt – don’t skip this, it balances everything out.
- 3 cups (360g) all-purpose flour, plus more for dusting – the foundation of your future happiness.
- For the Filling:
- ½ cup (113g) unsalted butter, softened – gotta be soft enough to spread!
- ¾ cup (150g) packed light brown sugar – adds that deep, molasses-y flavor.
- 2 tablespoons ground cinnamon – because what’s a cinnamon roll without cinnamon? A sad roll.
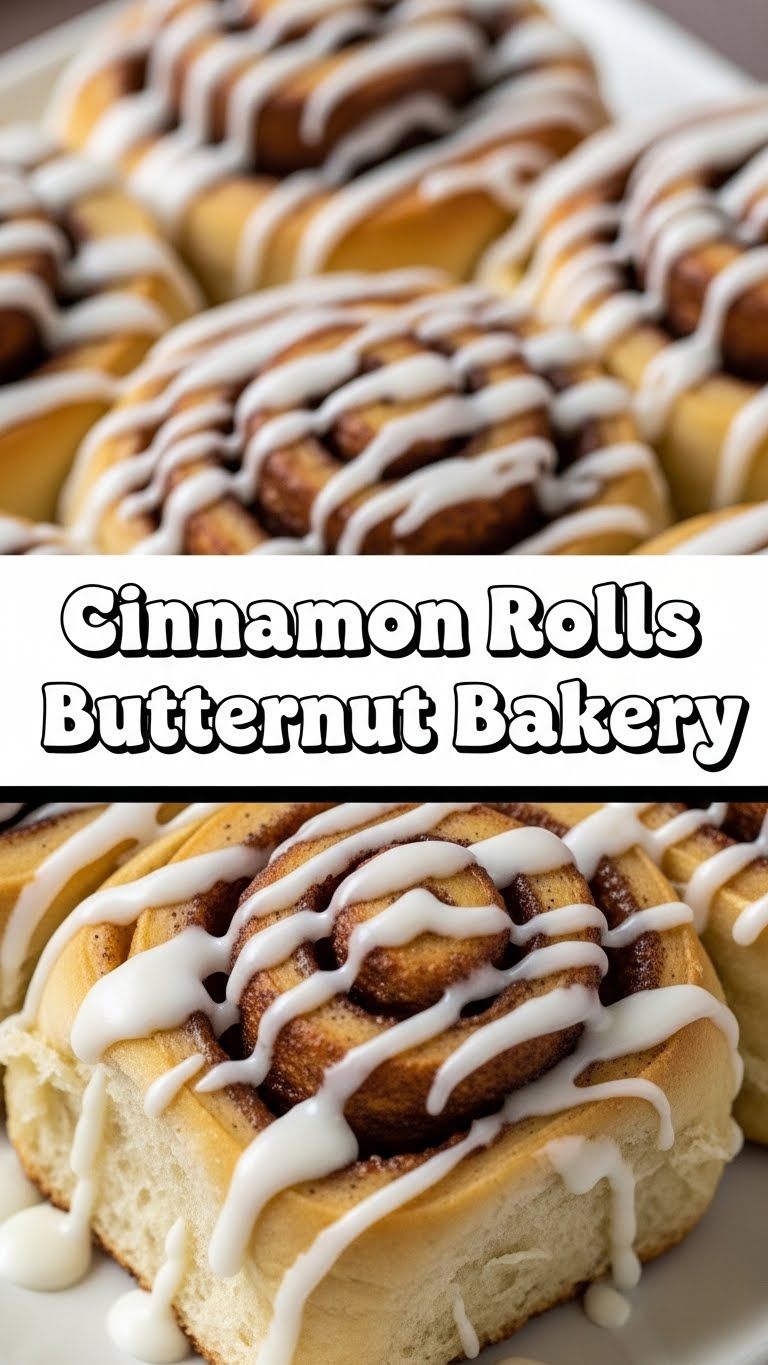
- For the Cream Cheese Frosting (the best part, IMO):
- 4 oz (113g) cream cheese, softened – full-fat, please. This is not the time for diet food.
- ¼ cup (57g) unsalted butter, softened – again, soft.
- 1 ½ cups (180g) powdered sugar (confectioners’ sugar) – for that dreamy, smooth sweetness.
- ½ teaspoon vanilla extract – a touch of fancy.
- 1-2 tablespoons milk or cream – to get that perfect drizzly consistency.
Step-by-Step Instructions
- Activate the Yeast: In a large bowl, pour in the warm milk. Sprinkle the yeast and a tablespoon of the granulated sugar over it. Give it a gentle stir and let it sit for 5-10 minutes until it looks foamy. This means your yeast is alive and ready to party!
- Mix the Dough: Add the rest of the granulated sugar, egg, melted butter, and salt to the foamy yeast mixture. Stir it all together. Gradually add the flour, mixing with a wooden spoon or a stand mixer with a dough hook until a shaggy dough forms.
- Knead It Out: Turn the dough out onto a lightly floured surface. Knead for 5-8 minutes until it’s smooth and elastic. If you’re using a stand mixer, let it knead for about 5 minutes. The dough should be slightly tacky but not sticky.
- First Rise: Lightly grease a large bowl. Place the dough in the bowl, turning once to coat. Cover with plastic wrap or a clean kitchen towel and let it rise in a warm place for 1-1.5 hours, or until doubled in size. This is where patience pays off!
- Make the Filling: While the dough is rising, combine the softened butter, brown sugar, and cinnamon in a small bowl. Mix until well combined and spreadable.
- Roll ‘Em Out: Once the dough has risen, punch it down gently to release the air. On a lightly floured surface, roll the dough into a large rectangle, roughly 12×18 inches (30×45 cm). Don’t stress too much about perfection here!
- Spread the Love: Evenly spread the cinnamon-sugar filling all over the dough, leaving a small ½-inch border on one of the long edges.
- Roll ‘Em Up: Starting from the opposite long edge, tightly roll the dough into a log. The tighter you roll, the prettier your spirals will be!
- Slice and Dice: Using a sharp knife or, even better, unflavored dental floss (seriously, try it!), cut the log into 12 equal-sized rolls. About 1.5 inches (3.8 cm) thick.
- Second Rise: Arrange the rolls in a lightly greased 9×13 inch (23×33 cm) baking dish. Make sure they have a little space to grow. Cover again and let them rise for another 30-45 minutes, or until puffy.
- Bake Time: Meanwhile, preheat your oven to 375°F (190°C). Bake the rolls for 20-25 minutes, or until golden brown and cooked through. If they start to get too dark, you can loosely tent them with foil.
- Whip Up the Frosting: While the rolls are cooling slightly (but still warm!), beat the softened cream cheese and butter together until smooth. Add the powdered sugar, vanilla, and 1 tablespoon of milk/cream. Beat until smooth and creamy. Add more milk/cream if you want a thinner consistency.
- Frost and Devour: Spread that glorious frosting generously over the warm cinnamon rolls. The warmth will make it melt just perfectly. Serve immediately and watch them disappear!
Common Mistakes to Avoid
We all make mistakes, but let’s try to avoid these rookie errors, shall we?
- Killing the Yeast: Using water that’s too hot will murder your yeast. Aim for bathwater warm, not lava hot. If it doesn’t get foamy, start over. Seriously.
- Not Kneading Enough (or Too Much): Under-kneading makes for dense, tough rolls. Over-kneading? Also tough. Aim for smooth and elastic. If it springs back when poked, you’re good.
- Forgetting the Salt: Salt isn’t just for flavor; it helps control yeast activity. Skip it, and your rolls might taste bland or rise too fast.
- Impatience with Rising: Rushing the rise times means less fluffy rolls. Good things come to those who wait!
- Over-Flouring the Dough: Adding too much flour during kneading or rolling makes the dough stiff and dry. Use just enough to prevent sticking.
- Cutting with a Dull Knife: This squishes your beautiful rolls. Use a super sharp knife, or grab that dental floss for clean cuts!
- Not Softening the Butter: Trying to spread cold butter is a nightmare. Soften it to room temp for the filling and frosting. Trust me.
Alternatives & Substitutions
Feeling adventurous? Or maybe you just ran out of something important. No judgment here!
- Milk: Any dairy milk works. For a dairy-free option, unsweetened almond milk or oat milk can work, but the texture might be slightly different (still good though!).
- Butter: For the dough and filling, real butter is king. Margarine technically works, but the flavor won’t be as rich. For the frosting, definitely stick to butter and cream cheese for the best texture and taste.
- Flour: While all-purpose is ideal, you could try bread flour for an even chewier roll, or a mix of whole wheat and all-purpose for a slightly healthier (shhh!) twist.
- Filling Fun: Add some chopped pecans or walnuts to your filling for a nutty crunch. Or a dash of cardamom for an extra aromatic kick!
- Frosting Variations: No cream cheese? Make a simple glaze with powdered sugar, milk, and vanilla. Or try a maple glaze for a fall twist. You’re the chef, get creative!
FAQ (Frequently Asked Questions)
- Can I make these ahead of time? Absolutely! After placing the cut rolls in the baking dish, cover them tightly and refrigerate overnight (up to 12-18 hours). Pull them out about an hour before baking to let them come to room temp and proof a bit more.
- My rolls didn’t rise. What gives? Either your yeast was dead (too old, or water too hot/cold), or your rising spot wasn’t warm enough. Dough likes cozy places!
- Can I freeze cinnamon rolls? Yes! You can freeze the baked and frosted rolls, or just the baked (unfrosted) rolls. Wrap them individually in plastic wrap, then foil. Thaw and warm gently. You can also freeze the unbaked rolls after the second rise. Thaw overnight in the fridge and then let rise at room temp before baking.
- What if I don’t have a stand mixer? No worries! You can totally knead the dough by hand. It’s a bit of a workout, but very therapeutic. Just make sure to knead for the full 8-10 minutes.
- Why are my rolls dry? This usually means they were over-baked or too much flour was added. Keep an eye on them, and take them out when they’re golden, not dark brown.
- Can I use margarine instead of butter? Well, technically yes, but why hurt your soul like that? Butter just tastes better, period. It’s a treat, live a little!
Final Thoughts
So there you have it, folks! Your new favorite recipe for cinnamon rolls that taste like they came from a fancy bakery, but were actually made by your glorious self. This recipe is all about embracing the joy of baking without the stress. They’re warm, they’re gooey, they’re smothered in the best cream cheese frosting imaginable. What’s not to love?
Now go impress someone—or more importantly, yourself—with your new culinary skills. You’ve earned this sweet, sweet victory. And trust me, your kitchen will smell incredible. You might even get a few new best friends when the aroma wafts through the neighborhood. Happy baking!


