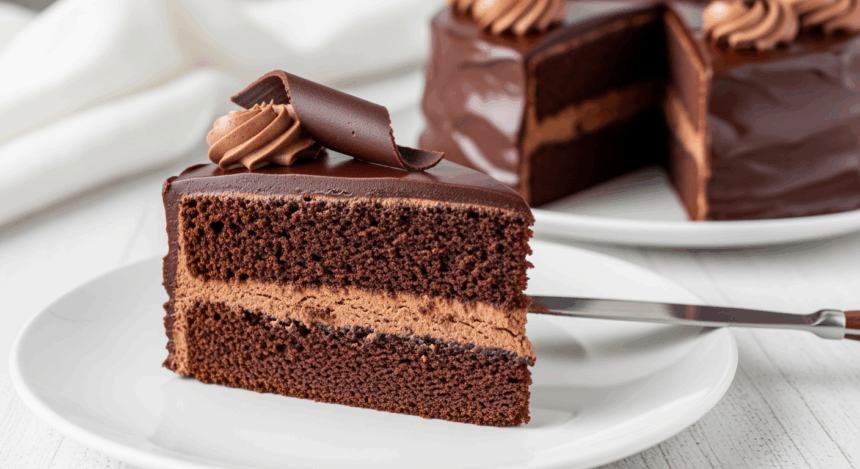
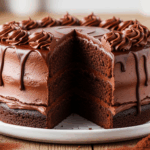
Let’s be real—is there anything that screams “I need comfort NOW” quite like a slice of cake with chocolate frosting? It’s basically therapy in dessert form, minus the hourly rate. Whether you’re celebrating something, drowning sorrows, or just craving sugar at 11 PM on a Tuesday (no judgment here), this recipe has your back. The best part? It’s ridiculously easy to whip up, even when your cooking skills are… questionable at best.
Why This Recipe is Awesome
First off, this isn’t just any cake recipe—it’s the one you’ll memorize after making it twice because it’s that simple. No fancy equipment needed (your grandma’s mixing bowl will do just fine). Plus, the chocolate frosting is so good you’ll be “cleaning” the bowl with your fingers when nobody’s looking. It’s practically foolproof, which means even if your cooking history includes burning water, you’ve got this one in the bag.
The other winning feature? This cake actually tastes better the next day, making it the perfect “I totally planned this” dessert for when friends drop by unexpectedly. Or, you know, for breakfast. I won’t tell.
Ingredients You’ll Need
For the cake:
- 2 cups all-purpose flour (the regular boring kind, nothing fancy)
- 2 cups granulated sugar (the white stuff that makes everything better)
- 1 teaspoon baking soda (not baking powder—they’re different, trust me on this one)
- 1/2 teaspoon salt (just a pinch, not the whole ocean)
- 1/2 cup unsalted butter (the real deal, not that imposter margarine)
- 1/2 cup vegetable oil (keeps things moist—sorry if you hate that word)
- 1 cup water (from the tap, not bottled, we’re not that fancy)
- 1/4 cup cocoa powder (the unsweetened kind, save the hot chocolate mix for drinking)
- 2 large eggs (from the fridge, not from under your neighbor’s chicken)
- 1/2 cup buttermilk (or regular milk with a splash of lemon juice if you’re not a buttermilk-keeping person)
- 1 teaspoon vanilla extract (the real stuff if possible, but we’re not cake snobs here)
For the chocolate frosting:
- 1/2 cup butter (again, the real stuff)
- 1/4 cup cocoa powder (same as before, no Swiss Miss here)
- 1/3 cup milk (whatever percentage you’ve got in the fridge)
- 4 cups powdered sugar (yes, that much—it’s frosting, not a salad)
- 1 teaspoon vanilla extract (for that *chef’s kiss* finish)
- Pinch of salt (to make the sweet taste sweeter—it’s science or something)
Step-by-Step Instructions
Prep Work:
- Preheat your oven to 350°F (175°C). This isn’t optional, people—a cold oven is a sad oven.
- Grease and flour a 9×13 inch baking pan. Or use parchment paper if you’re feeling fancy and hate cleanup.
- In a large bowl, whisk together flour, sugar, baking soda, and salt. Set aside while you handle the wet ingredients.
Making the Cake:
- In a saucepan over medium heat, combine butter, oil, water, and cocoa powder. Bring to a boil, stirring occasionally. This will smell amazing, so prepare for household members to suddenly appear in your kitchen.
- Pour the hot mixture over your dry ingredients and stir until just combined. It’ll look like mud. Appetizing mud, but mud nonetheless.
- In a separate bowl, whisk together eggs, buttermilk, and vanilla. Add this to your muddy mixture and stir until smooth.
- Pour the batter into your prepared pan. Bang the pan on the counter a couple times to remove air bubbles (and work out any latent aggression).
- Bake for 25-30 minutes or until a toothpick inserted in the center comes out clean. If you forget the toothpick test and just wing it, I respect your chaotic energy.
For the Frosting:
- About 15 minutes before the cake is done, start your frosting. In a saucepan, combine butter, cocoa, and milk. Heat until the butter is melted, stirring constantly.
- Remove from heat and gradually whisk in powdered sugar, vanilla, and salt until smooth. If it’s too thick, add a splash more milk. Too thin? More powdered sugar. Baking is just controlled chemistry experiments, after all.
- Pour the warm frosting over the still-warm cake. Yes, warm on warm—it creates this incredible fudgy layer that will make you weep with joy.
- Let the cake cool completely before cutting into slices. Or don’t. I’m not the dessert police.
Common Mistakes to Avoid
Even a simple recipe has its pitfalls. Here are some ways people mess this up (don’t be these people):
- Overmixing the batter – This isn’t a workout session. Mix until combined, then stop. Overmixed cake = tough cake.
- Opening the oven door too early – I know you’re excited, but your cake will sink faster than my motivation on Monday mornings.
- Frosting a hot cake (unless the recipe calls for it, like ours does) – Normally this creates a melty disaster, but our recipe actually wants the warm-on-warm action.
- Substituting ingredients willy-nilly – Baking is science. Salt and sugar both look like white crystals, but I promise they are NOT interchangeable.
- Forgetting to grease the pan – Unless you enjoy chiseling cake off metal, don’t skip this step.
Alternatives & Substitutions
Because we live in the real world where sometimes you don’t have everything you need:
Don’t have buttermilk? Add 1/2 tablespoon of lemon juice or white vinegar to 1/2 cup regular milk and let it sit for 5 minutes. Voilà—fake buttermilk that works just fine.
Gluten issues? Substitute a good quality 1:1 gluten-free flour blend. The texture might be slightly different, but it’ll still satisfy your cake craving.
Watching calories? LOL just kidding. This is cake with chocolate frosting. Embrace it. (But fine, you can reduce sugar by about 1/4 cup in both the cake and frosting if you must.)
Vegan needs? Replace butter with vegan butter, eggs with flax eggs (1 tbsp ground flaxseed + 3 tbsp water per egg), and milk with almond or oat milk. The frosting won’t set quite the same, but it’ll still be tasty.
FYI, you can add a handful of chocolate chips to the batter if you’re having an especially rough day. No one will judge you.
FAQ (Frequently Asked Questions)
Can I make this cake ahead of time?
Absolutely! This cake actually gets better after a day in the fridge. The flavors meld together like old friends at a reunion—it gets deep, man.
How do I store leftovers? (As if there will be any…)
Cover it and keep it at room temperature for up to 3 days, or refrigerate for up to a week. But let’s be real—it won’t last that long.
Can I freeze slices for later?
Sure can! Wrap individual slices in plastic wrap, then foil, and freeze for up to 3 months. Future You will be so grateful to Past You.
Why did my cake sink in the middle?
Did you open the oven door to peek? Busted! Drastic temperature changes cause sinking. Or your oven temperature is off. Or your leavening agents are old. Basically, there are many ways to mess this up, but the cake will still taste good, so who cares?
Can I turn these into cupcakes?
You overachiever, you! Yes, fill cupcake liners about 2/3 full and bake for 18-20 minutes. Makes about 24 cupcakes.
Is this a Texas sheet cake?
It’s a close cousin! The technique is similar, but traditional Texas sheet cake is usually thinner. Call it whatever you want—I’m not about to get into a cake-naming debate with Texans.
Final Thoughts
There you have it—a chocolate cake that’s simple enough for baking novices but delicious enough to impress that judgmental relative who always brings store-bought desserts to family gatherings. The beauty of this recipe is in its forgiving nature; even if you mess up a little, chocolate frosting covers a multitude of sins.
Remember, the goal isn’t perfection—it’s having a slice of happiness that you created yourself. So go ahead, cut yourself a generous piece (none of those sad skinny slices here), maybe add a scoop of vanilla ice cream if you’re feeling wild, and enjoy the simple pleasure of homemade cake. You deserve it, and honestly, so does everyone within fork-sharing distance of you.
