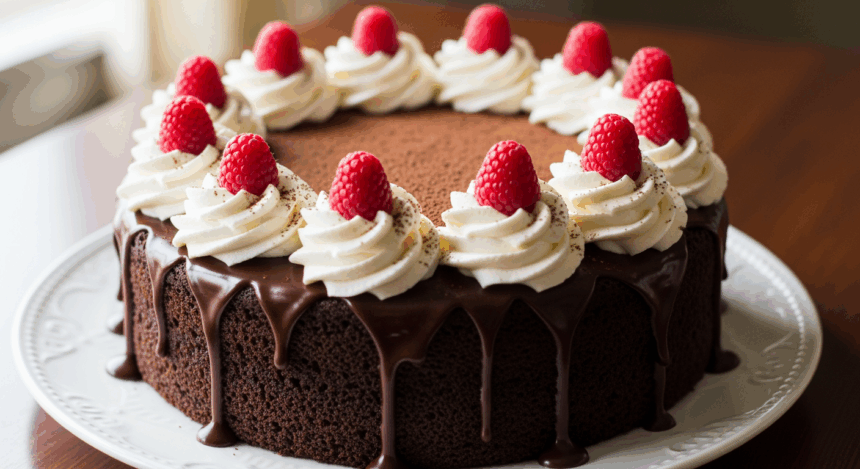
Ah, chocolate cake. Is there anything more comforting than sinking your fork into a slice of moist, rich cake topped with clouds of whipped cream? I think not! Whether you’re baking to impress your in-laws or just stress-eating your way through Tuesday night, this chocolate cake with whipped cream border is about to become your new BFF in the kitchen.
Why This Recipe is Awesome
Let me count the ways this cake recipe is going to rock your world. First, it’s basically foolproof—I once made this while simultaneously binge-watching Netflix and texting my mom, and it still turned out Instagram-worthy. Second, that whipped cream border? It hides all your decorating sins. Cake looking a little lopsided? Who cares! Slap some whipped cream on that bad boy and suddenly you’re a pastry chef.
Plus, this recipe uses simple ingredients you probably already have lurking in your pantry. No need to make a special trip to that fancy grocery store where they judge you for wearing sweatpants. This is judgment-free baking at its finest.
Ingredients You’ll Need
For the cake:
- 2 cups all-purpose flour (the regular stuff, nothing fancy)
- 2 cups granulated sugar (yes, that much—this isn’t health food, people)
- 3/4 cup unsweetened cocoa powder (not the hot chocolate mix, I learned that the hard way)
- 2 teaspoons baking soda (the orange box that’s been in your cabinet since 2018)
- 1 teaspoon salt (just a pinch to make the sweet stuff taste better)
- 2 large eggs (room temperature, if you’re fancy and plan ahead, which I never do)
- 1 cup buttermilk (or regular milk with a splash of vinegar if you’re a normal person who doesn’t keep buttermilk on hand)
- 1/2 cup vegetable oil (makes it moist—sorry if you hate that word)
- 2 teaspoons vanilla extract (the real stuff, not the imitation, unless that’s all you’ve got)
- 1 cup hot coffee (brings out the chocolate flavor—trust me on this)
For the whipped cream border:
- 2 cups heavy whipping cream (cold as your ex’s heart)
- 1/4 cup powdered sugar (more if you have a sweet tooth)
- 1 teaspoon vanilla extract
- Optional: chocolate shavings to sprinkle on top (because more chocolate is always the answer)
Step-by-Step Instructions
- Preheat your oven to 350°F (175°C). Don’t skip this step! Grease and flour two 9-inch round cake pans, or line them with parchment paper if you’re fancy.
- In a large bowl, whisk together flour, sugar, cocoa powder, baking soda, and salt. Make a little well in the center like you’re preparing for a tiny chocolate volcano.
- Add eggs, buttermilk, oil, and vanilla to your dry ingredients. Mix until just combined—don’t beat it to death, we’re not angry at the batter.
- Stir in the hot coffee. Yes, the batter will be ridiculously thin. No, you didn’t mess up. This is how it’s supposed to look.
- Pour batter evenly into your prepared pans. Tap them gently on the counter to get rid of air bubbles (and to feel like you know what you’re doing).
- Bake for 30-35 minutes or until a toothpick inserted in the center comes out mostly clean. A few moist crumbs are fine—dry cake is the enemy.
- Cool in pans for 10 minutes, then transfer to wire racks to cool completely. If you try to frost a warm cake, you’ll have a melty disaster on your hands.
- While the cake is cooling, make your whipped cream. In a cold bowl with cold beaters (stick ’em in the freezer for 10 minutes first), whip the heavy cream until soft peaks form.
- Add powdered sugar and vanilla, then continue whipping until stiff peaks form. Don’t overwhip or you’ll have butter!
- Place your first cake layer on a plate or cake stand. Spread some whipped cream on top.
- Add the second layer. Spread a thin layer of whipped cream all over the cake (this is your “crumb coat”).
- Fill a piping bag fitted with a star tip with the remaining whipped cream. Pipe decorative borders around the top and bottom edges. If piping bags terrify you, just dollop spoonfuls around the edges—rustic is a style too!
- Sprinkle with chocolate shavings if you’re feeling extra. Refrigerate until ready to serve.
Common Mistakes to Avoid
Even though this recipe is pretty forgiving, there are still ways to turn your dream cake into a nightmare:
- Opening the oven door too early. I know you’re curious, but your cake will sink faster than my motivation on Monday mornings.
- Using cold ingredients. Let those eggs come to room temp, unless you enjoy dense, weird-textured cake (no judgment if that’s your thing).
- Skipping the coffee. “But I don’t like coffee!” I hear you cry. Trust me, you can’t taste it—it just makes the chocolate flavor pop. But fine, use hot water if you must.
- Frosting a warm cake. Unless your aesthetic is “melted snowman,” let that cake cool completely.
- Not chilling your bowl for whipped cream. Room temperature equipment = sad, soupy whipped cream that slides right off your cake.
Alternatives & Substitutions
Life happens. Pantries aren’t always stocked. Here’s how to adapt:
No buttermilk? Add 1 tablespoon of white vinegar or lemon juice to a cup of milk and let it sit for 5 minutes. Boom—fake buttermilk.
Dairy-free needs? Use almond or oat milk with a splash of vinegar instead of buttermilk, and coconut cream instead of whipped cream (the full-fat canned stuff, chilled overnight).
Don’t do coffee? Hot water or hot chai tea works too.
Hate whipped cream? First, who are you? Second, use buttercream or cream cheese frosting instead.
IMO, chocolate cake is forgiving that way—it plays nice with almost any substitution you throw at it.
FAQ (Frequently Asked Questions)
Can I make this cake ahead of time?
Absolutely! The cake layers can be made 1-2 days in advance, wrapped well, and kept at room temperature. But add that whipped cream border right before serving, unless you want it to slowly melt into oblivion.
How do I store leftovers? (As if there will be any…)
Once the whipped cream is on, your cake needs to live in the fridge. It’ll stay good for about 3 days, though the cream might start looking a little sad by day 3.
Can I freeze this cake?
Freeze the cake layers without the whipped cream? Definitely. Freeze the whole decorated cake? Only if you enjoy culinary disappointment.
Do I really need two 9-inch pans?
Nope! You can use one pan and just bake longer, then slice the cake in half horizontally when cool. Or use a 9×13 pan for a sheet cake version. Live your truth.
My whipped cream won’t whip! What am I doing wrong?
Is your cream warm? Are your tools warm? Is Mercury in retrograde? Make sure everything is COLD, and your cream is at least 36% fat (heavy whipping cream, not just whipping cream).
Can I add food coloring to the whipped cream?
Sure! Go wild with pink whipped cream if that makes you happy. Just use gel food coloring, not the liquid stuff that can make your cream too runny.
Final Thoughts
There you have it—a chocolate cake that’s simple enough for Tuesday night stress-baking but impressive enough for your mother-in-law’s birthday. The whipped cream border makes it look like you spent hours on it, when really you just needed a way to hide the fact that you accidentally dropped the spatula on the cake (been there).
Remember, baking should be fun! If you mess up, just add more whipped cream or call it a “rustic interpretation” of chocolate cake. Worst case scenario? You’re left with a delicious mess that you get to eat with a spoon straight from the pan. And honestly, is that even a worst case?
Now go preheat that oven and show that chocolate cake who’s boss. You’ve got this!
