Ever stood in front of your fridge, desperately craving something sweet and fancy but lacking the motivation to embark on a full-on baking marathon? Well, friend, I’ve got just the thing—a ridiculously delicious layered cake slice doused in chocolate sauce that’ll make you look like you spent hours in the kitchen (when really, you might have been binge-watching that new series).
Why This Recipe is Awesome
Let’s cut to the chase—this recipe is the culinary equivalent of wearing sweatpants that somehow look like dress pants. It’s elegant enough to serve to guests but requires minimal effort on your part. The layers create that “I-know-what-I’m-doing” vibe, while the chocolate sauce covers up any minor disasters. It’s practically foolproof, which is saying something considering I once burned water (don’t ask).
Plus, you can prep most components ahead of time, so when dessert o’clock strikes, you just assemble and serve with that smug “oh this old thing?” expression we all secretly practice.
Ingredients You’ll Need
For the cake layers:
- 1 box of vanilla cake mix (the “I-don’t-judge-shortcuts” option) or your favorite homemade recipe
- 3 eggs (room temperature, because we’re fancy like that)
- ½ cup vegetable oil (or whatever oil is lurking in your pantry)
- 1 cup water (tap is fine, no need to import from the Alps)
For the filling:
- 2 cups whipped cream (freshly whipped if you’re showing off, store-bought if it’s Tuesday)
- 1 cup strawberry preserves (or whatever fruity jam is hiding in your fridge door)
- 1 tablespoon vanilla extract (the real stuff, not that imitation nonsense)
For the chocolate sauce:
- 1 cup semi-sweet chocolate chips (the good ones you hide from your family)
- ½ cup heavy cream (diets are for tomorrow)
- 2 tablespoons butter (salted or unsalted, we’re not picky)
- A tiny pinch of salt (trust me on this one)
Step-by-Step Instructions
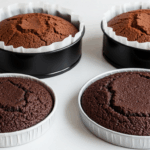
- Preheat your oven to 350°F (or 325°F if your oven runs hot like mine does—overachiever). Grease and line two 9-inch round cake pans.
- Mix your cake batter according to the box instructions or your recipe. Pour equal amounts into your prepared pans and bake until a toothpick comes out clean (approximately 25-30 minutes).
- Let the cakes cool completely. I mean it—completely. Impatience here leads to the dreaded “melty filling disaster” we’re trying to avoid.
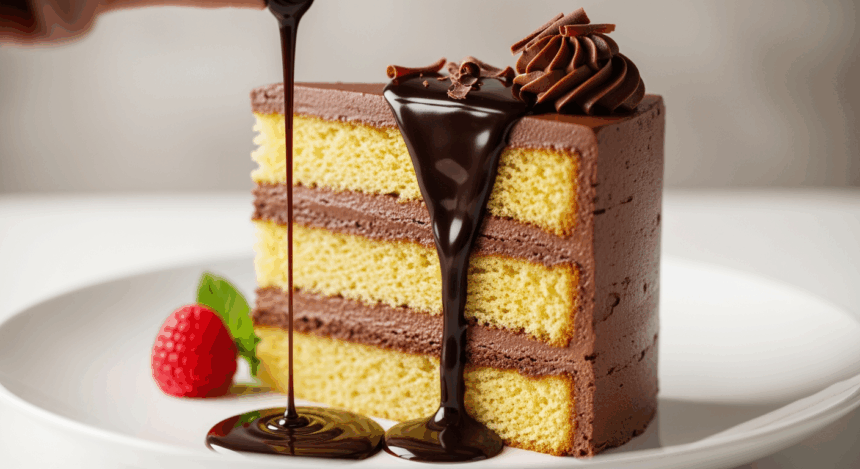
- Once cooled, slice each cake horizontally to create four layers. Don’t stress if they’re not perfectly even—that’s what excessive amounts of filling are for.
- Mix vanilla extract into your whipped cream. This is the “secret ingredient” that makes people think you went to culinary school.
- Start layering: cake, thin layer of preserves, whipped cream, repeat until you’ve used all layers, ending with cake on top.
- For the chocolate sauce (AKA the miracle cover-up), heat heavy cream until it just starts to simmer. Pour over chocolate chips and butter in a bowl, add the pinch of salt, then let sit for 2 minutes before stirring into smooth, glossy perfection.
- Refrigerate the cake for at least 30 minutes before serving. Cut into slices, drizzle with warm chocolate sauce, and pretend you do this every weekend.
Common Mistakes to Avoid
Rushing the cooling process—warm cake + filling = soggy mess that slides apart faster than my motivation on Monday mornings.
Overwhipping your cream until it resembles butter. Unless you’re secretly churning butter, stop when soft peaks form.
Being stingy with the chocolate sauce. This isn’t the time for moderation, folks. When in doubt, more chocolate is always the answer.
Cutting slices too thin. This isn’t a diet dessert—embrace the decadence and cut proper slices like the dessert deity you are.
Alternatives & Substitutions
Not a strawberry fan? Swap the preserves for raspberry, blackberry, or even lemon curd if you’re feeling adventurous.
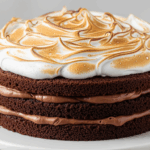
Chocolate cake layers work beautifully here too, creating what I call the “chocolate inception” effect. IMO, you can never have too much chocolate in one dessert.
Lactose issues? Non-dairy whipped cream alternatives work well, though they might not hold up as long, so serve promptly.
For a boozy twist, add a tablespoon of Baileys, Kahlúa, or rum to your chocolate sauce. I won’t tell if you don’t!
FAQ (Frequently Asked Questions)
Can I make this the day before?
Absolutely! In fact, the flavors meld together overnight, making it even better. Just keep the chocolate sauce separate and warm it up right before serving.
Will this cake survive outside the fridge for a party?
It’ll hold up for about 2 hours before looking sad and melty—kind of like me at social gatherings after the two-hour mark.
Can I freeze leftover slices?
You can, but let’s be honest, when have you ever had leftover cake? If this mythical situation occurs, wrap slices individually and freeze for up to a month.
Do I really need four layers?
Nope! Two layers work fine if you’re not feeling the extra cutting. The cake police won’t come for you, I promise.
My chocolate sauce got too thick. Help?
Add a splash more warm cream and stir. Crisis averted! If it’s too thin, add more chocolate chips. Chocolate is forgiving like that.
Final Thoughts
See? That wasn’t so hard! You’ve now mastered what looks like a fancy-pants dessert without breaking a sweat (or the bank). This layered cake with chocolate sauce is your new secret weapon for potlucks, dinner parties, or those moments when you need to remind yourself that you’re a functional adult who can create beautiful things.
Now go slice yourself a generous piece, drizzle it with extra sauce (because you deserve it), and enjoy the sweet rewards of your minimal labor. And if anyone asks for the recipe, feel free to sigh dramatically and say it’s been passed down for generations. Your secret’s safe with me!
