Ever have one of those days where your sweet tooth is screaming louder than your alarm clock, but your energy levels are whispering sweet nothings about ordering takeout? Yeah, me too. But guess what? Today, we’re not just *silencing* that sweet tooth; we’re giving it a full-blown concert with an encore! We’re diving headfirst into the glorious world of Chocolate Chip Caramel Cookies. And trust me, these aren’t your grandma’s cookies (unless your grandma was a secret rockstar chef, then maybe). These are gooey, chocolatey, caramel-y bombs of pure joy, and they’re surprisingly easy to make. So, apron up, buttercup!
Why This Recipe is Awesome
Okay, let’s be real. There are a bazillion cookie recipes out there. So why *this* one? Because it’s basically the culinary equivalent of a warm hug from a puppy that also gives you money. It’s got everything you want: the classic comfort of a chocolate chip cookie, but then BAM! A surprise gooey caramel center that takes it from “good” to “OH MY GOSH, I NEED MORE!” Seriously, it’s so foolproof, I’m pretty sure my cat could make them if she had opposable thumbs and a basic understanding of measurements. This recipe is quick, relatively simple, and delivers maximum flavor with minimum fuss. Plus, you get to lick the spoon, which is, IMO, half the fun of baking.
Ingredients You’ll Need
Get ready to raid your pantry! Here’s what you’ll need for these caramel-y delights. Don’t worry, nothing too exotic here.
- 1 cup (2 sticks) unsalted butter, softened. Because we’re fancy and control our own salt intake.
- ¾ cup granulated sugar. The white stuff.
- ¾ cup packed light brown sugar. For that extra chewiness and deep flavor. Don’t skimp!
- 2 large eggs. Happy little protein spheres to bind it all together.
- 1 teaspoon vanilla extract. Don’t even *think* about imitation vanilla. Your cookies deserve better.
- 2 ¼ cups all-purpose flour. The glorious binder of dreams.
- 1 teaspoon baking soda. For puffiness, not pancakes.
- ½ teaspoon salt. Balances all that glorious sweetness.
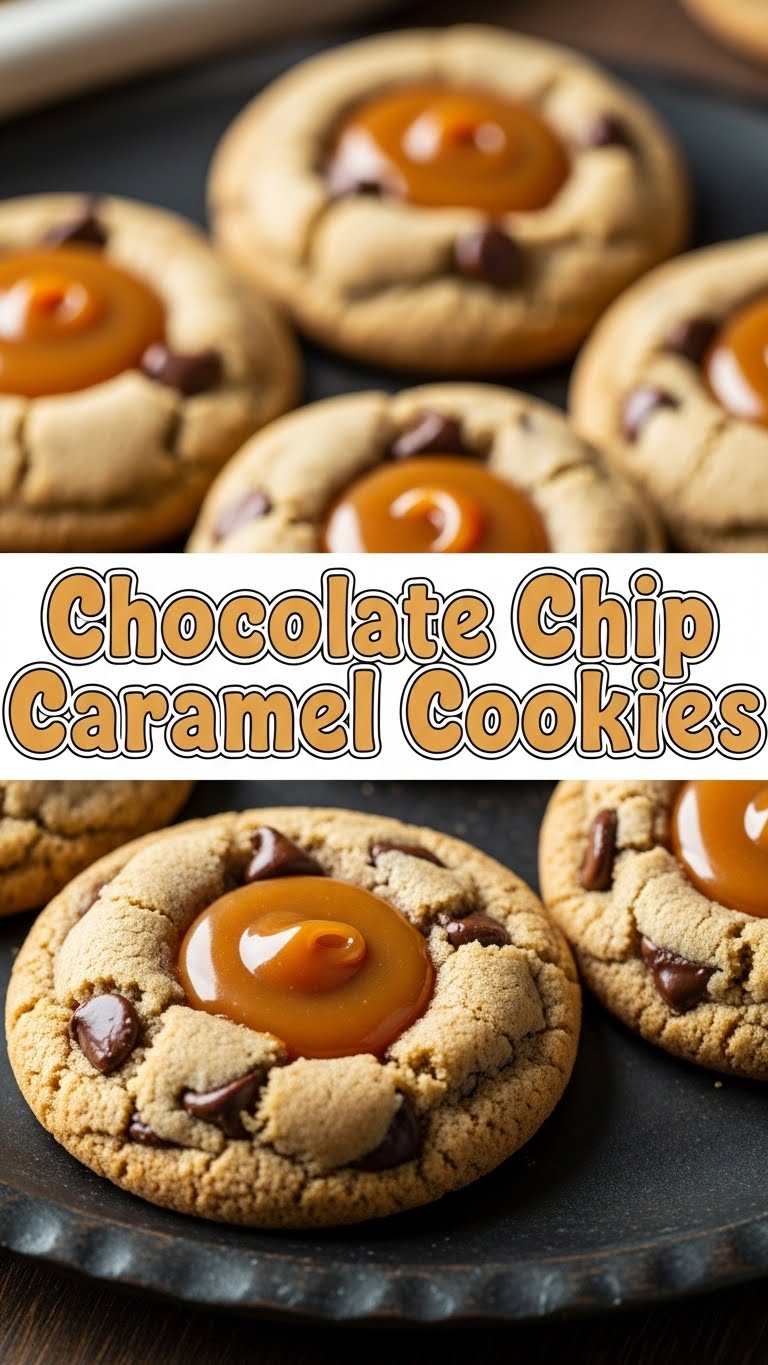
- 1 ½ cups (about 9 oz) chocolate chips. Your favorite kind! Milk, semi-sweet, dark—go wild!
- 1 cup (about 6 oz) caramel bits. These are the magic makers. Find them near the chocolate chips. If you can only find squares, chop them up!
Step-by-Step Instructions
Alright, time to get baking! Follow these simple steps and you’ll be in cookie heaven before you know it.
- First things first: preheat your oven to 375°F (190°C). Line a couple of baking sheets with parchment paper or silicone mats. Trust me, this makes cleanup a breeze and prevents sticky situations.
- In a large bowl, or your stand mixer if you’re feeling fancy, cream together the softened butter, granulated sugar, and brown sugar. Beat them until they’re light, fluffy, and look like sunshine. This usually takes about 2-3 minutes.
- Crack in those two eggs, one at a time, mixing well after each addition. Then stir in the vanilla extract. Scrape down the sides of the bowl to make sure everything is incorporated and happy.
- In a separate medium bowl, whisk together the flour, baking soda, and salt. Give it a good whisk to break up any lumps and ensure even distribution.
- Gradually add the dry ingredients to the wet ingredients, mixing on low speed until *just* combined. Don’t overmix! Overmixing leads to tough cookies, and nobody wants a tough cookie.
- Now for the fun part! Gently fold in the chocolate chips and those glorious caramel bits. Make sure they’re evenly distributed throughout the dough so every bite is a party.
- Scoop rounded tablespoons of dough onto your prepared baking sheets, leaving about 2 inches between each cookie. They’re going to spread a bit, like me after a big meal.
- Bake for 9-12 minutes, or until the edges are golden brown and the centers are still looking a little soft. Remember, ovens vary, so keep an eye on them!
- Let them cool on the baking sheet for about 5 minutes before transferring them to a wire rack to cool completely. Or, if you’re impatient like me, eat one warm and gooey right off the tray. Burned tongue? Worth it.
Common Mistakes to Avoid
Nobody’s perfect, especially in the kitchen! But we can learn from past mistakes. Here are a few traps to sidestep on your way to cookie glory:
- Overmixing the Dough: I said it once, I’ll say it again: overmixing develops too much gluten, which means you’ll end up with hockey pucks instead of soft, chewy cookies. Stop when the flour is *just* incorporated.
- Not Using Softened Butter: If your butter is too cold, it won’t cream properly, and your cookies will be dense. If it’s melted, your cookies will spread too much and be flat. Goldilocks it: just right, room temperature.
- Skipping the Parchment Paper: Rookie mistake! Your caramel bits will melt and stick to the pan like glue. Parchment paper is your best friend here.
- Baking Too Long: Keep an eye on those cookies! They might look a little underdone in the middle when you pull them out, but they’ll continue to cook on the hot baking sheet. Slightly underbaked is better than overbaked for chewiness!
- Eating All the Dough Before Baking: A valid mistake, but a mistake nonetheless. Leave some for the actual cookies! (Though a little taste test is highly encouraged.)
Alternatives & Substitutions
Feeling adventurous? Or just out of one particular ingredient? No worries, we’ve got options!
- Chocolate Chips: Swap them out for white chocolate chips, dark chocolate chunks, or even M&Ms for a fun pop of color.
- Caramel Bits: If you can’t find caramel bits, you can use individually wrapped soft caramels, chopped into small pieces. Just make sure they’re soft and chewy, not the hard, stick-to-your-teeth kind.
- Add-ins: Want more texture? Throw in a handful of chopped pecans or walnuts. A sprinkle of sea salt on top right after baking can also really elevate the flavor!
- Flour: For our gluten-free friends, you can try a 1:1 gluten-free baking blend, but results might vary slightly in texture.
- Butter: Technically, you *could* use shortening, but why hurt your soul like that? Butter just tastes better, period.
FAQ (Frequently Asked Questions)
Got questions? I’ve got answers (and probably a cookie crumb on my face).
Can I use store-bought caramel sauce instead of bits?
Nah, not really for *inside* the cookie dough, friend. It’ll just melt into a delicious, but very messy, puddle. Stick with the bits or chopped caramels; they hold their shape better and give you that gooey burst.
Do I *really* need to chill the dough?
For this specific recipe, it’s not strictly necessary, but a quick 30-minute chill can help the cookies spread less and give them a slightly chewier texture. It’s like a power nap for your dough!
My cookies are flat! What went wrong?
Ah, the dreaded pancake cookie! Common culprits include butter that was too soft (or melted), not enough flour, or an oven that wasn’t preheated properly. Make sure your butter is room temp (not melted!) and your oven is screaming hot when the cookies go in.
How long do these magical cookies last?
If you can manage to keep them around without devouring them all, they’ll stay fresh in an airtight container at room temperature for about 3-5 days. Good luck with that, though!
Can I freeze the dough?
Absolutely! Scoop the dough into balls, place them on a baking sheet, and freeze until solid. Once frozen, transfer them to a freezer-safe bag. When you’re ready for fresh cookies, bake from frozen, adding a couple of extra minutes to the baking time.
What if I don’t have brown sugar?
While brown sugar is key for the chewiness and flavor, you *can* substitute with all granulated sugar. Your cookies might be a bit crisper and less chewy, but still delicious. For a closer approximation, mix 1 cup granulated sugar with 1 tablespoon of molasses.
Final Thoughts
And there you have it, folks! Your very own batch of Chocolate Chip Caramel Cookies. You just made pure happiness, my friend. Go on, brag a little! Share them with loved ones, or hoard them all for yourself (no judgment here). You’ve earned every single gooey, chocolatey, caramel-filled bite. Now go impress someone—or yourself—with your new culinary skills. You’ve earned it!


