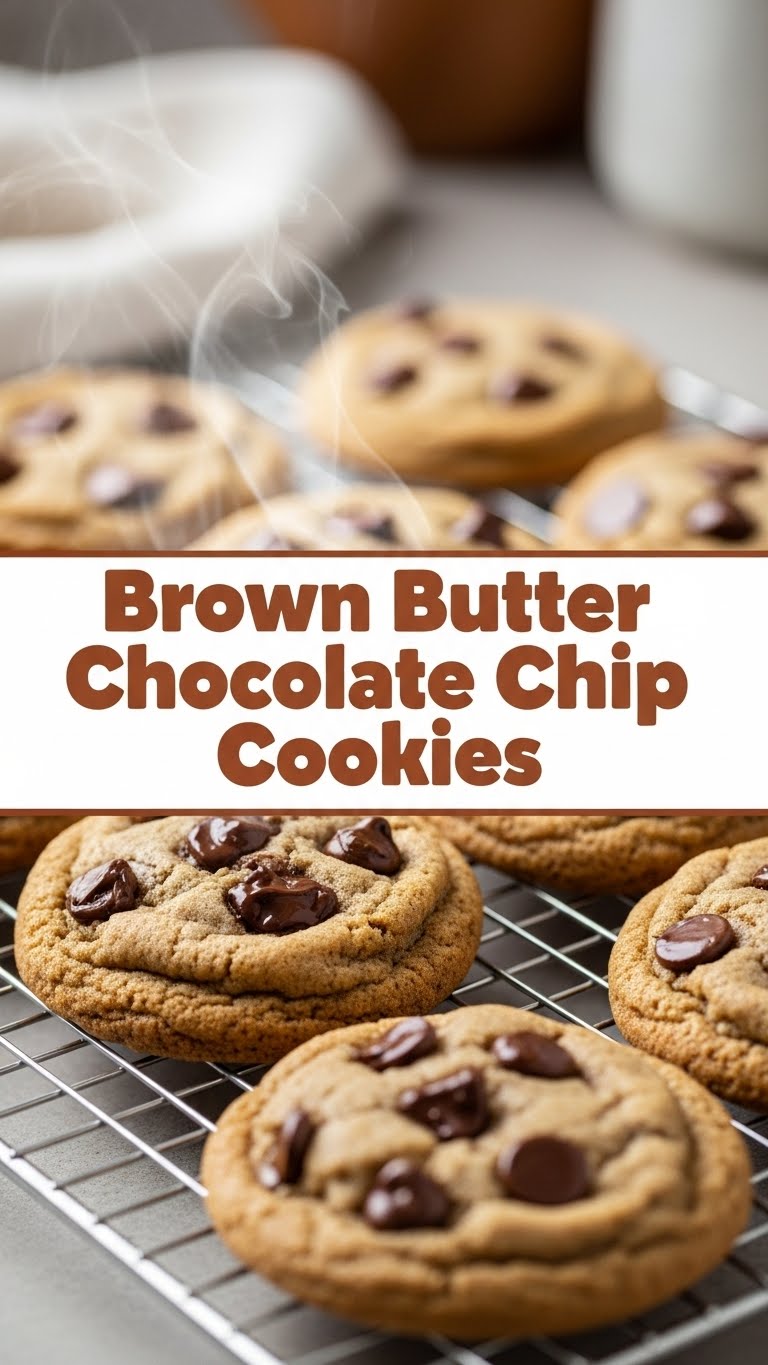
So, you’ve scrolled past one too many perfect-looking cookies on your feed, and now you’re wondering if you, too, can whip up something ridiculously delicious without setting your kitchen on fire, huh? Friend, you’ve come to the right place. We’re not just making *any* chocolate chip cookies today; we’re elevating them to superstar status with a little secret weapon: **brown butter**. Get ready to impress your taste buds (and anyone lucky enough to be in your vicinity) with minimal effort and maximum flavor. Let’s do this!
Why This Recipe is Awesome
Okay, let’s be real. There are a bazillion chocolate chip cookie recipes out there. But this one? It’s the one you’ll go back to. Why? Because brown butter isn’t just a fancy step; it’s a cheat code for depth of flavor. It adds this nutty, caramel-y goodness that makes regular cookies feel, well, a little… basic. Plus, this recipe is practically **idiot-proof**. Seriously, if I can nail it after a long Tuesday, you definitely can. It’s quick, it uses standard pantry stuff, and the payoff is huge. It’s like magic, but edible.
Ingredients You’ll Need
- 1 cup (2 sticks) unsalted butter: The star of our show. Don’t even think about using margarine here, unless you want to deeply offend your cookies.
- 1 cup packed light brown sugar: For that chewy texture and molasses-y sweetness.
- ½ cup granulated sugar: The perfect companion to brown sugar, giving us crisp edges and gooey centers.
- 2 large eggs: Room temp is best, because science (and better texture).
- 2 teaspoons vanilla extract: Don’t skimp! It’s like the soul of the cookie.
- 2 ¼ cups all-purpose flour: The backbone. Make sure it’s not packed too tightly.
- 1 teaspoon baking soda: Our little leavening friend.
- 1 teaspoon salt: Crucial for balancing sweetness and enhancing all those delicious flavors.
- 1 ½ cups chocolate chips (or chunks!): Milk, semi-sweet, dark – pick your poison! Or even a mix, for extra fun.
Step-by-Step Instructions
- Brown the Butter: Grab a light-colored saucepan (it helps you see the magic!). Melt your two sticks of butter over medium heat. Keep stirring, friend. It’ll foam, then start to smell nutty, and tiny brown bits will appear at the bottom. Once it’s golden brown with those lovely specks, immediately remove it from the heat and pour it into a heatproof bowl. Let it cool for about 10-15 minutes. **Don’t skip this cooling step!**
- Cream It Up: In a large mixing bowl, combine your slightly cooled brown butter with both brown sugar and granulated sugar. Beat them together with an electric mixer (or a strong arm!) until they’re light and fluffy, about 2-3 minutes.
- Egg-cellent Addition: Crack in your two eggs, one at a time, mixing well after each addition. Then, stir in that glorious vanilla extract. Scrape down the sides of the bowl to ensure everything gets properly acquainted.
- Dry Goods Unite: In a separate bowl, whisk together your flour, baking soda, and salt. This ensures even distribution, avoiding any pockets of pure baking soda horror.
- Combine & Fold: Gradually add the dry ingredients to the wet ingredients, mixing on low speed until *just* combined. **Whatever you do, don’t overmix!** Overmixing leads to tough cookies, and nobody wants that.
- Chocolate Time! Fold in your chocolate chips. Get them nice and evenly distributed throughout that beautiful dough.
- Chill Out (Optional, but Recommended!): Cover your bowl with plastic wrap and chill the dough for at least 30 minutes, or even a few hours. This deepens the flavor and prevents spreading. **Seriously, it’s worth it.**
- Preheat & Scoop: While your dough chills, preheat your oven to 375°F (190°C). Line a baking sheet with parchment paper. Scoop rounded tablespoons of dough onto the prepared sheet, leaving about 2 inches between them.
- Bake to Perfection: Bake for 9-12 minutes, or until the edges are golden brown and the centers are still slightly soft. **Remember, they’ll continue to set up as they cool.**
- Cool Down: Let the cookies cool on the baking sheet for a few minutes before transferring them to a wire rack to cool completely. Or, you know, eat one warm. I won’t tell.
Common Mistakes to Avoid
- Burning the Butter: Keep an eye on that butter! It goes from perfectly brown to burnt disaster in seconds. **Stay vigilant!**
- Overmixing the Dough: We just covered this, but it’s important enough to say again. Mix until *just* combined. Tough cookies are a sad story.
- Not Chilling the Dough: You’re busy, I get it. But a quick chill session helps prevent flat, sad cookies and really amps up the flavor. Patience, young padawan.
- Thinking You Don’t Need to Preheat the Oven: Rookie mistake. A properly preheated oven ensures even baking from the start.
- Baking Too Long: Pull those cookies out when they look slightly underdone in the middle. Trust me, they’ll finish baking on the hot pan. **Underbaked is better than overbaked for chewy cookies.**
Alternatives & Substitutions
Feeling adventurous or just missing an ingredient? No worries, I got you!
- Chocolate Choices: Mix it up! Try dark chocolate chunks with a sprinkle of sea salt on top. Or white chocolate chips with macadamia nuts (a personal fave). Peanut butter chips? Caramel bits? The world is your oyster!
- Flour Power: You *can* substitute up to ¼ cup of the all-purpose flour with whole wheat flour for a slightly nuttier flavor, but stick mainly to AP for the best texture. Gluten-free 1:1 blends can work too, but results may vary slightly.
- Spice it Up: A pinch of cinnamon or a tiny dash of cayenne pepper (for a subtle kick!) can be a fun addition, especially with dark chocolate.
- Nutty Additions: Pecans, walnuts, or even toasted hazelnuts would be delightful additions, particularly complementing the brown butter flavor.
FAQ (Frequently Asked Questions)
- Can I use salted butter instead of unsalted?
Technically, yes, but you’ll want to reduce the added salt in the recipe by about ¼ teaspoon to avoid overly salty cookies. **Unsalted gives you more control over the salt content.**
- How do I store these cookies?
Once completely cooled, store them in an airtight container at room temperature for up to 3-4 days. If they last that long, you have impressive self-control!
- Can I freeze the dough?
Absolutely! Scoop the dough into balls, place them on a baking sheet, and freeze until solid. Then transfer to a freezer-safe bag. When you’re ready to bake, pop them straight from the freezer into a preheated oven, adding a few extra minutes to the baking time. Instant gratification, whenever!
- Why did my brown butter burn?
Oops! You probably had the heat too high or weren’t stirring enough. **Keep the heat medium and stir constantly**, watching for those beautiful golden-brown bits, not black ones!
- My cookies came out flat, what happened?
A few culprits here! Your butter might have been too warm when mixed, you might have skipped chilling the dough, or your baking soda might be old. **Ensure your butter cools a bit and don’t skip the chill!**
Final Thoughts
There you have it! Your new go-to recipe for brown butter chocolate chip cookies. It’s simple enough for a weeknight craving, but impressive enough to bring to a potluck and pretend you slaved over it for hours. (Your secret’s safe with me!) Now go forth and conquer that cookie craving. You’ve earned it! Seriously, go make these. Your future self will thank you. And probably so will anyone else who gets to snag one. Enjoy!


