So, you’re craving something warm, gooey, and utterly delicious, but the thought of spending hours in the kitchen makes you want to curl up with a bag of chips instead? Yeah, me too. We’ve all been there. Good news, buttercup! Today, we’re whipping up a batch of Brown Sugar Chocolate Chip Cookies that are so good, so easy, and so ridiculously satisfying, you’ll wonder why you ever bought store-bought. Get ready to impress yourself!
Why This Recipe is Awesome
Let’s be real: life’s too short for complicated recipes that require a chemistry degree. This one? It’s basically **idiot-proof**. Seriously, even on my most distracted, “what even IS a teaspoon?” days, these come out perfect. The magic lies in the brown sugar, giving these cookies an insane chewiness and a depth of flavor that’ll make your taste buds do a happy dance. Plus, they’re quick. Like, “I need cookies NOW” quick. No fancy equipment, no bizarre techniques, just pure cookie bliss. Trust me, you’re gonna love ’em.
Ingredients You’ll Need
- 1 cup (2 sticks) unsalted butter, softened. Not melted, not rock hard. Just that perfect squishy, “I’ve been on the counter for a bit” kind of soft. This is key!
- 1 cup packed light brown sugar. This is your chewy superstar. Don’t skimp!
- 1/2 cup granulated sugar. Just a touch to balance things out.
- 2 large eggs. Room temp if you’re feeling fancy, but straight from the fridge is usually fine in my book (shh, don’t tell the pros).
- 2 teaspoons vanilla extract. Good quality stuff, please! It makes a difference.
- 2 1/4 cups all-purpose flour. Standard stuff, no need to get crazy.
- 1 teaspoon baking soda. The leavening hero!
- 1/2 teaspoon salt. Crucial for balancing the sweetness and making everything pop. Seriously, don’t forget it.
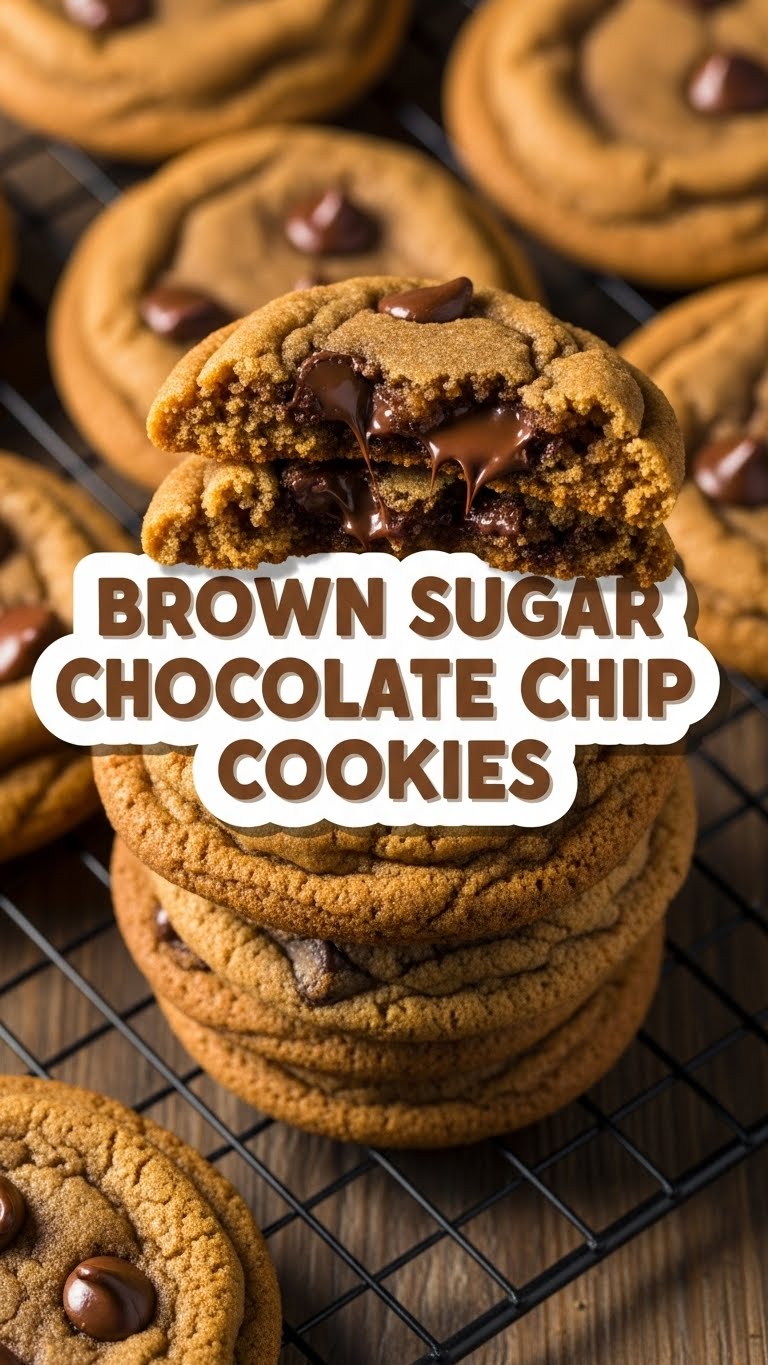
- 1 1/2 cups chocolate chips (or chunks, because who doesn’t love a good chocolate puddle?). Semi-sweet, milk, dark—your call, champ! A mix is divine.
Step-by-Step Instructions
- Preheat your oven and prep your pans. Set your oven to **375°F (190°C)**. Line a couple of baking sheets with parchment paper or silicone mats. This makes cleanup a breeze and prevents sticking.
- Cream the butter and sugars. In a large bowl (or stand mixer, if you’re living the dream), beat the softened butter, brown sugar, and granulated sugar together until they’re light and fluffy. This usually takes about 2-3 minutes. Scrape down the sides of the bowl!
- Add the wet ingredients. Beat in the eggs one at a time, mixing well after each addition. Then, stir in that glorious vanilla extract. Make sure everything is well combined and looks smooth.
- Whisk the dry ingredients. In a separate, medium bowl, whisk together the flour, baking soda, and salt. Give it a good whisk to ensure everything is evenly distributed.
- Combine wet and dry. Gradually add the dry ingredients to the wet ingredients, mixing on low speed (or by hand) until just combined. **Stop mixing as soon as the flour streaks disappear!** Overmixing is the enemy of tender cookies.
- Stir in the chocolate. Fold in your chocolate chips (or chunks!) until they’re evenly distributed throughout the dough. Try not to eat too much raw dough… I know, it’s hard.
- Scoop and bake. Drop rounded tablespoons of dough onto your prepared baking sheets, leaving about 2 inches between them. These babies will spread!
- Bake ’em up! Pop them in the preheated oven for **9-12 minutes**. You want the edges to be golden brown and the centers to still look a little soft. Trust the process.
- Cool and devour. Let the cookies cool on the baking sheets for a few minutes before transferring them to a wire rack to cool completely (if you can wait that long, you’re stronger than me).
Common Mistakes to Avoid
- Not preheating the oven: Rookie mistake! Your oven needs to be at the right temp from the get-go for even baking and perfect spread.
- Overmixing the dough: I said it once, I’ll say it again: **overmixing develops gluten**, leading to tough, chewy-in-a-bad-way cookies. Mix until *just* combined.
- Using cold butter (or melted butter): Cold butter won’t cream properly, and melted butter will give you greasy, flat cookies. Softened is the sweet spot.
- Overbaking: Don’t wait until they look super firm in the oven. They continue to cook a little on the hot pan after you pull them out. A slightly underbaked center means ultimate chewiness!
- Not using parchment paper: Cookies stick, sad faces ensue. Just use it, trust me.
Alternatives & Substitutions
Feeling adventurous or missing an ingredient? No stress!
- Butter: Can you use margarine? Well, technically yes, but why hurt your soul like that? Margarine can work, but it changes the flavor and texture significantly. For a dairy-free option, good quality vegan butter sticks can work wonders.
- Chocolate Chips: Mix it up! White chocolate chips, butterscotch chips, chopped nuts (walnuts or pecans are fab), toffee bits, or even a sprinkle of sea salt on top before baking. IMO, a mix of milk and dark chocolate chips is the ultimate combo.
- Flour: For a gluten-free version, a 1-to-1 gluten-free baking flour blend usually works pretty well, though you might notice a slight texture difference.
- Brown Sugar: If you’re completely out of brown sugar and only have white granulated, you can make a quick substitute by adding 1 tablespoon of molasses per cup of white sugar. It’s not exactly the same, but it’ll get you by in a pinch!
FAQ (Frequently Asked Questions)
Got questions? I’ve got (casual) answers!
- Can I chill the dough? Absolutely! Chilling the dough for at least 30 minutes (or even overnight!) can enhance the flavor and give you a thicker, chewier cookie. It’s not mandatory, but it’s a **pro-level move**.
- My cookies spread too much! What happened? Likely culprits: your butter was too soft/melted, your oven wasn’t hot enough (so they melted before setting), or you didn’t use enough flour. Try chilling the dough next time!
- How do I store these cookies? In an airtight container at room temperature for up to 3-4 days. If they last that long, you’re a miracle worker! You can also freeze baked cookies for up to a month.
- Can I freeze the raw dough? Heck yes! Scoop the dough onto a parchment-lined sheet, freeze until solid, then transfer the frozen dough balls to a freezer bag. Bake from frozen, adding a few extra minutes to the bake time. Genius, right?
- What kind of brown sugar is best? Light or dark? I usually stick with light brown sugar for this recipe as it offers a perfect balance of chewiness and sweetness. Dark brown sugar will give a deeper molasses flavor and an even chewier cookie, which some people absolutely adore!
- Why is salt so important in cookies? It’s not just for savory dishes! Salt balances the intense sweetness of the sugars and chocolate, preventing the cookies from tasting one-note. It actually enhances all the other flavors. **Don’t skip it!**
Final Thoughts
And there you have it! You’ve successfully navigated the glorious world of brown sugar chocolate chip cookies. Now go forth, enjoy the fruits of your (minimal) labor, and bask in the deliciousness. Share them (if you can bear to), or hoard them all for yourself – no judgment here. You’ve earned every single chewy, chocolatey bite. Happy baking, my friend!


