So you’re craving something ridiculously delicious, warm, and chewy, but the thought of getting out of your PJs to do anything complex is just… *ugh*? You and me both, friend. Good news: I’ve got a recipe that’s about to change your cookie game, without requiring a culinary degree or an hour-long prep session. Get ready for Olive Oil Chocolate Chip Cookies – they’re a revelation, trust me.
Why This Recipe is Awesome
Okay, let’s be real. Most cookie recipes involve butter, which is great, but sometimes you want something a little… *different*. Or maybe you just ran out of butter, and you’re too lazy to run to the store (been there!). This recipe swaps butter for olive oil, and before you raise an eyebrow, hear me out: it gives the cookies this incredible chewiness and a subtle, sophisticated fruitiness that butter just can’t quite replicate. Plus, it’s pretty much **idiot-proof**. Seriously, even I didn’t mess it up, and my track record with new recipes isn’t always sparkling. They come together super fast, bake beautifully, and will make you look like a genius. What’s not to love?
Ingredients You’ll Need (aka The Good Stuff)
- 1 ½ cups (190g) All-Purpose Flour: The basic building block of cookie dreams. Don’t overthink it.
- ½ teaspoon Baking Soda: Gives them that perfect lift and chew.
- ½ teaspoon Fine Sea Salt: Crucial for balancing the sweetness and making those chocolate chips sing. Don’t skip it, unless you enjoy blandness.
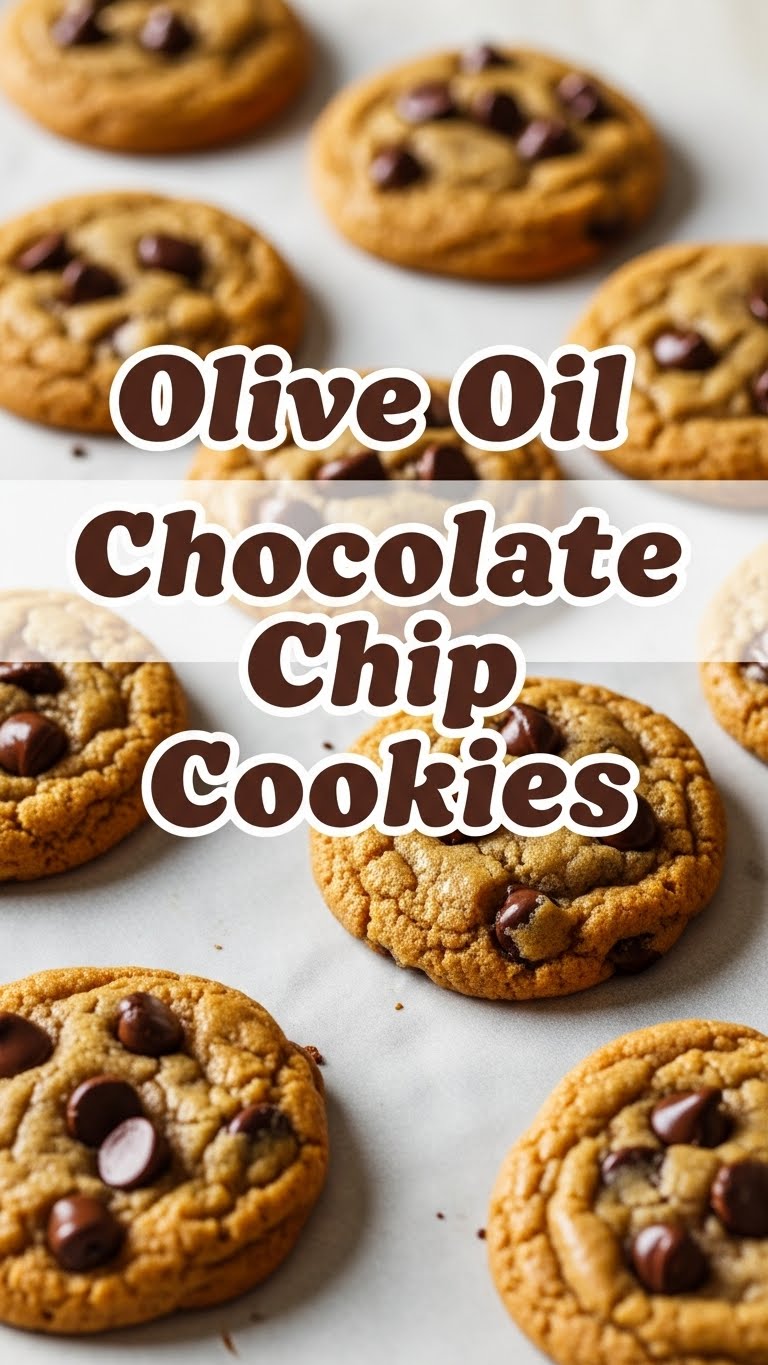
- ½ cup (120ml) Extra Virgin Olive Oil: The star of our show! Use a good quality one, but nothing so fancy you’d feel guilty baking with it.
- ¾ cup (150g) Granulated Sugar: For sweetness, obviously.
- ½ cup (110g) Packed Light Brown Sugar: Adds moisture and that lovely caramel-y depth.
- 1 Large Egg: Binds it all together. Room temp is best, but if you forget, don’t sweat it too much.
- 1 teaspoon Vanilla Extract: The MVP of all baking. Don’t be shy.
- 1 cup (170g) Chocolate Chips (or chopped chocolate!): Your choice! Dark, semi-sweet, milk… whatever makes your heart happy. I’m a dark chocolate fan myself, but you do you.
- Flaky Sea Salt (optional, but highly recommended for sprinkling): A little sprinkle on top makes them look fancy and taste even better. Trust me on this one.
Step-by-Step Instructions (Let’s Get Baking!)
- Preheat & Prep: First things first, turn your oven to **375°F (190°C)**. Line a couple of baking sheets with parchment paper. This isn’t optional, unless you enjoy scraping cookies off trays.
- Whisk the Dry Stuff: In a medium bowl, whisk together your flour, baking soda, and fine sea salt. Set it aside for a hot minute.
- Mix the Wet Stuff: In a larger bowl, whisk the olive oil, granulated sugar, and brown sugar until it’s smooth and perfectly combined. It should look like a glorious, golden syrup.
- Egg & Vanilla Time: Crack in your egg and add the vanilla extract to the wet mixture. Whisk vigorously until everything is fully incorporated and looks like a creamy dream.
- Combine Forces: Slowly add the dry ingredients to the wet ingredients. Mix with a spatula or a wooden spoon until just combined. **Don’t overmix!** Overmixing is the enemy of tender cookies.
- Fold in the Chocolate: Now for the fun part! Gently fold in your chocolate chips. Make sure they’re evenly distributed throughout the dough.
- Scoop ’em Up: Scoop about 1.5 to 2 tablespoons of dough per cookie onto your prepared baking sheets, leaving a couple of inches between each. If you’re using flaky sea salt, sprinkle a tiny pinch on top of each dough ball now.
- Bake Away! Pop those beauties into your preheated oven. Bake for **9-12 minutes**, or until the edges are golden brown and the centers are still a little soft. Remember, every oven is different, so keep an eye on them!
- Cool Down: Let them cool on the baking sheet for a few minutes before transferring them to a wire rack to cool completely. Or, you know, eat one straight off the tray. I won’t judge.
Common Mistakes to Avoid (So You Don’t Cry Over Cookies)
- Skipping the Preheat: Thinking you don’t need to preheat the oven? Rookie mistake! An un-preheated oven leads to sad, unevenly baked cookies. **Always preheat!**
- Overmixing the Dough: I said it once, I’ll say it again: **Don’t overmix!** Once the flour is just combined, stop. Overmixing develops the gluten too much, resulting in tough, cake-like cookies instead of chewy ones.
- Using Low-Quality Olive Oil: While you don’t need your most expensive finishing oil, a cheap, flavorless olive oil will give you bland cookies. Aim for something decent, but save the super fancy stuff for salads.
- Ignoring Your Oven: Baking times are guidelines. If your cookies aren’t golden at 9 minutes, give them another minute or two. If they’re burning at 8, pull ’em out! Get to know your oven, it’s your best baking buddy.
- Eating All the Dough: While incredibly tempting, raw egg isn’t ideal. Plus, then you won’t have any cookies! Portion control, people!
Alternatives & Substitutions (Get Creative!)
Feeling a little wild? Or maybe you’re missing an ingredient? No stress, here are a few ideas:
- Chocolate Varieties: Not a fan of plain chips? Try white chocolate, butterscotch, or even a mix! Chopping up a good quality chocolate bar also makes for glorious puddles of chocolate goodness. IMO, chopped chocolate always wins.
- Add-ins: Want to zhuzh things up? Toss in some chopped nuts (walnuts, pecans!), shredded coconut, or a pinch of orange zest for a vibrant twist. A tiny bit of espresso powder can also deepen the chocolate flavor beautifully.
- Vegan Option? You *could* try a flax egg (1 tbsp ground flaxseed + 3 tbsp water, let sit for 5 mins) instead of a regular egg. I haven’t personally tried it with this specific recipe, but it often works for olive oil-based baked goods. Report back if you do!
- Flour Power: While all-purpose is classic, you could experiment with a mix of whole wheat pastry flour for a nuttier flavor, but be prepared for a slightly different texture. **Stick to the recipe for your first batch though!**
FAQ (Because You Have Questions, I Have (Slightly Sarcastic) Answers)
- Can I use light olive oil? You *can*, but why would you want to? The extra virgin olive oil is what gives these cookies their unique flavor and amazing texture. Light olive oil is, well, *lighter* in flavor and won’t have the same oomph. Don’t be scared of the good stuff!
- My cookies spread too much! What happened? A few culprits: your oven might not be hot enough (re-check that preheat!), your dough might have been too warm, or you might have used too much olive oil. For extra insurance, you can chill the dough for 20-30 minutes before baking.
- How long do these cookies last? If you manage not to eat them all in one go (impressive!), they’ll stay fresh in an airtight container at room temperature for about 3-4 days. But let’s be real, they rarely make it past day two.
- Can I freeze the dough? Absolutely! Roll the dough into balls, place them on a parchment-lined baking sheet, and freeze until solid. Then transfer to a freezer-safe bag. When you’re ready to bake, just pop them onto a baking sheet and add a couple of extra minutes to the bake time. Future you will thank you.
- Is olive oil healthier than butter? Look, we’re making chocolate chip cookies here, not a kale salad. While olive oil has different nutritional benefits than butter, let’s focus on the deliciousness, shall we? These are a treat, so enjoy them!
Final Thoughts (Go Forth and Conquer!)
And there you have it! Your new go-to, secretly sophisticated, ridiculously easy chocolate chip cookie recipe. Seriously, these olive oil beauties are going to blow your mind and probably earn you a few compliments. Now go impress someone—or yourself—with your new culinary skills. You’ve earned it, you magnificent baking wizard! Happy munching!


