So you’re craving something warm, gooey, and utterly delicious, but the thought of a complicated recipe makes you want to just order takeout? Been there, my friend. Let’s make some *actual* comfort food without breaking a sweat or your kitchen.
Why This Recipe is Awesome
Seriously, this isn’t just *another* chocolate chip cookie recipe. This is THE one. It’s designed for maximum deliciousness with minimum fuss. You won’t need a culinary degree, just a working oven and a sweet tooth.
Think soft centers, slightly crispy edges, and chocolate chips melting in your mouth. It’s practically magic, and frankly, it’s pretty **idiot-proof**. Even I, the queen of kitchen mishaps, manage to pull these off perfectly every single time.
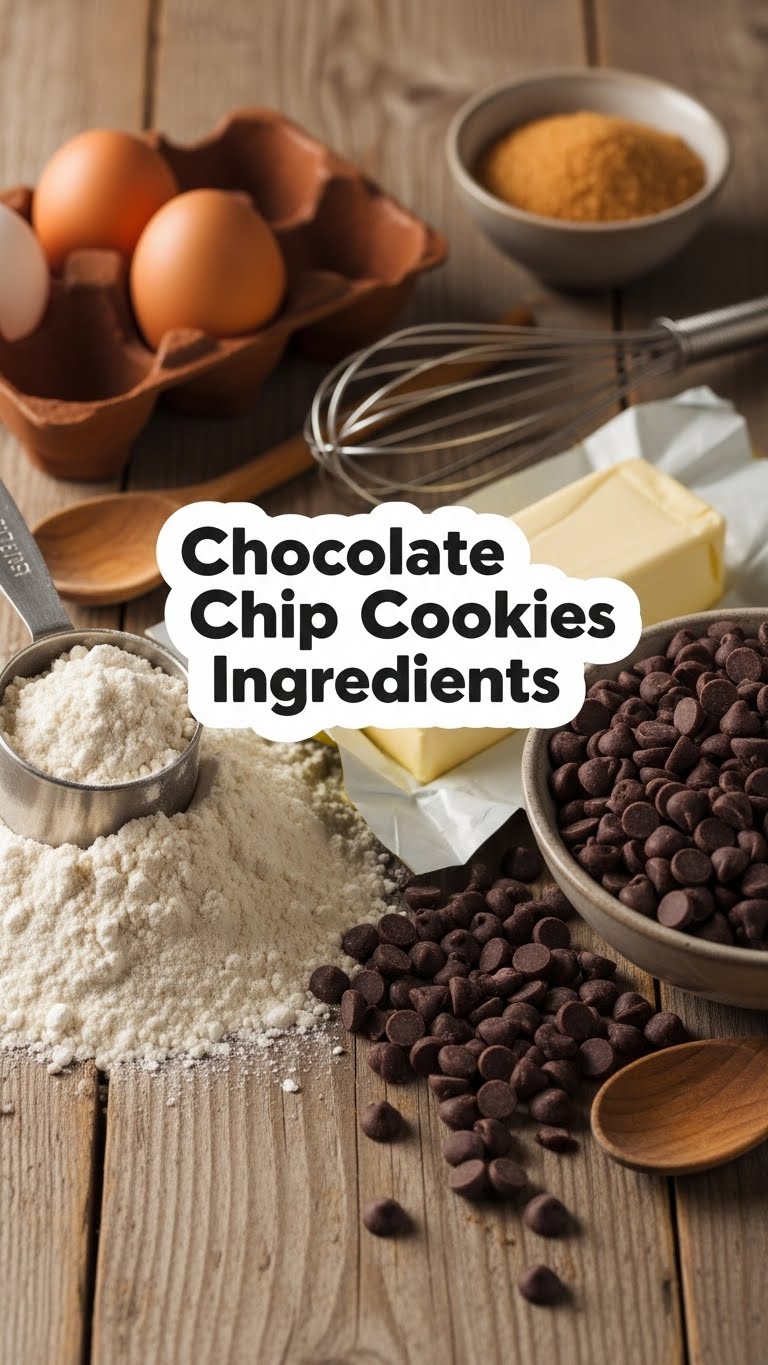
Ingredients You’ll Need
- Unsalted Butter: One stick (that’s 1/2 cup or 113g for the grammers out there). Softened, but not melted. Like, left out on the counter while you debated your life choices.
- Granulated Sugar: 1/2 cup (100g). The classic sweetener.
- Brown Sugar: 3/4 cup (150g), packed. This is your secret weapon for chewiness. Don’t skip it!
- Large Eggs: Two of ’em. Preferably at room temperature. They’re the glue that holds this sugary dream together.
- Vanilla Extract: Two whole teaspoons. Don’t skimp! A good quality vanilla is a game-changer. It’s like the secret weapon of yum.
- All-Purpose Flour: 1 3/4 cups (210g). Just regular ol’ flour. Don’t worry about fancy stuff unless you’re feeling extra.
- Baking Soda: One teaspoon. Gives them that lovely lift. Don’t confuse it with baking powder, unless you want flatter cookies (which, sometimes, is okay too, I guess?).
- Salt: 1/2 teaspoon. Balances the sweetness. Crucial! Don’t skip it, unless you want your cookies to taste like just pure sugar.
- Chocolate Chips: One generous cup (or more, we don’t judge). The star of the show! Use your favorite – semi-sweet, milk, dark, or a mix. More is always better, right?
Step-by-Step Instructions
- Preheat & Prep: Get that oven heated to 375°F (190°C). Line a baking sheet with parchment paper. Trust me, it makes cleanup a breeze.
- Cream the Butter & Sugars: In a large bowl, cream the softened butter with both sugars until it’s light and fluffy. This usually takes about 2-3 minutes with an electric mixer. Don’t rush this step; it’s key for texture!
- Add Eggs & Vanilla: Beat in the eggs one at a time, making sure each is fully incorporated before adding the next. Stir in that delicious vanilla extract.
- Combine Dry Ingredients: In a separate medium bowl, whisk together the flour, baking soda, and salt. Whisk it good!
- Mix Wet & Dry: Gradually add the dry ingredients to the wet ingredients, mixing on low speed just until *barely* combined. Overmixing is a sin! Stop as soon as you don’t see any streaks of flour.
- Fold in Chocolate Chips: Gently fold in the chocolate chips with a spatula. Be generous!
- Scoop & Bake: Drop rounded tablespoons of dough onto your prepared baking sheet. Leave a little space between them, as they *will* spread.
- Bake ’em Up! Bake for 9-12 minutes, or until the edges are golden brown and the centers still look slightly soft. Remember, they’ll continue to bake a little on the pan!
- Cool Down: Let them cool on the baking sheet for a few minutes before transferring them to a wire rack to cool completely (if you can wait that long, you’re a stronger person than I am).
Common Mistakes to Avoid
- Cold Butter: Trying to cream rock-hard butter is a recipe for arm pain and lumpy dough. Soften it, please!
- Overmixing the Dough: This develops the gluten too much, leading to tough, chewy (not in a good way) cookies. Mix just until combined, then stop.
- Skipping the Salt: Your cookies will taste flat and overly sweet. Salt balances everything out and makes the chocolate pop!
- Baking on an Unlined Sheet: Hello, sticky mess and unevenly cooked bottoms! Use parchment paper or a silicone mat for easy release and even baking.
- Not Chilling the Dough (Sometimes): While not strictly required for *this* recipe, if your dough is super warm or your cookies are consistently flat, a quick 15-minute chill can help prevent over-spreading. Pro tip: Always worth a try if you’re having flat cookie issues!
- Eating All the Dough Before Baking: Self-control, my friend, self-control! (Okay, a little taste test is fine, IMO.)
Alternatives & Substitutions
Feeling adventurous or just missing an ingredient? No worries, we can usually make it work!
- Butter: Can you use margarine? Technically yes, but… why hurt your soul like that? Butter gives these cookies their superior flavor and texture. If you must, use a good quality stick margarine. For dairy-free, use a plant-based butter alternative.
- Chocolate Chips: Mix it up! Try white chocolate chips, butterscotch chips, chopped nuts, M&Ms, or even a sprinkle of sea salt on top before baking. Get wild!
- Flour: All-purpose works best here. Whole wheat will give a denser, nuttier cookie, which isn’t bad but definitely changes the vibe. Gluten-free flour blends can also work, just be sure they’re designed for baking.
- Vanilla Extract: Ran out? A tiny splash of almond extract can work in a pinch, but it’ll give a different flavor profile. Embrace the change!
FAQ (Frequently Asked Questions)
Got questions? I’ve got answers (and probably a cookie crumb on my shirt).
- “Can I use melted butter?” Not if you want these exact results, buddy. Melted butter will make your cookies flatter and greasier. Stick with softened butter for that perfect chew.
- “My cookies spread too much! What happened?” Could be a few things: butter was too warm, oven temp was off, or you didn’t measure your flour correctly. A quick chill of the dough (15-30 min) can often fix this!
- “How do I store them?” In an airtight container at room temperature for up to a week. If they last that long, you’re doing something wrong (kidding!).
- “Can I freeze the dough?” Absolutely! Scoop individual portions onto a baking sheet, freeze until solid, then transfer to a freezer-safe bag. Bake from frozen, adding a few extra minutes to the baking time. FYI, fresh is always best, but frozen is a lifesaver.
- “Why are my cookies hard?” Likely overbaked! Pull them out when the edges are set and the centers still look a little soft. They’ll firm up as they cool. Don’t be afraid of a slightly underbaked center.
- “Do I *have* to use both white and brown sugar?” For the absolute best texture and flavor, yes! Brown sugar adds moisture and chewiness, while white sugar adds crispness and helps with spread. It’s a team effort!
Final Thoughts
And there you have it, folks! Your very own batch of irresistible chocolate chip cookies. Seriously, pat yourself on the back – you just created pure joy. They’re perfect for impressing friends, bribing family, or just, you know, devouring solo while binging your favorite show. No judgment here!
Now go forth, enjoy your warm, gooey, perfectly baked masterpieces. You’ve earned every single crumb!


