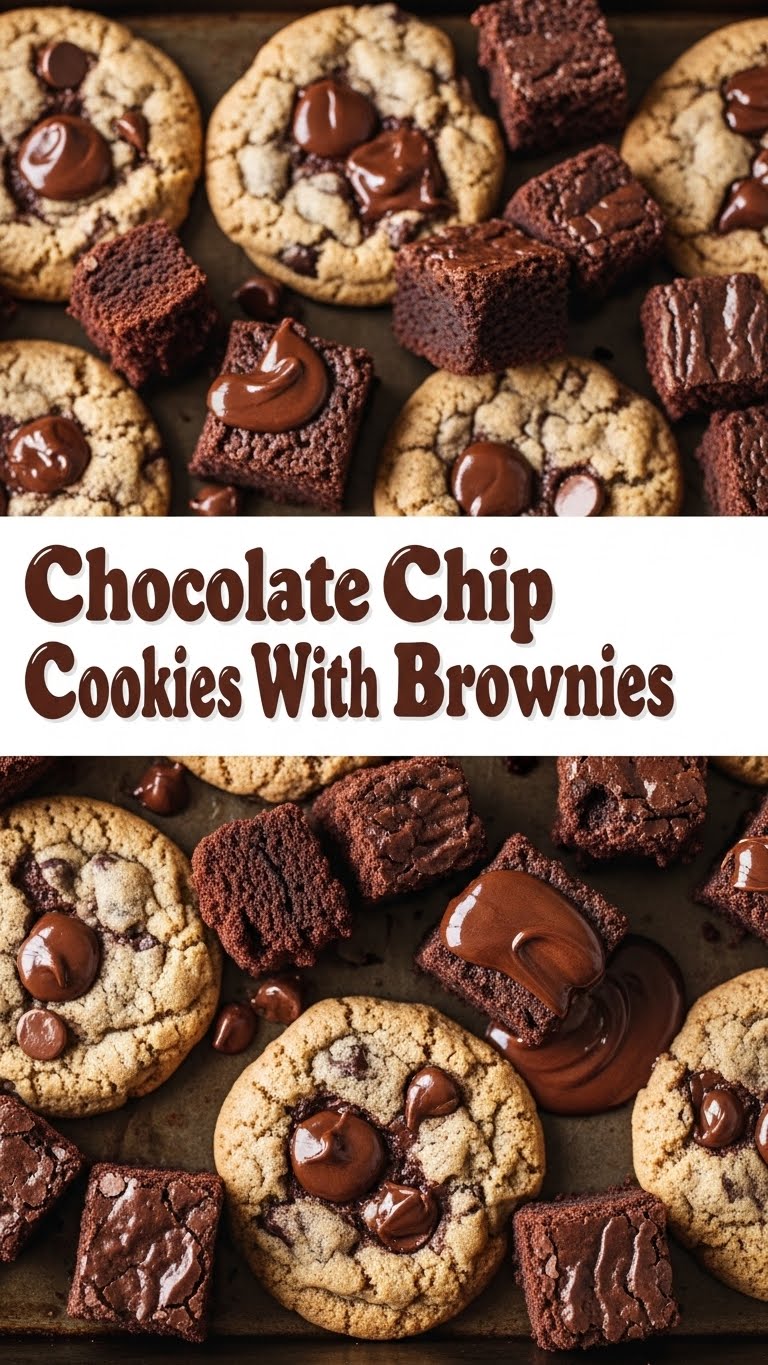
So you’re craving something tasty but too lazy to spend forever in the kitchen, huh? Same. But what if I told you there’s a magical dessert that combines two of the greatest things ever invented: gooey brownies and chewy chocolate chip cookies? No, it’s not a fever dream. It’s real, it’s spectacular, and it’s ridiculously easy to make. Get ready to have your mind (and your taste buds) blown with these legendary Chocolate Chip Cookie Brownies!
Why This Recipe is Awesome
Let’s be real, life is too short for boring desserts. And sometimes, you just can’t pick between a rich, fudgy brownie and a classic, warm chocolate chip cookie. Why should you have to, IMO? This recipe is basically a culinary superpower, giving you the best of both worlds in one glorious square. It’s idiot-proof, even I didn’t mess it up, and the ‘oohs’ and ‘aahs’ you’ll get from anyone who tastes them are totally worth the minimal effort. Plus, it looks super impressive, like you actually tried really hard. Win-win!
Ingredients You’ll Need
Gather ’round, baking buddies! Here’s what you’ll need to conjure up this masterpiece. Don’t worry, it’s all pretty standard stuff, no unicorn tears required.
- Unsalted Butter (1 cup, softened): The golden nectar of all things delicious. Softened, not melted, unless you like a greasy mess.
- Granulated Sugar (1 cup): Sweet, sweet granulated joy.
- Light Brown Sugar (½ cup, packed): Adds that perfect chewiness and depth. Don’t even think about skipping this for plain sugar.
- Large Eggs (2): The glue that holds our dreams together. Room temperature is best, but if you forget, don’t sweat it too much.
- Vanilla Extract (1 teaspoon): Because vanilla makes everything better. It’s a fact.
- All-Purpose Flour (1½ cups): The foundational magic. Sifting? Nah, we’re friends here, just spoon and level.
- Unsweetened Cocoa Powder (½ cup): For that deep, dark, mysterious brownie vibe. Use good quality, please!
- Baking Soda (½ teaspoon): Our little leavening agent friend.
- Salt (½ teaspoon): Don’t skip it! It balances the sweetness like a pro.
- Chocolate Chips (1 cup, plus more for sprinkling): Because, duh. Use your favorite – semi-sweet, milk, dark, a mix – go wild!
Step-by-Step Instructions
Alright, oven mitts on! Let’s get this party started. Read through once, then dive in. You got this!
- Preheat & Prep: First things first, crank your oven to 350°F (175°C). Seriously, do it now. Then, grab an 8×8 or 9×9 inch baking pan, line it with parchment paper, leaving an overhang on the sides. This is your future self’s best friend for easy lifting.
- Cream the Dream: In a large bowl, beat the softened butter with both the granulated and brown sugars until it’s light and fluffy. This usually takes about 2-3 minutes with an electric mixer. Keep scraping down the sides!
- Egg-cellent Addition: Add the eggs one at a time, beating well after each addition. Then, stir in that lovely vanilla extract. The mixture should be smooth and creamy.
- Dry Goods Time: In a separate medium bowl, whisk together the flour, cocoa powder, baking soda, and salt. Make sure there are no lumpy bits of cocoa powder – nobody wants a dry powder surprise!
- Combine Forces: Gradually add the dry ingredients to the wet ingredients, mixing on low speed until *just* combined. Do not overmix! Overmixing leads to tough brownies, and we’re aiming for fudgy perfection.
- Chocolate Chip Extravaganza: Fold in most of your chocolate chips (about ¾ cup). Save some for sprinkling on top later. Because aesthetics matter, even for comfort food.
- Spread the Love: Pour the batter into your prepared baking pan and spread it evenly. Don’t worry if it looks thick – that’s how we get those glorious layers! Sprinkle the remaining chocolate chips on top.
- Bake It Up: Pop that pan into your preheated oven and bake for 30-35 minutes. How do you know it’s done? A toothpick inserted into the center should come out with moist crumbs, not wet batter. If it comes out clean, you’ve overbaked (gasp!).
- Cool Down: Once baked, let them cool in the pan for at least 15-20 minutes before attempting to lift them out by the parchment paper. Then, transfer to a wire rack to cool completely. This is the hardest part, FYI, but essential for perfect slices.
- Slice & Devour: Once fully cooled (or mostly cooled, if you’re impatient like me), slice into squares and prepare for pure bliss.
Common Mistakes to Avoid
Listen up, buttercup! Even the best of us make mistakes. But with these brownies, we’re aiming for perfection. Here are a few common pitfalls to sidestep:
- Thinking you don’t need to preheat the oven: Rookie mistake! A cold oven means uneven baking and sad brownies. Don’t be that person.
- Overmixing the batter: This is a biggie. As soon as the flour streaks disappear, stop mixing. Seriously. Overmixing develops gluten, making your brownies tough instead of wonderfully fudgy.
- Overbaking: The ultimate sin! Dry brownies are a travesty. Keep an eye on them; remember, we’re looking for moist crumbs, not a completely clean toothpick. When in doubt, underbake slightly rather than overbake.
- Not lining the pan: Ever tried to pry sticky brownies from a pan? Not fun. Parchment paper is your friend. Use it.
- Eating the entire batch yourself (in one sitting): Okay, maybe not a “mistake” per se, but pacing is key for maximum enjoyment. Or not. You do you.
Alternatives & Substitutions
Feeling adventurous? Or maybe you’re just missing an ingredient (we’ve all been there). Here are some easy swaps and fun additions:
- Chocolate Type: Not a fan of semi-sweet? Use all milk chocolate chips for a sweeter treat, or dark chocolate chips for a more intense cocoa hit. Or mix ’em up for a chocolate party!
- Nutty Crunch: Add ½ cup of chopped walnuts or pecans to the batter for a delightful crunch. Toasted nuts are even better, if you’re feeling fancy.
- Gluten-Free: Swap out the all-purpose flour for a 1:1 gluten-free baking flour blend. Make sure it contains xanthan gum for the best results.
- Dairy-Free: Use a good quality plant-based butter alternative and dairy-free chocolate chips. Just make sure your butter substitute is suitable for baking.
- Flavor Boosters: A pinch of instant espresso powder will deepen the chocolate flavor without making it taste like coffee. A dash of peppermint extract could turn these into a holiday treat!
FAQ (Frequently Asked Questions)
Got questions? I’ve got answers! Mostly. Maybe.
- Can I use margarine instead of butter? Well, technically yes, but why hurt your soul like that? Butter provides a richer flavor and better texture. Margarine might make them a bit cakier. Proceed with caution.
- How long do these cookies/brownies last? Stored in an airtight container at room temperature, they’re typically good for 3-4 days. But let’s be real, they rarely last that long.
- Can I freeze them? Absolutely! Wrap individual squares tightly in plastic wrap, then place them in a freezer-safe bag or container for up to 2-3 months. Thaw at room temperature.
- My cookies turned out hard/dry, what happened? My guess? You overbaked them. Or possibly overmixed the batter. Less time in the oven for a chewier brownie, and a gentle hand with the mixing!
- What if I don’t have an 8×8 or 9×9 inch pan? A 9×13 inch pan will work, but your brownies will be thinner, and the baking time will be shorter (around 20-25 minutes). Keep an eye on them!
- Can I add other mix-ins? Go wild! Sprinkles, M&Ms, chopped candy bars, pretzels (for that sweet and salty vibe) – if it sounds good, it probably is.
- Do I have to let them cool completely? No, but you’ll have a gooey, crumbly mess if you cut them too hot. If you want neat squares, patience is key. If you just want to shovel warm deliciousness into your face, go for it!
Final Thoughts
And there you have it, folks! Your new go-to recipe for when you can’t decide, or when you just want to show off a little. These Chocolate Chip Cookie Brownies are more than just a dessert; they’re a statement. A statement that says, “I love chocolate, I love fun, and I’m not afraid to combine my favorite things.” Now go impress someone—or yourself—with your new culinary skills. You’ve earned it!

