So, you’re craving something warm, gooey, and chocolate-chip-packed but the thought of dragging out the stand mixer (and then *gasp* cleaning it) makes you want to curl up and cry? Same, friend. Same.
You’re in luck! We’re about to dive into the magical world of no-mixer chocolate chip cookies. Yes, you heard that right. Ditch the heavy machinery, embrace the spatula, and prepare for pure cookie bliss without the extra fuss.
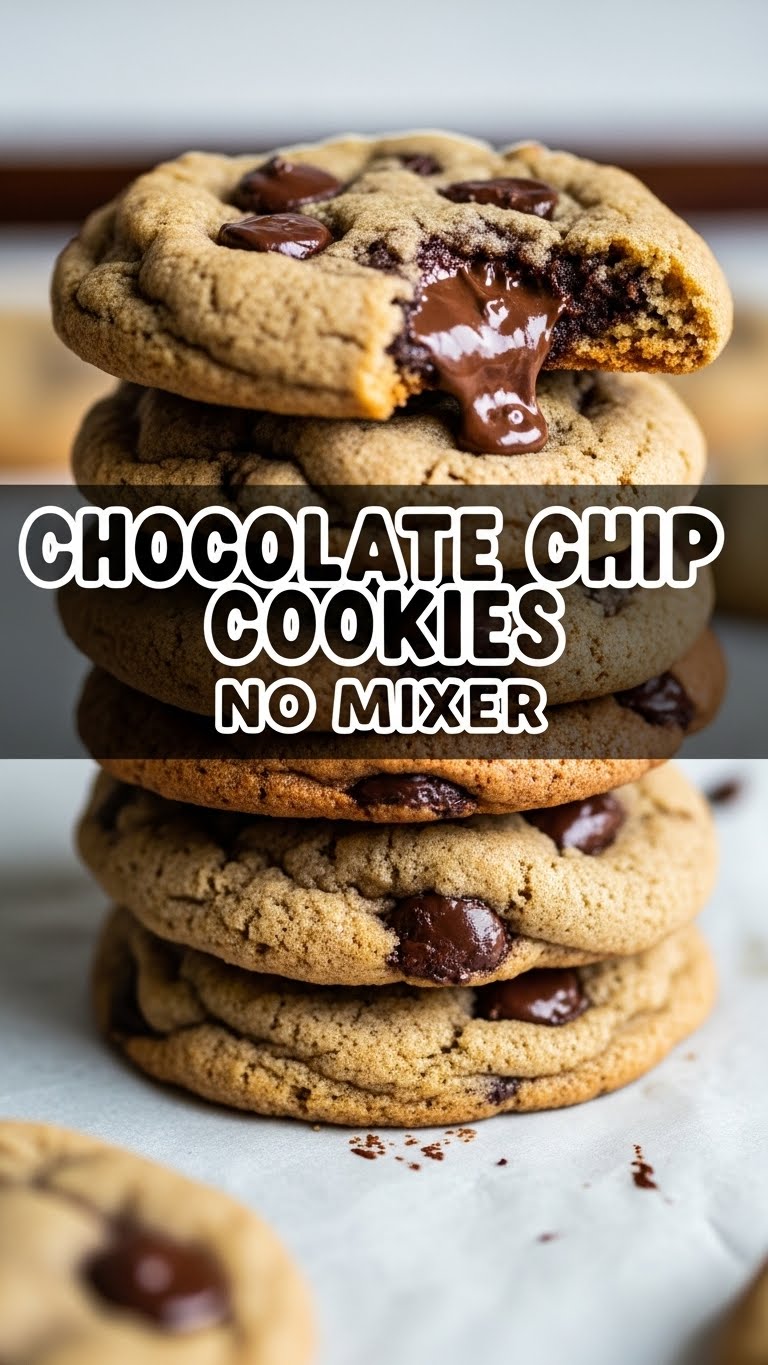
Why This Recipe is Awesome
Let’s be real, who needs a bicep workout from a stand mixer when you can get it from stirring? Kidding (mostly). This recipe is awesome because it’s practically idiot-proof. Seriously, if I can do it without setting off the smoke detector, you’re golden. It’s perfect for those “I need cookies RIGHT NOW” emergencies, last-minute cravings, or when you just can’t be bothered with extra dishes. It’s fast, it’s delicious, and it proves that sometimes, simpler really is better. Plus, no mixer means less noise, so your housemates/pets/neighbors will thank you. Win-win-win.
Ingredients You’ll Need
Gather ’round, my fellow lazy gourmands! Here’s what you’ll need for your culinary masterpiece. Don’t worry, nothing too fancy, just the usual suspects:
- ½ cup (1 stick) unsalted butter: Melted. Yes, melted! This is key for that no-mixer magic. Don’t even think about using cold butter unless you enjoy an arm workout worthy of a personal trainer.
- ½ cup granulated sugar: For that classic sweetness.
- ¼ cup packed light brown sugar: Adds chewiness and a lovely caramel note. Don’t skimp on this one, IMO!
- 1 large egg: Room temperature, if you can remember to take it out ahead of time. If not, don’t stress, it’s not the end of the world.
- 1 teaspoon vanilla extract: The soul of every good cookie. Don’t use the imitation stuff; your taste buds deserve better.
- 1 ¼ cups all-purpose flour: The foundation of our dreams.
- ½ teaspoon baking soda: Our little helper for puffiness.
- ¼ teaspoon salt: Balances the sweetness and makes everything pop. Trust me, it’s essential.
- 1 cup chocolate chips: The star of the show! Milk, semi-sweet, dark—whatever makes your heart sing. Go crazy, I won’t judge.
Step-by-Step Instructions
Alright, apron on (or not, we’re informal here), let’s make some cookie magic happen!
- First things first: Preheat your oven to 375°F (190°C). Line a baking sheet with parchment paper or a silicone mat. This step is non-negotiable, unless you like your cookies fused to the pan.
- Grab a medium-sized mixing bowl. Melt the butter in a microwave-safe bowl or small saucepan. Let it cool for a minute or two – we don’t want scrambled eggs in our cookie dough!
- Pour the melted butter into your mixing bowl. Add both the granulated sugar and the brown sugar. Using a whisk or a sturdy spoon, stir vigorously until everything is well combined and looks like a gloriously smooth, sandy paste. This might take a minute, but enjoy the arm workout!
- Now, crack in that large egg and add the vanilla extract. Mix thoroughly until the egg is fully incorporated and the mixture is light and creamy.
- In a separate, smaller bowl, whisk together the flour, baking soda, and salt. Then, gradually add the dry ingredients to the wet ingredients, mixing just until combined. Be careful not to overmix here; we want tender cookies, not hockey pucks!
- Finally, it’s chocolate chip time! Fold in your chocolate chips with a spatula. Make sure they’re evenly distributed throughout the dough, because every bite deserves chocolate.
- Using a cookie scoop or two spoons, drop rounded tablespoons of dough onto your prepared baking sheet, leaving about 2 inches between each cookie. Don’t crowd the pan; these babies need their space to spread and bake perfectly.
- Bake for 9-12 minutes, or until the edges are golden brown and the centers are still slightly soft. Ovens vary, so keep an eye on them!
- Once baked, let them cool on the baking sheet for a few minutes before transferring them to a wire rack to cool completely (if you can wait that long, you’re a stronger person than I). Enjoy your warm, gooey masterpieces!
Common Mistakes to Avoid
Even though this recipe is super chill, there are a few rookie errors that can derail your cookie dreams. Let’s keep things perfect, shall we?
- Overmixing the Flour: Seriously, once you add the flour, mix *just* until it’s combined. Overmixing develops the gluten too much, leading to tough, chewy cookies instead of soft, tender ones. Nobody wants a cookie that fights back.
- Skipping the Melted Butter Cooling Step: Adding a hot egg to hot butter? Recipe for sadness. Let that melted butter chill out for a minute or two before the egg goes in.
- Not Preheating Your Oven: Thinking you don’t need to preheat? Rookie mistake! A cold oven will mess with the cookie’s spread and texture. Give it time to get to temperature.
- Baking on an Unlined Sheet: Unless you love scraping cookies off a pan (who does?), use parchment paper or a silicone mat. Cleanup is a breeze, and your cookies won’t stick.
- Eating All the Dough: I know, I know, it’s tempting. But raw eggs, my friend. Exercise some self-control. Or, you know, just a little bite won’t hurt… (don’t tell anyone I said that).
Alternatives & Substitutions
Feeling adventurous? Or maybe you’re just out of something. No worries, we’ve got options!
- Butter Swaps: While butter is king here, you can substitute with vegetable shortening for a slightly softer, thicker cookie. Or try coconut oil (melted), but be aware it might impart a slight coconut flavor. Not a bad thing, just different!
- Sugar Shenanigans: If you’re low on brown sugar, you can use all granulated sugar, but your cookies might be less chewy. For a richer flavor, consider adding a tablespoon of molasses with all granulated sugar to mimic brown sugar.
- Chocolate Chip Remix: Don’t limit yourself! Use chopped nuts (walnuts, pecans), M&Ms, toffee bits, white chocolate chips, or a mix of all the above. Dried cranberries or cherries can also add a nice tart contrast. Go wild!
- Gluten-Free Flour: For our gluten-sensitive pals, a 1:1 gluten-free baking blend usually works wonderfully in this recipe. Just make sure it contains xanthan gum.
FAQ (Frequently Asked Questions)
Got questions? I’ve got (casual) answers!
- Can I use margarine instead of butter? Well, technically yes, but why hurt your soul (and your cookies’) like that? Butter provides superior flavor and texture. Margarine can lead to flatter, less flavorful cookies. So, stick with butter if you can!
- Do I need to chill the dough? For this specific no-mixer recipe, chilling isn’t strictly necessary since the melted butter helps keep them from spreading too much. However, a 30-minute chill can sometimes lead to thicker, chewier cookies with a more developed flavor. So, if you have the time, go for it!
- My cookies spread too much! What happened? A few culprits: your butter might have been too warm when mixed, your oven might not be hot enough, or you might have used too little flour. Make sure to level your flour properly!
- How do I store these masterpieces? Store cooled cookies in an airtight container at room temperature for up to 3-4 days. If you want to keep them longer, the baked cookies freeze well for up to 3 months.
- Can I make a double batch? Absolutely! Just make sure your mixing bowl is big enough to handle the extra volume, and consider baking in batches if your oven can’t accommodate two sheets at once without compromising even baking.
- Why are my cookies hard? You likely overbaked them! Remember, they’ll continue to set up as they cool. Pull them out when the edges are golden and the centers still look a tiny bit underdone.
Final Thoughts
Boom! You just made amazing chocolate chip cookies without breaking a sweat (or a stand mixer). You’re basically a kitchen wizard. Now go impress someone—or yourself—with your new culinary skills. You’ve earned it! Enjoy every single delicious, gooey, chocolatey bite. And hey, if you make an extra batch, my address is…


