Ever had one of those days where your brain is screaming for a vacation to a tropical island, but your wallet’s like, ‘Nah, stay home and bake’? Perfect. Today, we’re bringing the island vibes straight to your kitchen, one ridiculously delicious Key Lime White Chocolate Chip Cookie at a time. No passport needed, just a whisk and a serious craving for sunshine-y goodness.
Why This Recipe is Awesome
Listen, I get it. Life is busy, and sometimes the idea of baking feels like signing up for an Olympic sport. But these cookies? They’re the chillest, most laid-back champions you’ll ever meet. They’re idiot-proof, even if your previous baking attempts have ended in a smoke alarm concert, you got this. Seriously.
Not only are they ridiculously easy, but they’re also a flavor party in your mouth: the zingy, bright pucker of key lime balanced out by the creamy sweetness of white chocolate. It’s basically a mini vacation for your taste buds, and who doesn’t need that? Plus, you’ll look like a culinary genius without actually having to put in genius-level effort. Win-win!
Ingredients You’ll Need
Gather ’round, my baking buddy. Here’s what we need to get this tropical cookie party started:
- 1 cup (2 sticks) Unsalted Butter: Softened, please! Because cold butter is a pain in the… well, you know.
- ¾ cup Granulated Sugar: The sweet stuff that makes the world go ’round.
- 1 large Egg: Room temperature. It helps everything bind together beautifully, like a good friendship.
- 2 Tablespoons Fresh Key Lime Juice: Fresh is best, always. Don’t even *think* about that green stuff in a bottle unless you enjoy culinary regret.
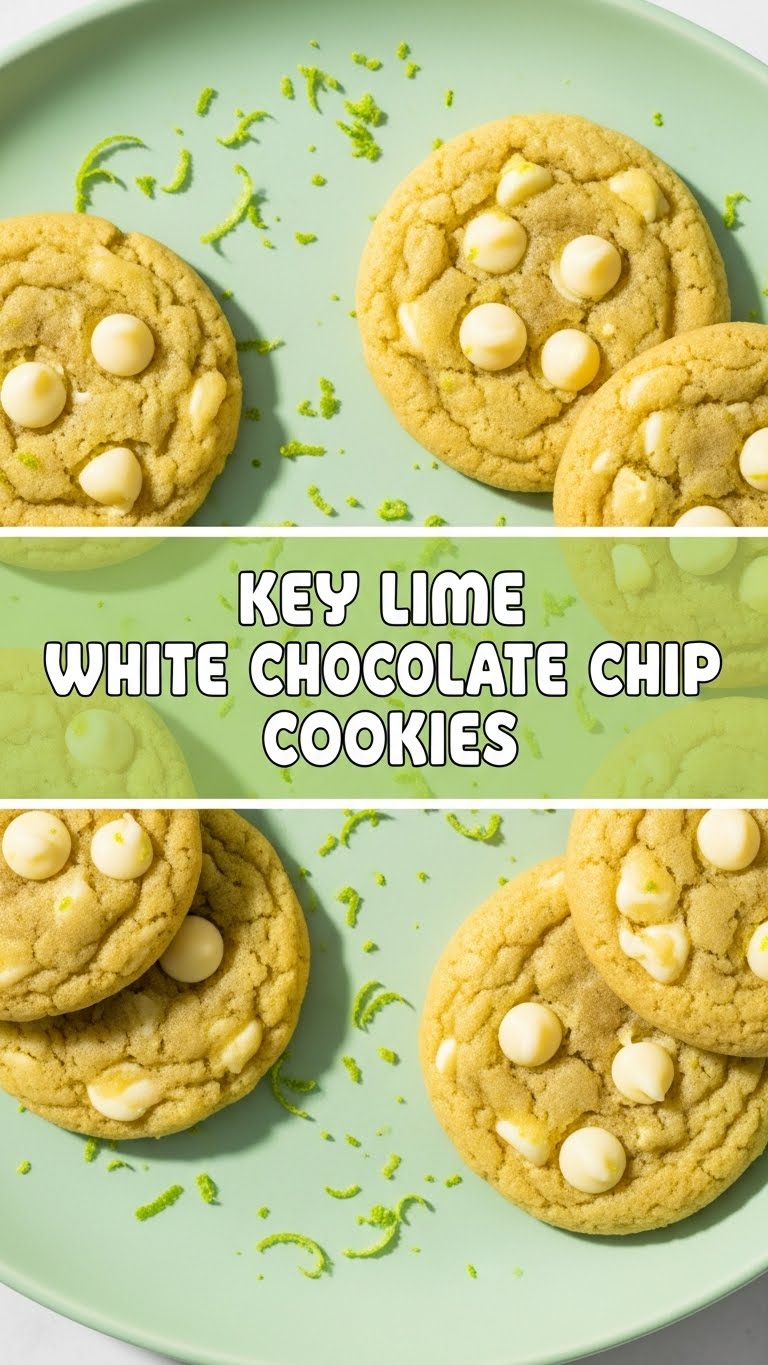
- 2 teaspoons Key Lime Zest: This is where the magic happens, people! Don’t skip it. It’s the key to the key lime flavor.
- 2 cups All-Purpose Flour: The backbone of every great cookie.
- 1 teaspoon Baking Powder: Gives our cookies that lovely lift.
- ½ teaspoon Baking Soda: More lift, more happiness.
- ½ teaspoon Salt: Just a pinch to balance the sweetness and make those flavors pop.
- 1 cup White Chocolate Chips: High quality, please! This is not the place to cheap out, my friend. Go for the good stuff; it makes a difference.
Step-by-Step Instructions
Alright, apron on (or not, I’m not your mom), let’s do this!
- First things first, preheat that oven to 350°F (175°C). While it’s getting toasty, line a couple of baking sheets with parchment paper. Trust me, it makes cleanup a breeze.
- In a large bowl, or your stand mixer if you’re feeling fancy, cream together the softened butter and granulated sugar until it’s light and fluffy. We’re talking 2-3 minutes of pure bliss.
- Beat in the room temperature egg until it’s fully incorporated. Then, add the fresh key lime juice and key lime zest. Mix until just combined – try not to overdo it!
- In a separate, medium-sized bowl, whisk together your dry ingredients: the flour, baking powder, baking soda, and salt. Give ’em a good mix so everything is evenly distributed.
- Gradually add the dry ingredients to the wet ingredients, mixing on low speed (or by hand) until the dough just comes together. Stop mixing as soon as you no longer see streaks of flour. Overmixing makes tough cookies, and nobody wants a tough cookie.
- Finally, gently fold in those glorious white chocolate chips. We want them evenly distributed, but again, don’t overmix!
- Drop rounded tablespoons of dough onto your prepared baking sheets, leaving a couple of inches between each cookie. They like their space.
- Bake for 10-12 minutes, or until the edges are lightly golden and the centers are just set. They might look a little underdone in the middle, but that’s how we get that perfect chewy texture.
- Let the cookies cool on the baking sheets for 5 minutes before transferring them to a wire rack to cool completely. Or, you know, eat one warm. I won’t tell.
Common Mistakes to Avoid
We’re aiming for perfection here (or at least deliciousness without a kitchen disaster), so let’s dodge these common pitfalls:
- Overmixing the Dough: I know, I sound like a broken record, but seriously. Once you add the flour, just mix until *just* combined. Overmixing develops too much gluten, which leads to dense, tough cookies. We want tender, chewy cookies!
- Skipping the Zest: The juice gives tang, but the zest? That’s where the intense, aromatic key lime flavor lives. Don’t be a zest-skipper; your taste buds will thank you.
- Using Cold Ingredients: Room temperature butter and egg are your friends. They emulsify better with the sugar and create a smoother, more uniform dough. Science!
- Eyeballing Measurements: Baking is more of a science than jazz. Use your measuring cups and spoons accurately. Don’t be that person who guesses a “dash” of flour.
- Baking Too Long: Keep an eye on those cookies! They should be lightly golden on the edges and still look a little soft in the middle. If you wait for them to be hard in the middle, you’ll end up with hockey pucks instead of heavenly cookies.
Alternatives & Substitutions
Feeling a little rebellious? Or just ran out of something? Here are some simple swaps:
- No Key Limes? No Problem: Regular lime juice and zest will work just fine. It won’t be *exactly* key lime, but it’ll still be zesty and delicious. Your secret is safe with me.
- White Chocolate Hater? (Gasp! But okay, I get it.): If white chocolate isn’t your jam, try milk chocolate chips for a sweeter, less tart cookie. Or, if you’re feeling tropical, macadamia nuts would be a fantastic addition (or substitution!).
- Gluten-Free Gang: Swap the all-purpose flour for a good quality 1:1 gluten-free all-purpose flour blend. Your cookies will still be delicious!
- Extra Zest, Extra Zest! If you really love that intense key lime flavor, feel free to add another teaspoon of zest. More zing, more fun, IMO.
FAQ (Frequently Asked Questions)
Got questions? I’ve got (casual) answers!
“Can I use bottled key lime juice?”
Well, technically yes, but why hurt your soul like that? Fresh is infinitely better, my friend. Bottled juice just doesn’t have the same vibrant, fresh zing. Trust me on this one.
“Do I have to chill the dough?”
For these bad boys, nope! Unless your kitchen is a sauna and your dough is super sticky, then maybe 15-20 minutes in the fridge wouldn’t hurt to firm it up a bit.
“My cookies spread too much! What happened?”
Ah, the classic spread. Could be a few things: your butter was too soft (or too much of it!), not enough flour, your oven temperature might be off, or your baking powder/soda are expired. Also, don’t put dough on hot baking sheets!
“How do I store these cookies?”
Keep ’em in an airtight container at room temperature for up to 3-4 days. If they last that long, which, let’s be real, they probably won’t.
“Can I freeze the dough?”
Absolutely! Scoop the dough into balls, freeze them on a baking tray until solid, then transfer to a freezer-safe bag. When you’re ready to bake, pop them directly from the freezer onto a lined baking sheet and add a minute or two to the bake time.
“Can I add more zest/juice?”
Go for it if you like a super pucker-power cookie! Just be mindful of adding too much liquid (juice), as it can mess with the dough’s consistency and make your cookies spread more. Zest away, though!
Final Thoughts
So there you have it, folks! Your new favorite cookie recipe, ready to rock your world and impress anyone within sniffing distance. You just whipped up a batch of sunshine and tropical good vibes. Now go enjoy your culinary escape, one delicious bite at a time. You totally earned it!
Don’t forget to share your creations (or don’t, I won’t judge). Happy baking, my friend!


