Okay, so picture this: you’ve had *one of those days*. You’re craving something warm, gooey, chocolatey, and utterly soul-soothing, but the idea of a complicated recipe makes you want to crawl under a blanket and re-watch reality TV. Am I right? Good news, my friend! We’re diving into the magical world of brown butter chocolate chip cookies, and trust me, it’s going to be easier (and tastier) than ordering takeout. This isn’t just any cookie; it’s *the* cookie that will make you feel like a culinary wizard with minimal effort. Let’s get baking!
Why This Recipe is Awesome
Let’s be real, you’re not here for a dry science lesson. You’re here for cookies that taste like a warm hug from a professional baker, but without all the professional baker fuss. This recipe? It’s basically **idiot-proof**. Even I, queen of “accidentally setting off the smoke detector,” manage to pull these off beautifully. The brown butter adds this nutty, caramel-y depth that regular cookies just *dream* about having. It’s next-level deliciousness with minimal extra effort. Plus, everyone will think you’re a culinary genius. You’re welcome.
Ingredients You’ll Need
Don’t panic, it’s mostly stuff you probably already have. Or, an excuse for a quick grocery run, which, let’s face it, usually involves buying snacks you don’t *need*.
- 1 cup (2 sticks) unsalted butter: Go for the good stuff. This is the star of the brown butter show, people!
- 1 cup packed light brown sugar: Gives us that chewy, caramel goodness. Don’t even *think* about skimping.
- ½ cup granulated sugar: For a little crispness and balance.
- 2 large eggs: Room temperature, please! They mix better, trust me.
- 2 teaspoons vanilla extract: Don’t be shy here. Good vanilla makes a difference.
- 2 ¼ cups all-purpose flour: The structure of our cookie empire.
- 1 teaspoon baking soda: Our leavening buddy, for puffiness.
- ½ teaspoon salt: Enhances all the flavors. Don’t skip it, even if you think you’re a salt-hater.
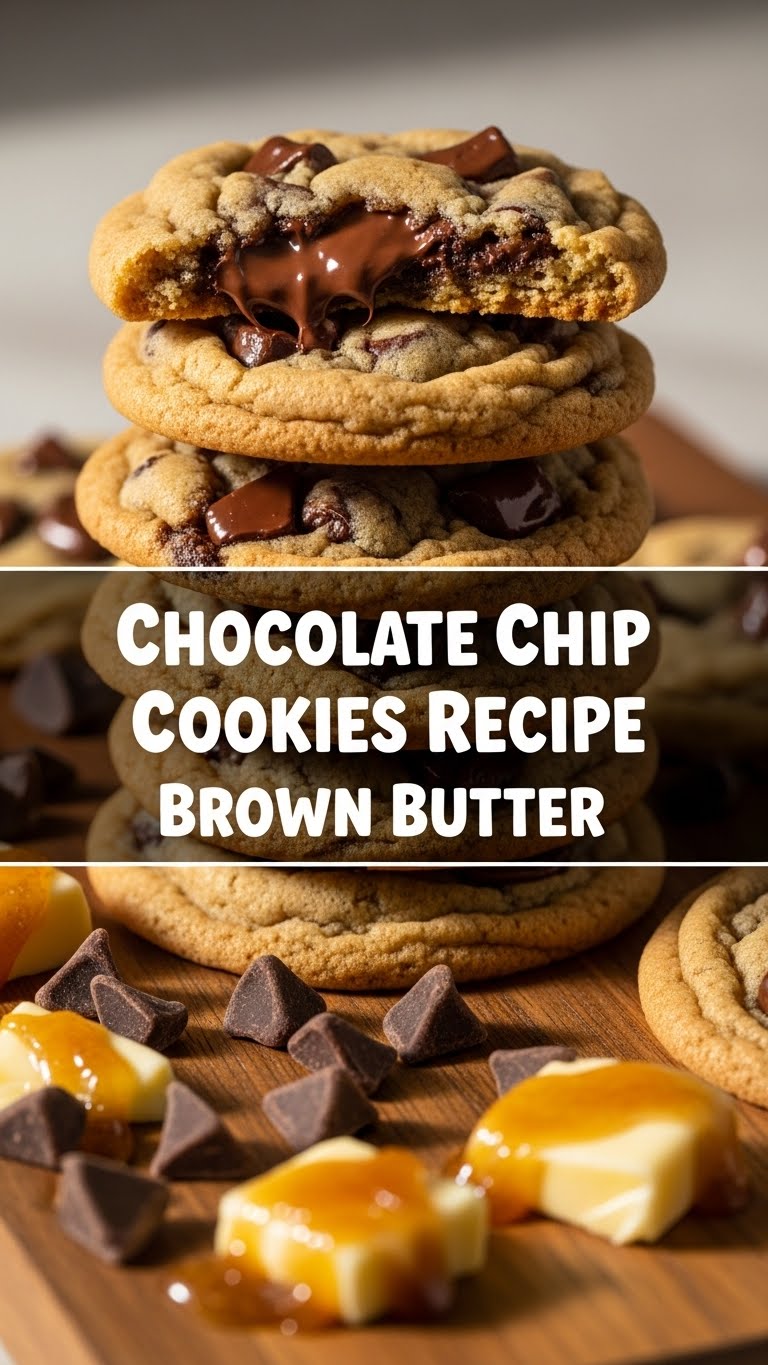
- 1 ½ cups chocolate chips (or chunks!): A mix of milk and semi-sweet is **chef’s kiss**, but use your faves. More is always better, right?
Step-by-Step Instructions
Alright, apron on (or don’t, I won’t judge your loungewear), let’s bake some magic!
Brown that butter, baby! Grab a light-colored saucepan. Melt the butter over medium heat. It’ll foam, then get bubbly, then start to brown on the bottom. Swirl it often! Look for nutty aromas and amber specs. Once it smells like toasted heaven and looks beautifully golden brown, immediately pour it into a heatproof bowl. Let it cool for about 10-15 minutes. **Don’t burn it!** That’s a sad, sad smell.
Mix the wet stuff: Once your brown butter has cooled a bit (it shouldn’t be super hot, just warm), add both sugars to the bowl. Whisk them together until combined. Then, beat in the eggs one at a time until smooth, followed by the vanilla. You want it light and fluffy.
Combine the dry stuff: In a separate medium bowl, whisk together the flour, baking soda, and salt. Easy peasy.
Marry them! Gradually add the dry ingredients to the wet ingredients, mixing on low speed (or by hand) until *just* combined. **Do not overmix!** Overmixing leads to tough cookies, and nobody wants a tough cookie.
Chocolate time! Fold in your chocolate chips. Be generous!
Chill out (optional, but highly recommended): Cover the dough and refrigerate for at least 30 minutes, or even a few hours. This step really lets the flavors meld and prevents spreading. **IMO, this is key for chewy cookies!**
Preheat & Scoop: When you’re ready to bake, preheat your oven to 375°F (190°C). Line a baking sheet with parchment paper. Scoop about 2-tablespoon sized balls of dough onto the sheet, leaving some space between them.
Bake ’em! Bake for 9-12 minutes, or until the edges are golden brown and the centers are still a little soft and gooey.
Cool down: Let the cookies cool on the baking sheet for a few minutes before transferring them to a wire rack to cool completely. Or, you know, eat them warm. We’re friends, I won’t tell.
Common Mistakes to Avoid
Don’t worry, we’ve all been there. Here’s how not to mess up your masterpiece:
- Burning the brown butter: Seriously, watch it like a hawk. The line between nutty brown and burnt black is surprisingly thin. Once it’s amber and fragrant, off the heat it goes!
- Overmixing the dough: This is a biggie. Stop mixing as soon as the flour streaks disappear. Tough cookies are a culinary tragedy.
- Not chilling the dough: While you *can* skip it, your cookies will likely spread more and have a less complex flavor. **Patience is a virtue, especially for cookies.**
- Baking on an unlined sheet: Parchment paper is your best friend. It prevents sticking and ensures even baking. No more sad, stuck-on cookies!
- Overbaking: Pull them out when the centers still look *just* slightly underdone. They’ll continue to cook a bit on the hot baking sheet. This is the secret to gooey centers!
Alternatives & Substitutions
Feeling adventurous or just missing an ingredient? I got you!
- Chocolate: Not a fan of chips? Use chopped chocolate bars (dark chocolate chunks are divine!), M&Ms, or even white chocolate. Feel free to mix and match!
- Nuts: Add ½ cup of chopped pecans or walnuts to the dough with the chocolate chips for extra crunch and flavor. Because who doesn’t love a little texture party?
- Salt: If you’re feeling fancy, sprinkle a tiny pinch of flaky sea salt on top of the cookies right after they come out of the oven. It’s a game-changer, **FYI**.
- Flour: All-purpose is best here, but if you’re in a pinch, a 1:1 gluten-free baking blend might work, though I haven’t personally tested it. Use at your own risk!
- Butter: Can you use margarine instead of butter? Well, technically yes, but why hurt your soul like that? Butter truly makes this recipe shine, especially for browning. Don’t compromise on the brown butter, please!
FAQ (Frequently Asked Questions)
Let’s tackle those burning cookie questions!
- Can I make the dough ahead of time? Absolutely! You can chill the dough for up to 3 days in the fridge. The flavors actually get even *better* as they sit. Talk about meal prep!
- What if I don’t have a light-colored saucepan for browning butter? A light-colored pan helps you see the solids browning, but you can still do it in a darker pan. Just be extra vigilant and stir constantly so you don’t burn it! Rely on your nose, too – it’ll smell nutty.
- My cookies spread too much! What did I do wrong? Usually, it’s either the butter was too warm when mixed, the dough wasn’t chilled enough, or your oven temperature is off. Make sure to **chill your dough** and double-check your oven temp with an external thermometer.
- Can I freeze the cookie dough? Heck yes! Scoop balls of dough onto a parchment-lined tray and freeze until solid. Then transfer them to a freezer-safe bag for up to 3 months. When you want a fresh cookie, just bake from frozen, adding a couple of extra minutes to the baking time.
- Why is brown butter so special? Oh, you sweet summer child! Browning butter cooks out the water and toasts the milk solids, creating a complex, nutty, caramel-like flavor that takes your baking from “good” to “OMG, I need more!” It’s basically magic.
Final Thoughts
So there you have it, my friend. A recipe for brown butter chocolate chip cookies that’s not just a recipe, but a promise of pure, unadulterated joy. You’ve now unlocked a whole new level of cookie baking. Go forth and conquer those cravings! Share them with loved ones, hoard them all for yourself (no judgment here!), or just enjoy the simple satisfaction of baking something truly delicious. Now go impress someone—or yourself—with your new culinary skills. You’ve earned it!


