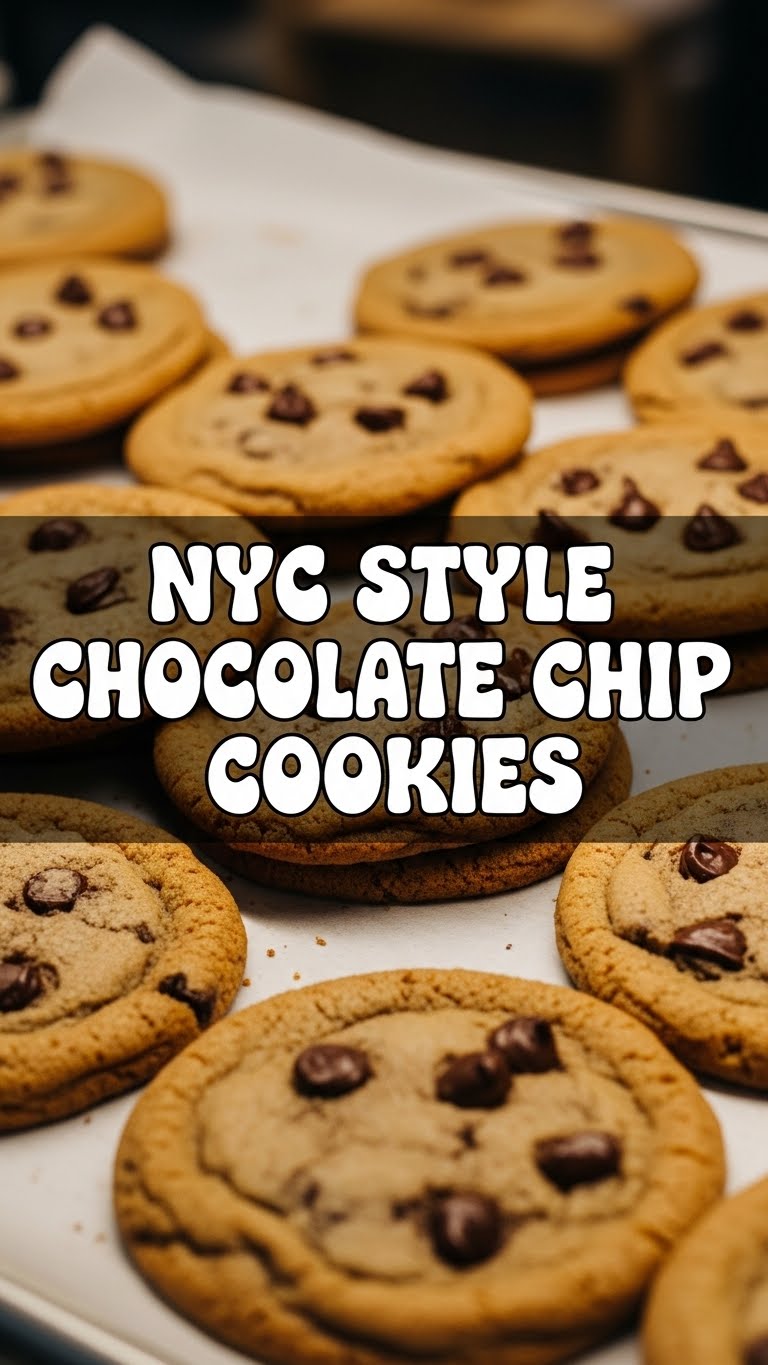
So, you’re scrolling, craving something ridiculously delicious, and maybe, just maybe, tired of those sad, flat cookies that pretend to be chocolate chip royalty? Good. Because today, my friend, we’re not just making cookies; we’re crafting little pieces of **NYC-style chocolate chip heaven**. Think thick, chewy, gooey perfection with puddles of melty chocolate. You in? Thought so. Let’s get baking without taking ourselves too seriously, shall we?
Why This Recipe is Awesome
Okay, first things first: this isn’t just *another* chocolate chip cookie recipe. This is **THE ONE**. The kind that makes you close your eyes, hum a little tune, and forget all your problems for a solid 30 seconds. It’s got that bakery-level chewiness, that slight crisp edge, and a center so ridiculously soft and chocolatey, it’s practically a warm hug. Seriously, forget those delicate, thin cookies. We’re going for **THICCC** and proud.
And guess what? It’s pretty darn idiot-proof. Even if your usual culinary adventure involves microwaving leftovers, you’re going to nail this. I mean, if *I* can do it without setting off the smoke detector, you totally got this. **Trust the process.**
Ingredients You’ll Need
Gather ’round, my little ingredient soldiers! Nothing too wild here, but quality makes a difference. Don’t cheap out on the good stuff!
- **1 cup (2 sticks) unsalted butter**, softened. Not melted, not rock hard. Goldilocks zone. Don’t even *think* about margarine. Your soul will weep.
- **¾ cup packed light brown sugar**. This is for that incredible chewiness. Don’t skimp.
- **½ cup granulated sugar**. Our buddy for a little crisp and spread.
- **2 large eggs**, at room temperature. Cold eggs are just rude and don’t emulsify well.
- **1 teaspoon pure vanilla extract**. Please, for the love of all that is holy, use *pure* vanilla. Imitation is a crime.
- **2 ¼ cups all-purpose flour**. No fancy stuff required, unless ‘fancy’ means ‘in your pantry’.
- **1 teaspoon baking soda**. Our little lift-off agent.
- **1 teaspoon salt**. Crucial for balancing all that sweetness! Don’t skip it; your cookies will taste flat.
- **1 ½ cups chocolate chips/chunks**. This is where the magic happens. A mix of good quality semi-sweet chips AND chopped dark chocolate (or a chopped chocolate bar) is my secret weapon. **Puddles, people, puddles!**
Step-by-Step Instructions
Alright, apron on (or not, live dangerously), let’s make some magic!
- **Cream the wet dream team:** In a large bowl (or stand mixer), beat the softened butter with both brown and granulated sugars until it’s light and fluffy. This usually takes about 2-3 minutes. **Don’t rush this step!** It whips air into your butter, making your cookies soft.
- **Egg-cellent additions:** Beat in the eggs, one at a time, until fully incorporated. Then stir in that glorious vanilla extract. Scrape down the sides of the bowl to make sure everything gets mixed in properly.
- **Dry run:** In a separate medium bowl, whisk together the flour, baking soda, and salt. Give it a good whisk to distribute everything evenly.
- **Marry them up:** Gradually add the dry ingredients to the wet ingredients, mixing on low speed (or by hand) until just combined. **Stop immediately once no dry streaks remain.** Overmixing develops gluten, making tough cookies. We want tender, chewy ones!
- **Chocolate party!** Fold in your beautiful chocolate chips and chunks. Make sure they’re evenly distributed throughout the dough.
- **The Zen Chill:** This is probably the **most important step** for that NYC-style chew. Cover the bowl with plastic wrap and chill the dough in the fridge for at least 30 minutes, or up to 24 hours. The longer, the better the flavor and texture, **IMO.**
- **Preheat & Scoop:** When you’re ready to bake, preheat your oven to 375°F (190°C). Line a baking sheet with parchment paper. Scoop generous balls of dough (about 2-3 tablespoons each) and place them about 2 inches apart on the prepared sheet.
- **Bake to Perfection:** Bake for 10-12 minutes, or until the edges are golden brown but the centers still look slightly soft and gooey. Don’t overbake! They’ll continue to cook a bit on the hot pan.
- **Cool it down (mostly):** Let the cookies cool on the baking sheet for 5-10 minutes before transferring them to a wire rack to cool completely. Or, you know, just eat one immediately. I won’t tell.
Common Mistakes to Avoid
Listen, we all make mistakes. But let’s try to avoid *these* ones, okay?
- **Skipping the Chill:** Seriously, I know you’re eager, but **DO NOT skip chilling the dough**. It allows the flavors to meld, the flour to hydrate, and prevents your cookies from spreading into sad, flat pancakes. Rookie mistake, people.
- **Overmixing the Dough:** Once you add the flour, treat it gently. Mix until *just* combined. If you keep beating it, you’ll end up with tough, dense cookies instead of soft, chewy ones.
- **Using Cheap Chocolate:** Your cookies are only as good as their chocolate. Waxy, subpar chips just won’t cut it. Invest in some good quality chocolate; it’s worth every penny for those glorious melty puddles.
- **Baking on a Hot Sheet:** If you’re doing multiple batches, make sure your baking sheet cools down between uses. Placing dough on a hot sheet will cause them to spread too quickly.
- **Not Preheating Properly:** An oven that’s not up to temperature will mess with your baking time and cookie texture. Invest in an oven thermometer if you suspect your oven is a liar!
Alternatives & Substitutions
Feeling a little adventurous? Here are some ways to shake things up, or just make do with what you’ve got!
- **Chocolate Choices:** Don’t have a mix? All milk chocolate or all dark chocolate works! White chocolate chips can be fun too, or even butterscotch. **FYI**, using chopped chocolate bars creates those beautiful chocolate puddles that chips don’t quite achieve.
- **Add-ins:** Want more texture? Toss in ½ cup of chopped walnuts or pecans (toasted is even better!). A sprinkle of flaky sea salt on top of the warm cookies after baking? **Game changer.**
- **Sugar Swap:** You *can* use all brown sugar for an even chewier, slightly denser cookie, or all granulated for a crispier one. But the mix gives you the best of both worlds!
- **Butter Alternatives:** While butter is king here for flavor and texture, if you absolutely *must*, a high-quality plant-based butter alternative can work, but the results might vary slightly. Just don’t say I didn’t warn you.
FAQ (Frequently Asked Questions)
- **Do I *really* need to chill the dough?** Yes, yes, a thousand times YES! It’s non-negotiable for that thick, chewy, bakery-style texture and depth of flavor. Think of it as a little spa day for your dough.
- **How long do these cookies last?** In my house? About 5 minutes. Realistically, stored in an airtight container at room temperature, they’re best within 3-4 days. But let’s be honest, they rarely last that long.
- **Can I freeze the cookie dough?** Absolutely! Scoop the dough into balls, place them on a parchment-lined baking sheet, and freeze until solid. Then transfer to a freezer-safe bag. Bake from frozen, adding a couple of extra minutes to the baking time. Future-you will thank you!
- **My cookies spread too much! What went wrong?** Could be a few things: your butter was too soft/melted, the dough wasn’t chilled enough (or at all!), or your oven temperature is off (too low can cause spreading). **Check your butter consistency and chill time!**
- **Can I use all dark chocolate?** You absolutely can! If you’re a dark chocolate fiend, go for it. The bitterness will cut through the sweetness beautifully.
- **What’s the best way to get those “puddles” of chocolate?** Chopping up a good quality chocolate bar (like Ghirardelli, Guittard, or even Trader Joe’s Pound Plus bar) instead of just using chips is the secret! Also, placing a few extra chocolate chunks on top of the dough balls *before* baking helps.
Final Thoughts
So there you have it, my friend. You’ve just conquered the magnificent NYC-style chocolate chip cookie. Take a bow! Seriously, that heavenly aroma wafting from your kitchen is proof of your genius. These aren’t just cookies; they’re a statement. They say, “I can bake, I’m fun, and I have excellent taste.”
Now go impress someone (or just yourself, because you deserve it). Grab a warm cookie, a glass of milk, and enjoy the glorious fruits of your labor. You’ve earned it! And don’t forget to send me a picture (or, you know, an actual cookie). Happy baking!

