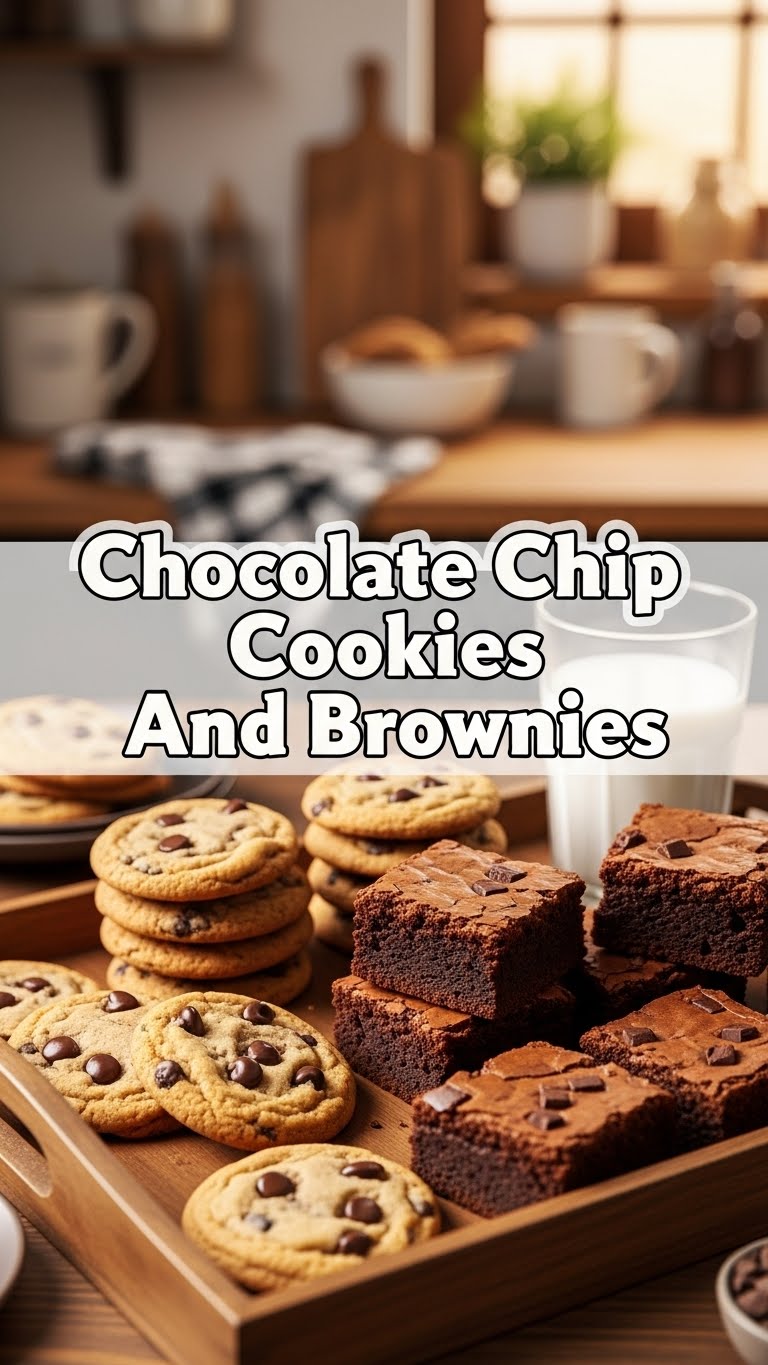
So you’re craving something utterly delicious, a treat that screams “comfort” but also “I’m a genius for making this”? And you’re torn between the chewy goodness of a chocolate chip cookie and the dense, fudgy magic of a brownie? Dilemma, right? **Well, darling, today we’re solving that existential crisis.** We’re not choosing; we’re combining! Get ready for the ultimate mashup: Chocolate Chip Cookies AND Brownies, all in one glorious bite. Your tastebuds can thank me later.
Why This Recipe is Awesome
Because why settle for one amazing dessert when you can have two? This recipe is basically the culinary equivalent of having your cake and eating it too, but with cookies and brownies. It’s the best of both worlds, a fudgy brownie base crowned with a chewy, chocolate-studded cookie layer. Plus, it’s pretty much **idiot-proof**. Even I, with my sometimes questionable kitchen judgment, didn’t mess this up. It looks impressive but requires minimal fuss, making it perfect for when you want to look like a baking guru without, you know, *being* one. FYI, it’s also a fantastic way to impress your friends, family, or just your very hungry self.
Ingredients You’ll Need
Grab your apron (or just wear whatever, who cares?), and let’s get this party started. Here’s your shopping list:
- **Unsalted Butter:** 1 cup (2 sticks), softened. Unsalted because we control the salt. Or salted, if you like to live on the edge. Your call.
- **Granulated Sugar:** 1 ½ cups. For that sweet, sweet bliss.
- **Light Brown Sugar:** ½ cup, packed. Hello, chewiness and depth!
- **Large Eggs:** 3. Preferably from happy chickens, but any large eggs will do the trick.
- **Vanilla Extract:** 2 teaspoons. The good stuff. Don’t skimp here; it makes a difference.
- **All-Purpose Flour:** 1 ¾ cups. Just regular old flour, nothing fancy.
- **Unsweetened Cocoa Powder:** ½ cup. For the brownie part, obvs.
- **Baking Soda:** 1 teaspoon. Our little leavening friend.
- **Salt:** ½ teaspoon. Crucial for balancing all that sweetness. Don’t forget it!
- **Chocolate Chips:** 2 cups. A mix of semi-sweet, milk, or dark is glorious. Go wild! Your playground, friend.
Step-by-Step Instructions
Ready to get your hands a little dirty? (Don’t worry, it’s the fun kind of dirty.)
- **Preheat Power-Up:** First things first, crank that oven to **350°F (175°C)**. Grease and flour a 9×13 inch baking pan, or line it with parchment paper for easy lift-out. Seriously, do the parchment; your future self will thank you.
- **Butter & Sugar Bash:** In a large bowl, cream together the softened butter, granulated sugar, and brown sugar until light and fluffy. This usually takes about 2-3 minutes with an electric mixer. Scrape down the sides of the bowl!
- **Egg-cellent Addition:** Beat in the eggs one at a time, making sure each is fully incorporated before adding the next. Then stir in the vanilla extract. It’s going to smell amazing already.
- **Dry Mix Magic:** In a separate medium bowl, whisk together the flour, cocoa powder, baking soda, and salt. This ensures everything is evenly distributed. Nobody wants a lump of baking soda in their brownie.
- **Combine Forces:** Gradually add the dry ingredients to the wet ingredients, mixing on low speed until *just* combined. **Do not overmix!** Overmixing is the enemy of tender baked goods.
- **Chocolate Chip Avalanche:** Stir in 1 ½ cups of your glorious chocolate chips. Reserve the other ½ cup for later.
- **The Great Divide:** Now, here’s the clever bit. Take about **two-thirds of the dough** and press it evenly into the bottom of your prepared pan. This is your brownie base.
- **Cookie Crumble:** Crumble the remaining one-third of the dough over the brownie layer. This will form your cookie topping. Sprinkle the remaining ½ cup of chocolate chips over the top.
- **Bake It Till You Make It:** Pop that pan into your preheated oven and bake for **30-35 minutes**, or until the edges are set and a toothpick inserted into the brownie layer comes out with moist crumbs, not wet batter.
- **Cool Down, Buttercup:** Let them cool completely in the pan on a wire rack before cutting. This is the hardest part, I know, but trust me, it’s worth it.
Common Mistakes to Avoid
We’ve all been there, making a few oopsies. Here’s how to steer clear of disaster (or at least, less-than-perfect deliciousness):
- **Skipping the Preheat:** Thinking you don’t need to preheat the oven? Rookie mistake. Your oven needs to be at the correct temperature for even baking from the get-go.
- **Overmixing the Batter:** As mentioned, overmixing develops gluten too much, leading to tough, dense brownies and cookies. Mix until *just* combined.
- **Not Greasing/Lining the Pan:** Unless you enjoy chiseling dessert out of a pan, always grease or use parchment paper. Seriously.
- **Cutting Them Hot:** Oh, the temptation! But cutting these beauties while they’re still warm will result in a glorious, gooey mess that’s hard to handle (and share neatly). Patience, young grasshopper.
- **Skimping on Chocolate Chips:** Why? Why would you do that to yourself? Embrace the chocolate!
Alternatives & Substitutions
Feeling a little rebellious? Here are some ways to shake things up:
- **Chocolate Chip Variety:** Don’t limit yourself to just semi-sweet. Try a mix of white chocolate, dark chocolate, or even some chopped peanut butter cups!
- **Nutty Professor:** Add ½ cup of chopped walnuts or pecans to the batter for a delightful crunch.
- **Espresso Boost:** A teaspoon of instant espresso powder mixed into the dry ingredients will deepen the chocolate flavor without making it taste like coffee. **Chef’s kiss!**
- **Butter Substitute:** Can you use margarine instead of butter? Well, technically yes, but why hurt your soul like that? Butter truly delivers on flavor and texture. Stick with it if you can.
- **Gluten-Free Flour:** A 1:1 gluten-free baking blend can often be substituted, but results may vary slightly in texture.
FAQ (Frequently Asked Questions)
- **How do I know when they’re done?** The edges should be set, and the center might still look a little soft and wobbly. A toothpick inserted into the brownie layer should come out with moist crumbs, not wet batter. Trust your gut (and your nose)!
- **Can I make these ahead of time?** You can definitely make the dough a day in advance and store it in the fridge. Just let it come closer to room temp before pressing into the pan. But honestly, fresh-baked is best, **IMO**.
- **My cookies/brownies turned out flat! What happened?** This could be due to old baking soda (check the expiration!), overmixing, or your butter being too melted when you started. Keep that butter soft, not liquid!
- **Can I freeze these?** Absolutely! Once completely cooled, cut them into squares, wrap individually in plastic wrap, and store in an airtight container in the freezer for up to 3 months. Perfect for emergency cravings.
- **What if I only have one type of sugar?** You can typically use just granulated sugar, but the brown sugar really helps with that chewy texture and depth of flavor. It’s worth a quick trip to the store for optimal results, *just saying*.
- **Are these healthy?** Oh honey, we’re not even going there today. Delicious? Absolutely. Healthy? Let’s pretend it’s a “mental health” food.
Final Thoughts
There you have it, folks! A recipe that proves you can indeed have it all. These cookie-brownie bars are a fantastic way to satisfy both cravings in one fell swoop. They’re rich, they’re fudgy, they’re chewy, and they’re bursting with chocolate. So go ahead, whip up a batch. Now go impress someone—or yourself—with your new culinary skills. You’ve earned it!


