So, you’re looking to elevate your cookie game from “meh” to “OMG, where has this been all my life?!” without, you know, *actually* enrolling in a pastry course? You’re my kind of person. We’re about to make some Elevated Chocolate Chip Cookies that are so good, they might just convince you you’re a professional baker. Spoiler alert: you don’t need to be.
Why This Recipe is Awesome
Listen, I get it. Life’s short, and your cookie cravings are immediate. This recipe isn’t just “good,” it’s **aggressively good**. It’s the kind of recipe that makes people ask for the secret, and your secret is… it’s actually super easy. It’s practically idiot-proof (trust me, I’ve tested this theory on myself many times). We’re talking chewy edges, gooey centers, and a flavor profile that screams “I tried harder than I actually did.” Plus, **no chilling required**, because who has time to wait for cookie dough to get its act together?
Ingredients You’ll Need
Gather ’round, my fellow lazy gourmands! Here’s what you’ll need to transform your kitchen into a beacon of deliciousness. Measurements are important, but don’t stress too much; it’s baking, not rocket science.
- 1 cup (2 sticks) Unsalted Butter: Room temperature, please! If it’s cold, your cookies will be sad. If it’s melted, your cookies will be puddles. Find that happy medium.
- ¾ cup Granulated Sugar: The sweet stuff.
- 1 cup Packed Light Brown Sugar: This is the secret weapon for chewiness. Don’t skimp!
- 2 Large Eggs: Also at room temp. Cold eggs can shock your butter. We don’t want shocked butter.
- 2 teaspoons Vanilla Extract: Use the good stuff if you have it. It makes a difference, IMO.
- 2 ¼ cups All-Purpose Flour: Make sure it’s leveled.
- 1 teaspoon Baking Soda: Gives them that little lift.
- ½ teaspoon Salt: Balances all that sweetness. Crucial!
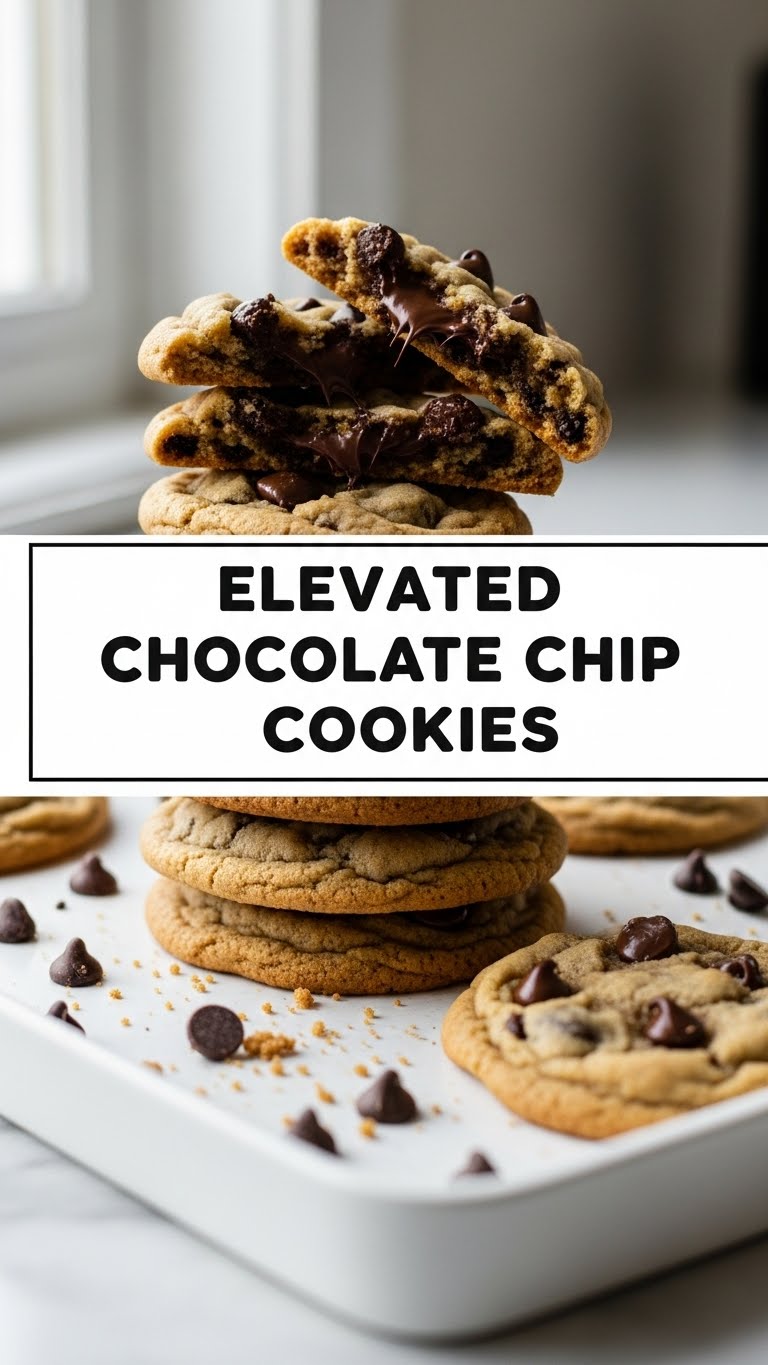
- 1 ½ cups Mixed Chocolate Chips/Chunks: I’m talking dark chocolate, milk chocolate, maybe even some chopped chocolate bars. Variety is the spice of life (and cookies!).
- Optional: Flaky sea salt for sprinkling (before baking, trust me on this).
Step-by-Step Instructions
Alright, apron on (or not, I’m not your mom), let’s get baking! These steps are so easy, you could probably do them in your sleep.
- Preheat & Prep: First things first, preheat your oven to **375°F (190°C)**. Line a couple of baking sheets with parchment paper. This is non-negotiable for easy cleanup and no-stick cookies.
- Cream the Goods: In a large bowl, cream together the room-temperature butter, granulated sugar, and brown sugar. Beat them on medium speed until they’re light and fluffy, about 2-3 minutes. This incorporates air, which leads to happy, fluffy cookies.
- Egg-cellent Addition: Add the eggs one at a time, beating well after each addition. Scrape down the sides of the bowl to make sure everything gets mixed. Then, stir in the vanilla extract.
- Dry Mix: In a separate bowl (yes, another one, just for a sec!), whisk together the flour, baking soda, and salt. This ensures even distribution of your dry ingredients.
- Combine Forces: Gradually add the dry ingredients to the wet ingredients, mixing on low speed until just combined. **Do not overmix!** As soon as you see no more streaks of flour, stop.
- Chocolate Time: Fold in your glorious mix of chocolate chips and chunks. Use a spatula for this, not your mixer, to avoid overworking the dough.
- Scoop & Bake: Drop rounded tablespoons of dough onto your prepared baking sheets, leaving about 2 inches between them. If you’re feeling fancy, sprinkle a tiny pinch of flaky sea salt on top of each cookie before it goes in the oven.
- Golden Goodness: Bake for **9-12 minutes**, or until the edges are golden brown and the centers still look slightly soft. Remember, every oven is a unique snowflake, so keep an eye on ’em!
- Cool Down: Let the cookies cool on the baking sheet for 5 minutes before transferring them to a wire rack to cool completely (if they even make it that far).
Common Mistakes to Avoid
Look, we all make mistakes. But some mistakes are just… avoidable. Learn from my past kitchen mishaps!
- Cold Butter & Eggs: Trying to cream rock-hard butter or mixing cold eggs into a fluffy butter-sugar mixture is like trying to fit a square peg in a round hole. It just won’t work right, and your texture will suffer. **Room temp, always!**
- Overmixing: Once you add the flour, treat your dough gently. Overmixing develops the gluten too much, leading to tough, chewy cookies – and not in the good way. Stop when the flour just disappears.
- Eyeballing Ingredients: Baking is a science, my friend. A very delicious science. Don’t eyeball the flour or sugar unless you’re a seasoned pro (and even then, why risk it?).
- Not Preheating: Rookie mistake! A hot oven ensures your cookies start baking immediately and achieve that perfect texture.
- Greasing Parchment Paper: Seriously, don’t. Parchment paper is already non-stick. You’re just adding unnecessary grease.
Alternatives & Substitutions
Feeling adventurous? Or just realized you’re missing an ingredient? No stress! Here are some ideas to tweak your cookie game.
- Butter Swap: If you’re vegan, you can absolutely use a good quality plant-based butter stick. Just make sure it’s one designed for baking. For the eggs, a flax egg (1 tbsp ground flaxseed + 3 tbsp water, let sit for 5 min) works wonderfully.
- Chocolate Variety: Don’t limit yourself to chips! Chopped up chocolate bars (milk, dark, white), mini M&Ms, toffee bits, or even a mix of nuts (pecans, walnuts) would be fantastic. Get creative!
- Flour Power: Want to make them gluten-free? A 1:1 gluten-free baking flour blend usually works well in this kind of recipe, but be aware that the texture might be slightly different.
- Salt Bae Moment: If you don’t have flaky sea salt, a pinch of regular coarse salt on top before baking still adds that lovely contrast.
FAQ (Frequently Asked Questions)
Got questions? I’ve got answers. Probably. Let’s dig in!
- Can I use margarine instead of butter? Well, technically yes, but why hurt your soul like that? Butter provides a superior flavor and texture that margarine just can’t replicate. Treat yourself!
- My cookies came out flat! What happened? Ah, the dreaded pancake cookie! This usually means your butter was too soft (or even melted), your baking soda is old, or you didn’t measure your flour correctly. Recheck those temps and measurements!
- How long do these cookies last? If you can manage not to devour them all in one sitting, they’ll stay fresh in an airtight container at room temperature for about 3-4 days. But let’s be real, they rarely make it past day one.
- Can I freeze the dough? Absolutely! Scoop the dough balls onto a parchment-lined baking sheet and freeze until solid. Then transfer them to a freezer-safe bag. When you’re ready to bake, just add a couple of extra minutes to the baking time, straight from the freezer. Instant cookies for future you!
- What’s the deal with “room temperature” butter/eggs? It means soft enough to indent easily with your finger, but not greasy or melty. For eggs, it helps them incorporate better into the batter, creating a smoother emulsion and a lighter, fluffier cookie. FYI, you can warm cold eggs quickly in a bowl of warm water for 5-10 minutes.
Final Thoughts
See? You just made some ridiculously delicious, elevated chocolate chip cookies without breaking a sweat (or a spirit). You’re basically a kitchen wizard now. These aren’t just cookies; they’re a statement. A statement that says, “I know good food, and I can make it happen.” Now go impress someone – or just yourself – with your new culinary skills. You’ve earned it!


