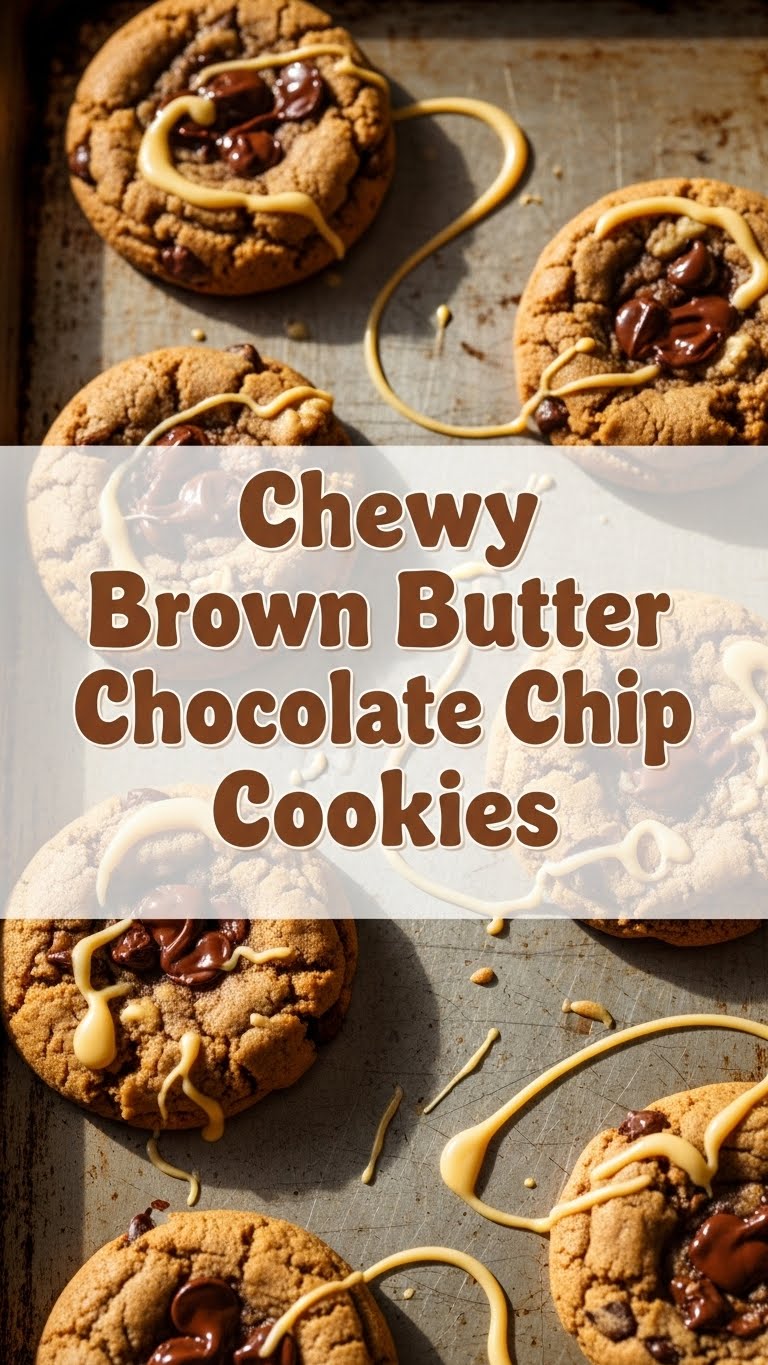
So, you’re scrolling through endless recipes, probably hungry, and thinking, “Can I *really* make something amazing without spending my entire Saturday covered in flour?” Honey, I feel you. And guess what? You absolutely can! Especially when we’re talking about the holy grail of cookies: **Chewy Brown Butter Chocolate Chip Cookies.** Forget those flat, sad, dry imposters. We’re going for gold here, the kind that makes you close your eyes and do a little happy dance.
Why This Recipe is Awesome
Okay, let’s be real. There are a bazillion chocolate chip cookie recipes out there. Why this one? Because it’s not just good; it’s **”I’m going to hide these from my family”** good. It combines the nutty, caramelly magic of brown butter (more on that culinary sorcery later) with that perfect, melt-in-your-mouth chewy texture. It’s the kind of cookie that says, “I’m sophisticated, but I also know how to party.” Plus, it’s pretty much idiot-proof. If *I* can make them without setting off the smoke alarm or accidentally creating a cookie-brick, so can you. It’s also shockingly simple for something that tastes like it came from a fancy bakery. No weird ingredients, no crazy techniques. Just pure, unadulterated cookie joy.
Ingredients You’ll Need
Gather ’round, my sweet-toothed friend! Here’s what you’ll need for your chewy cookie adventure:
- **1 cup (2 sticks) Unsalted Butter:** This is our MVP, our golden ticket. Don’t even think about margarine unless you want to break my heart.
- **1 cup Packed Light Brown Sugar:** Hello, chewiness! This is your secret weapon for that soft, bendy texture.
- **½ cup Granulated Sugar:** Just enough for a little crispness and balance.
- **2 large Eggs:** Room temperature, please! They mix better.
- **2 teaspoons Vanilla Extract:** The good stuff, none of that imitation nonsense. It makes a difference, trust me.
- **2 ¼ cups All-Purpose Flour:** Standard stuff. Don’t compact it; spoon it into your measuring cup and level.
- **1 teaspoon Baking Soda:** Our little lift-off agent.
- **¾ teaspoon Salt:** Crucial for balancing all that sweetness and bringing out the flavor. Don’t skip it!
- **1 ½ cups Chocolate Chips:** A mix of milk and semi-sweet is my personal jam, but you do you. Chunks work too!
Step-by-Step Instructions
- **Brown that Butter, Baby!** In a light-colored saucepan (you need to see the magic happen!), melt the butter over medium heat. Swirl occasionally. It’ll foam, then get quiet, then start smelling nutty and delicious, and you’ll see little brown bits at the bottom. This usually takes 5-8 minutes. Once it’s golden brown and smells like caramel, immediately pour it into a heat-proof bowl to stop it from burning. Let it cool for about 10 minutes.
- **Get Creamy.** In a large bowl, combine your cooled brown butter with both brown and granulated sugars. Whisk vigorously for about 2 minutes until it’s light and fluffy. Don’t skimp on this step!
- **Egg-cellent Addition.** Beat in the eggs one at a time, mixing well after each addition. Stir in the vanilla extract. Your mixture should look smooth and luscious.
- **Dry Mix Time.** In a separate medium bowl, whisk together the flour, baking soda, and salt. Make sure it’s all combined evenly.
- **Combine Forces.** Gradually add the dry ingredients to the wet ingredients, mixing on low speed (or by hand) **just until combined**. We’re not making cement, so don’t overmix! A few streaks of flour are totally fine.
- **Chocolate Intervention.** Fold in your chocolate chips. Get them evenly distributed, but still, no overmixing!
- **Chill Out.** Cover the dough and refrigerate for at least 30 minutes, or up to 24 hours (the longer, the better the flavor develops, IMO!). This is a non-negotiable step for chewy cookies. Trust the process!
- **Preheat & Scoop.** When you’re ready to bake, preheat your oven to 375°F (190°C). Line a baking sheet with parchment paper. Scoop rounded tablespoons of dough onto the prepared sheet, leaving about 2 inches between cookies.
- **Bake Away!** Bake for 9-12 minutes, or until the edges are golden brown and the centers are still slightly soft. They’ll firm up as they cool.
- **Cool Down.** Let the cookies cool on the baking sheet for 5 minutes before transferring them to a wire rack to cool completely (if you can resist eating them all immediately, that is).
Common Mistakes to Avoid
- **Burning the Brown Butter:** Rookie mistake! Watch it like a hawk. Those little brown bits can turn black in a blink. A light-colored pan helps you see the color change.
- **Not Chilling the Dough:** Thinking you can skip the chill? You’ll end up with flat, greasy pancakes instead of glorious chewy cookies. Patience is a virtue here, my friend.
- **Overmixing the Dough:** Once you add the flour, mix *just until combined*. Overmixing develops the gluten too much, leading to tough cookies. Nobody wants a tough cookie.
- **Overbaking:** This is the arch-nemesis of chewiness. Pull them out when the edges are set and golden, but the centers still look a tiny bit soft. They’ll continue to bake on the hot sheet.
- **Skimping on Salt:** “Is that really necessary?” you ask? YES. Salt makes everything better, especially chocolate chip cookies. It balances the sweetness beautifully.
Alternatives & Substitutions
Feeling adventurous? Or just realized you’re missing an ingredient? Here are some tweaks:
- **Chocolate Varieties:** Not a fan of a mix? Go all milk, all semi-sweet, or even toss in some white chocolate chips (though I personally think white chocolate is a little extra, but hey, you do you). Chocolate chunks or chopped chocolate bars give you those glorious melty puddles.
- **Flour Power:** While all-purpose is standard, you *could* try a 1:1 gluten-free flour blend if needed, but results may vary slightly in texture. Don’t swap for bread flour unless you’re aiming for a super-chewy, almost bagel-like cookie (which, let’s be honest, sounds weird).
- **Mix-ins:** Want to get wild? Add a handful of chopped nuts (pecans or walnuts are divine), shredded coconut, or even a sprinkle of sea salt on top before baking for an extra flavor pop. Just don’t go overboard, or your cookies might become “things with some cookie.”
- **Dairy-Free?** Okay, this is tough for brown butter. You *could* try browning a high-quality plant-based butter, but the browning process relies on milk solids, so it won’t be quite the same. It’ll still be a good cookie, just not *brown butter* good.
FAQ (Frequently Asked Questions)
- **”Do I *really* have to chill the dough?”** Oh, my sweet summer child, yes! Absolutely. It solidifies the butter, preventing spread, and allows the flavors to meld. Without it, you get flat, sad cookies. Don’t make sad cookies!
- **”Can I use cold butter for browning?”** Yep! That’s actually ideal. It melts more evenly and gives you more time to watch for those perfect brown bits without burning.
- **”What if I don’t have brown sugar?”** You can make your own! Just mix 1 cup granulated sugar with 1 tablespoon molasses. But honestly, for this recipe, run to the store. Brown sugar is key for the chewiness here.
- **”My cookies aren’t spreading much, what gives?”** Your dough might be too cold, or you might have used too much flour (fluff and level, remember!). Let the dough sit at room temperature for 10-15 minutes before baking.
- **”Can I freeze the dough?”** Heck yeah! Scoop balls of dough onto a baking sheet, freeze until solid, then transfer to a freezer-safe bag or container. Bake from frozen, adding a few minutes to the baking time. Fresh-baked cookies on demand? You’re basically a wizard.
- **”How do I store these magical cookies?”** In an airtight container at room temperature for up to 3-4 days. But let’s be honest, they rarely last that long. If they get a little hard, pop one in the microwave for 10-15 seconds for a warm, gooey revival!
Final Thoughts
So there you have it, your personal guide to baking the most ridiculously delicious chewy brown butter chocolate chip cookies this side of a Michelin-starred dessert menu. They’re warm, they’re chewy, they’re packed with chocolate, and they have that secret nutty brown butter flavor that just screams “I know what I’m doing in the kitchen.” Now go impress someone—or more importantly, yourself—with your new culinary skills. You’ve earned it, and a warm cookie is definitely the best reward. Happy baking, my friend!


