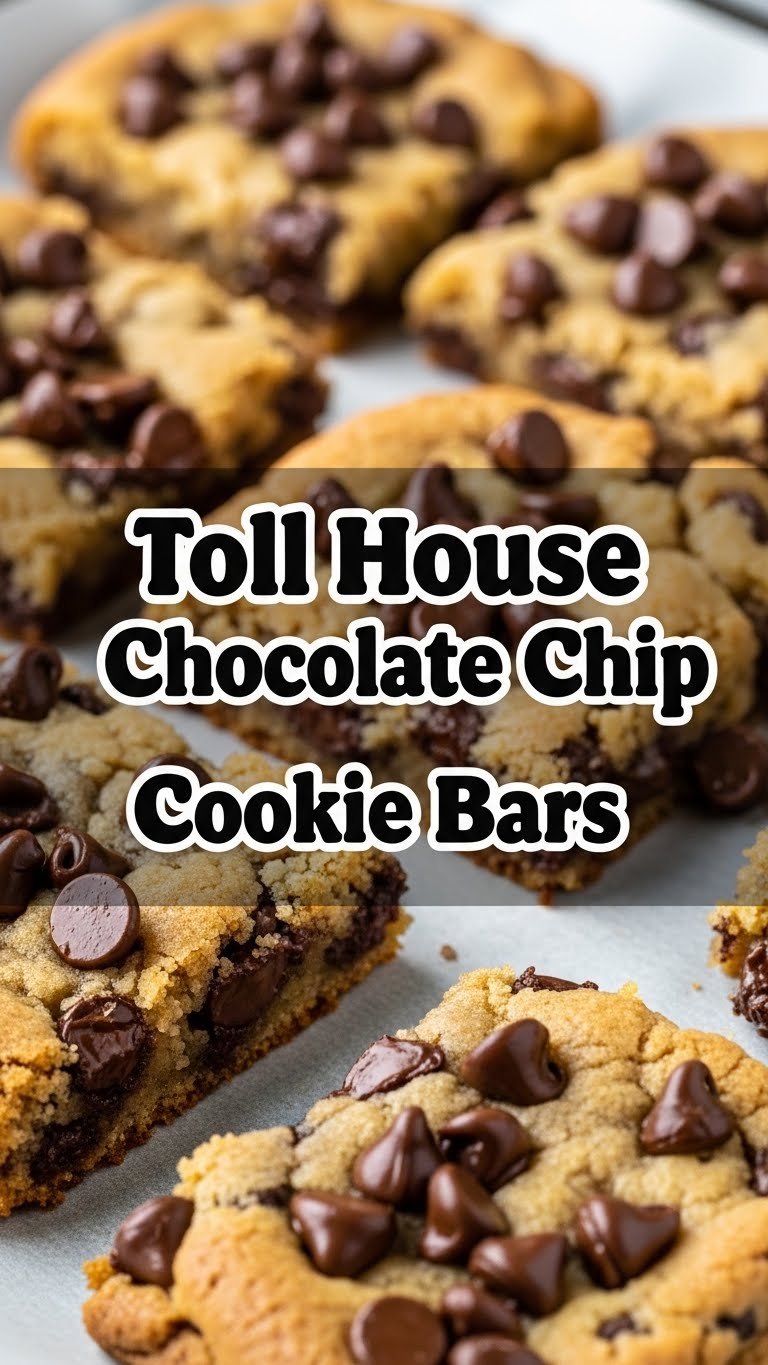
Alright, listen up, buttercup! Had one of *those* days where your brain just can’t handle the intricate choreography of scooping individual cookies, but your sweet tooth is screaming ‘CHOCOLATE!’ at the top of its lungs? Yep, me too. That’s where these glorious Toll House Chocolate Chip Cookie Bars swan into your life like a delicious, rectangular superhero. Get ready, because your dessert game just got a serious upgrade with minimal effort.
Why This Recipe is Awesome
Okay, so why bother with these bad boys instead of, you know, just eating a spoonful of chocolate chips from the bag (no judgment, we’ve all been there)? First off, they’re practically **fail-proof**. Seriously, if I can make these without burning down the kitchen or creating a black hole of culinary despair, you absolutely can too.
Second, it’s all the chewy, gooey goodness of your favorite chocolate chip cookie, but in bar form. Think about it: **no endless scooping**, no waiting for multiple batches, just one glorious pan of pure happiness. Plus, they look super impressive for company, even if you just rolled out of bed to make them. It’s efficiency meets deliciousness, and honestly, what’s not to love?
Ingredients You’ll Need
- **Unsalted Butter:** 1 cup (2 sticks), softened. (The good stuff! Don’t even *think* about margarine unless you’re trying to break my heart.)
- **Granulated Sugar:** 3/4 cup. (Sweetness! Balance is key, my friend.)
- **Packed Light Brown Sugar:** 3/4 cup. (This is where the chewiness magic happens. Don’t skimp!)
- **Large Eggs:** 2. (Room temp, if you’re feeling fancy. Adds structure and richness.)
- **Vanilla Extract:** 2 teaspoons. (The MVP of flavor. Use the real stuff, please.)
- **All-Purpose Flour:** 2 1/4 cups. (The glue that holds this deliciousness together.)
- **Baking Soda:** 1 teaspoon. (For that perfect rise. Don’t skip it!)
- **Salt:** 1/2 teaspoon. (Enhances all the other flavors. Don’t worry, it won’t taste salty.)
- **Semi-Sweet Chocolate Chips:** 1 1/2 cups. (Toll House, obviously, for authenticity! But honestly, any good quality chips work. Or throw in a mix of milk and dark, live a little!)
Step-by-Step Instructions
- **Preheat and Prep:** Get your oven warming up to **375°F (190°C)**. Grab a 9×13 inch baking pan, line it with parchment paper (leave an overhang for easy lifting!), and give it a light spray with non-stick spray. This step is crucial for easy removal, trust me.
- **Cream the Goods:** In a large bowl, or your stand mixer, cream together the softened butter, granulated sugar, and brown sugar until it’s light and fluffy. This usually takes a couple of minutes. You’re basically aerating the butter, making happy little pockets of air.
- **Egg-cellent Addition:** Beat in the eggs one at a time, mixing well after each addition. Then, stir in that glorious vanilla extract. Make sure everything is well combined and looks smooth.
- **Dry Mix Fun:** In a separate medium bowl, whisk together the flour, baking soda, and salt. Give it a good whisk to ensure everything is evenly distributed. We don’t want any surprising pockets of baking soda!
- **Combine Forces:** Gradually add the dry ingredients to the wet ingredients, mixing on low speed (or by hand) until just combined. **Don’t overmix!** Overmixing develops gluten, which makes tough cookies (and bars!).
- **Chocolate Time!:** Fold in the chocolate chips. Use a spatula for this so you don’t overmix. Make sure they’re spread throughout the dough, ready to melt into gooey perfection.
- **Pan It Up:** Press the dough evenly into your prepared 9×13 inch pan. It might be a little sticky, so wet your hands slightly or use the back of a spatula to smooth it out.
- **Bake to Perfection:** Pop it into your preheated oven and bake for **20-25 minutes**. You want the edges to be golden brown and the center to look set but still a *little* soft. A wooden skewer inserted into the center shouldn’t come out wet, but a few moist crumbs are totally fine.
- **Cool Down (If You Can Wait):** Let the bars cool completely in the pan on a wire rack before cutting. **This is the hardest part, FYI.** Seriously, they set up as they cool, making them easier to cut and preventing a crumbly mess. Once cool, use the parchment paper overhang to lift them out, slice, and devour!
Common Mistakes to Avoid
- **Not preheating the oven:** Rookie mistake! Your oven needs to be at temperature for even baking. Don’t rush it.
- **Overmixing the dough:** We talked about this! Tough bars are sad bars. Mix just until combined.
- **Baking for too long:** Nobody wants dry, hard cookie bars. Keep an eye on them! They should be slightly underbaked in the center for that perfect gooey texture.
- **Cutting them too soon:** I know, I know, the smell is intoxicating. But warm bars crumble. **Patience, grasshopper.**
- **Using cold butter:** Your butter needs to be softened for proper creaming. Cold butter won’t incorporate well and can lead to a dense bar.
- **Skipping the parchment paper:** Oh, you think you’re brave, do you? Good luck getting those bars out without a fight. **Parchment is your friend.**
Alternatives & Substitutions
- **Chocolate Chip Variety:** Don’t limit yourself to just semi-sweet! Try milk chocolate, dark chocolate, white chocolate, or even a mix. Butterscotch chips are also a fun twist. **IMO, a mix of semi-sweet and milk chocolate is divine.**
- **Nutty Additions:** Want some crunch? Fold in 1/2 to 1 cup of chopped walnuts or pecans along with the chocolate chips. Toasted nuts add extra flavor!
- **Flavor Boosts:** A pinch of cinnamon, a dash of almond extract instead of some vanilla, or even a sprinkle of sea salt on top before baking can elevate the flavor profile.
- **Gluten-Free Flour:** You can usually substitute an equal amount of a good quality 1:1 gluten-free baking flour blend for the all-purpose flour. Results may vary slightly, but it often works!
- **Butter vs. Margarine:** (Deep sigh) Look, I said it before. Butter is king. But *if* you absolutely must, you can use a stick margarine that’s similar to butter in fat content. Just know it might slightly change the texture and flavor. **Why hurt your soul like that?**
FAQ (Frequently Asked Questions)
- **Can I make these ahead of time?** Absolutely! These bars stay fresh at room temperature in an airtight container for 3-4 days. They’re also great for freezing!
- **Why are my bars dry and crumbly?** Chances are you either overbaked them (baked too long or oven was too hot) or overmixed the dough. Next time, try taking them out a minute or two earlier and being gentle with that mixing!
- **Do I *really* need to use brown sugar?** Yes, my friend, you really do. Brown sugar is key for that chewy texture and depth of flavor. Granulated sugar alone will give you a crispier bar.
- **My bars sank in the middle, what happened?** This can be due to opening the oven door too early, overmixing the batter, or not enough leavening (baking soda). Make sure your baking soda isn’t expired!
- **Can I halve this recipe?** You sure can! Use an 8×8 inch square pan and adjust the baking time down to about 18-22 minutes. Keep an eye on it!
- **What’s the deal with room temperature eggs?** Room temp eggs incorporate more easily and evenly into the butter and sugar mixture, resulting in a smoother, more consistent batter and a better texture in your final product. Not a deal-breaker if you forget, but it helps!
- **Can I add more chocolate chips?** Is that even a question? Of course you can! Live your best chocolate-filled life. Just don’t go *too* crazy, or your bars might struggle to hold together.
Final Thoughts
So there you have it, my friend! A recipe for Toll House Chocolate Chip Cookie Bars that’s so easy, you’ll wonder why you ever bothered with individual cookies. These are perfect for parties, potlucks, or just a Tuesday night when you need a little (or a lot) of comfort. Now go impress someone—or yourself—with your new culinary skills. You’ve earned it! And hey, if you accidentally eat half the pan by yourself? No worries, your secret’s safe with me. 😉


