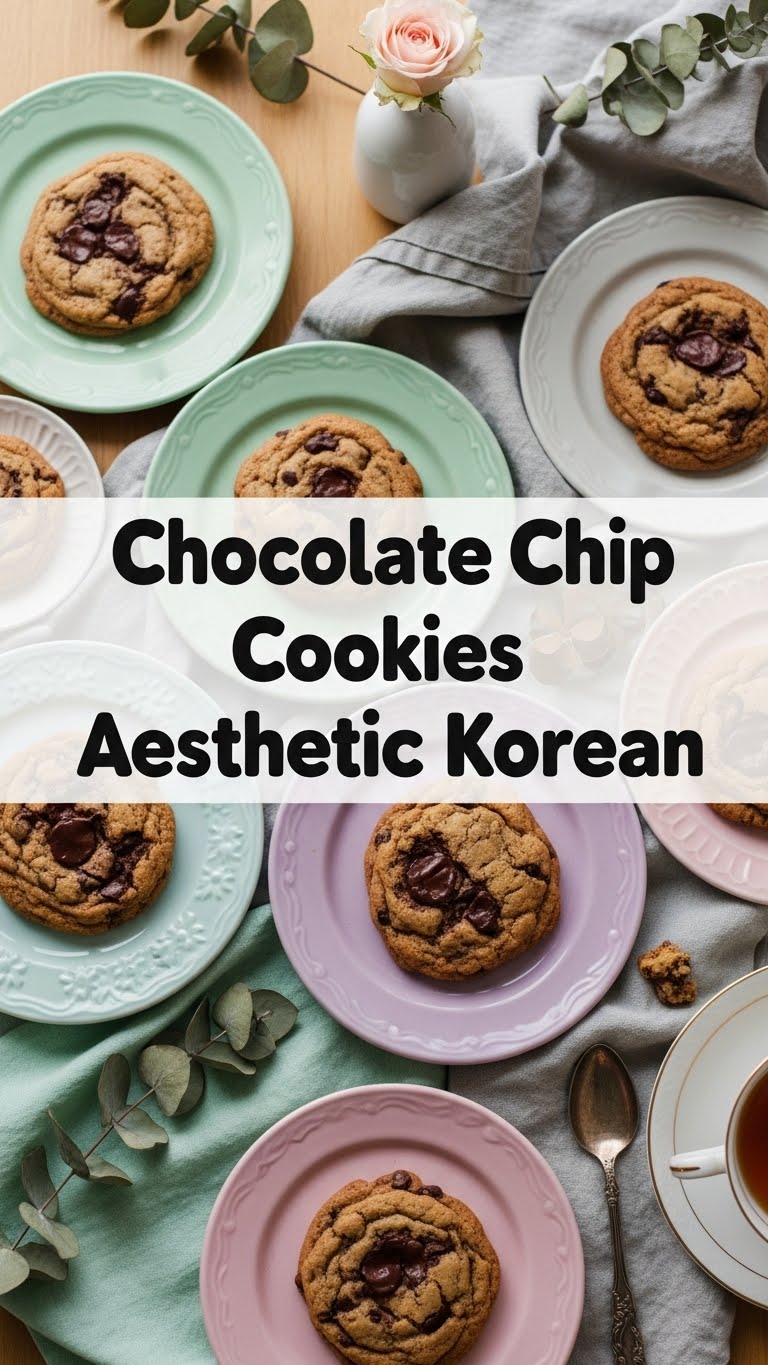
So you’re craving something tasty but too lazy to spend forever in the kitchen, huh? Same, friend, same. We’ve all been there: scrolling through gorgeous food pics, drooling over those perfect, chewy chocolate chip cookies that look like they just popped out of a fancy Seoul cafe. Well, guess what? You don’t need a plane ticket or a pastry chef degree to make those dreamy **Chocolate Chip Cookies with that Aesthetic Korean Vibe**. We’re talking soft, chewy centers, slightly crisp edges, and those glorious puddles of chocolate that just scream “eat me *now*.” Let’s get baking!
Why This Recipe is Awesome
Okay, let’s be real. This isn’t just *another* cookie recipe. This is the one you’ll save, print, and probably make weekly. Why? Because it’s practically **idiot-proof**. Seriously, even I didn’t mess it up, and I once set off a smoke alarm trying to boil water (don’t ask). It’s quick, requires minimal fuss, and you probably have most of these ingredients chilling in your pantry already. Plus, the end result isn’t just delicious; it’s genuinely beautiful. Think thick, golden-edged cookies with gooey centers and generous chocolate pockets, perfect for your next Instagram story or, you know, just devouring in solitude while binging K-dramas. No fancy equipment needed, unless you count your hands as equipment (which, let’s be honest, they are!).
Ingredients You’ll Need
Gather ’round, fellow snack enthusiasts! Here’s your hit list. Keep it simple, keep it real.
- **1/2 cup (113g) Unsalted Butter**, softened. Seriously, softened. Don’t be a hero and try to cream cold butter. It’s a workout you don’t need.
- **1/2 cup (100g) Granulated Sugar**. The classic sweetener, doing its thing.
- **1/4 cup (50g) Packed Light Brown Sugar**. This is our secret weapon for chewiness. Don’t skip it!
- **1 Large Egg**. Room temperature, if you can remember to take it out ahead of time. If not, whatever, life’s short.
- **1 teaspoon Vanilla Extract**. Use the good stuff if you have it. It makes a difference, trust me.
- **1 cup (120g) All-Purpose Flour**. Your basic flour, ready for action.
- **1/2 teaspoon Baking Soda**. The magic leavener.
- **1/4 teaspoon Salt**. Balances everything out. Crucial!
- **1 cup (170g) Chocolate Chunks or Disks**. This is where the “aesthetic” really comes in. Big chunks or flat disks create those gorgeous melty puddles. Go for good quality dark or semi-sweet.
- **Flaky Sea Salt** (optional, but highly recommended for that gourmet touch).
Step-by-Step Instructions
Alright, apron on, game face ready. Let’s get these beauties made!
- **Preheat Power:** First things first, get your oven ready. Preheat it to **375°F (190°C)**. Line a baking sheet with parchment paper. This is key for easy cleanup and preventing sticking.
- **Butter & Sugar Bash:** In a medium bowl, cream together your softened butter, granulated sugar, and brown sugar until it’s light and fluffy. This usually takes about 2-3 minutes with an electric mixer, or a solid arm workout if you’re going manual.
- **Egg-cellent Addition:** Beat in the egg and vanilla extract until they’re just combined. Don’t overmix here; we’re going for fluffy, not tough.
- **Dry Team Assembles:** In a separate, smaller bowl, whisk together the flour, baking soda, and salt. Make sure it’s all mixed evenly.
- **Combine & Conquer:** Gradually add the dry ingredients to the wet ingredients, mixing on low speed (or gently by hand) until just combined. **Stop mixing as soon as you see no dry streaks of flour**. Overmixing is a common mistake that leads to tough cookies.
- **Chocolate Time!** Fold in those beautiful chocolate chunks. Distribute them evenly, but don’t obsess. Some rogue pieces are part of the charm.
- **Scoop ‘Em Up:** Scoop generous 2-tablespoon sized balls of dough onto your prepared baking sheet. Leave about 2 inches between each cookie. For that extra aesthetic touch, you can press a few extra chocolate chunks onto the top of each dough ball.
- **Chill Out (Optional, but recommended!):** For the absolute best results (thicker cookies, richer flavor, less spread), pop your baking sheet with the dough balls into the fridge for at least 15-30 minutes. If you’re really patient, an hour or even overnight is gold.
- **Bake Away:** Bake for **9-11 minutes**, or until the edges are golden brown and the centers are still slightly soft and look a little underdone. This is crucial for that chewy interior!
- **The Grand Finale:** Remove from the oven. If desired, immediately sprinkle with a tiny pinch of flaky sea salt. Let them cool on the baking sheet for 5-10 minutes (they’ll continue to set), then transfer to a wire rack to cool completely. Or, you know, eat them warm with reckless abandon.
Common Mistakes to Avoid
Nobody’s perfect, but we can learn from past cookie blunders, right? Here are some pitfalls to dodge.
- **Not Preheating the Oven:** Rookie mistake! An oven that isn’t fully preheated means inconsistent baking and cookies that spread too much. Give it time, folks.
- **Using Cold Butter:** We talked about this. It won’t cream properly, resulting in a dense, sad cookie. **Butter at room temperature is key.**
- **Overmixing the Dough:** Once the flour goes in, mix only until just combined. Too much mixing develops the gluten, making your cookies tough instead of tender and chewy.
- **Skipping the Chill Time:** While not strictly necessary, chilling the dough makes a HUGE difference in cookie texture and appearance. It helps them stay thicker and prevents excessive spreading. **IMO, it’s a game-changer.**
- **Baking Too Long:** This is the most common culprit for dry, hard cookies. Remember, they should look slightly underdone in the middle when you pull them out. They continue to cook on the hot baking sheet!
- **Being Impatient:** Yes, the smell is intoxicating. But diving into a piping hot cookie straight from the oven can lead to a burnt tongue and a cookie that crumbles before it’s set. Give them a few minutes to cool!
Alternatives & Substitutions
Feeling adventurous? Or just realized you’re missing an ingredient? No worries, we’ve got options!
- **Chocolate Choices:** Don’t limit yourself to just semi-sweet. Try milk chocolate, white chocolate, or a mix of all three for a more complex flavor profile. Dark chocolate chunks are fantastic if you love a richer, less sweet cookie.
- **Flour Power:** If you’re gluten-free, a good 1:1 gluten-free baking blend can often be substituted directly. Just note that the texture might be slightly different.
- **Butter Replacements:** For a dairy-free version, use a good quality plant-based butter (like Miyoko’s Kitchen or Earth Balance sticks). Coconut oil can work too, but it might slightly alter the flavor and texture.
- **Extra Goodies:** Want to jazz them up? Add a handful of chopped nuts (pecans or walnuts are divine), a sprinkle of dried cranberries, or even some mini marshmallows for a s’mores vibe. A little espresso powder (1/2 tsp) in the dough can also deepen the chocolate flavor.
- **Salt Swaps:** No flaky sea salt? A tiny pinch of regular salt works, but the texture of flaky salt on top is truly special.
FAQ (Frequently Asked Questions)
Got questions? I’ve got (casual) answers!
**Q: Can I use margarine instead of butter?**
A: Well, technically yes, but why hurt your soul like that? Butter provides a flavor and texture that margarine just can’t replicate. If you want the best cookies, stick with butter!
**Q: How long do these cookies last?**
A: In my house? About 24 hours, tops. But for real, stored in an airtight container at room temperature, they’re typically good for 3-5 days. They tend to soften more over time, which some people love!
**Q: Can I freeze the cookie dough?**
A: Absolutely! Scoop the dough balls onto a parchment-lined baking sheet and freeze until solid. Then transfer them to a freezer-safe bag. When you’re ready to bake, just add a couple of extra minutes to the baking time – no need to thaw!
**Q: What makes them “Aesthetic Korean”?**
A: It’s all about the look and texture! Think soft, chewy centers with a slightly crispy edge, those big beautiful puddles of chocolate, and a generally thick, inviting appearance. They’re simple, elegant, and perfectly Instagrammable, like something you’d find in a trendy Korean cafe.
**Q: My cookies spread too much, what did I do wrong?**
A: Ah, the dreaded pancake cookie! This usually happens if your butter was too soft/melted, your oven wasn’t hot enough, or your dough wasn’t chilled. Double-check those points for your next batch!
**Q: Can I make a double batch?**
A: Yes, please do! More cookies mean more happiness. Just make sure your mixing bowl is big enough and you don’t over-crowd your baking sheets.
Final Thoughts
And there you have it, your new go-to recipe for those undeniably aesthetic and ridiculously delicious chocolate chip cookies. Seriously, pat yourself on the back. You just created magic! Whether you’re making them for friends, a special someone, or just for your own personal joy (which is a perfectly valid reason, **FYI**), these cookies are a winner. Now go impress someone—or yourself—with your new culinary skills. You’ve earned it!


