Alright, let’s be real. You’re scrolling, you’re craving something warm, gooey, and chocolatey, but the thought of baking a gigantic batch of cookies that’ll sit around judging you for days (or, more likely, be devoured in one sitting) just feels like too much commitment. You want instant gratification, a cozy vibe, and minimal cleanup, right? Same, friend. That’s where these **Small Batch Double Chocolate Chip Cookies** come in. They’re basically a hug in cookie form, designed for those moments when you need just enough sweetness without the epic baking saga.
Why This Recipe is Awesome
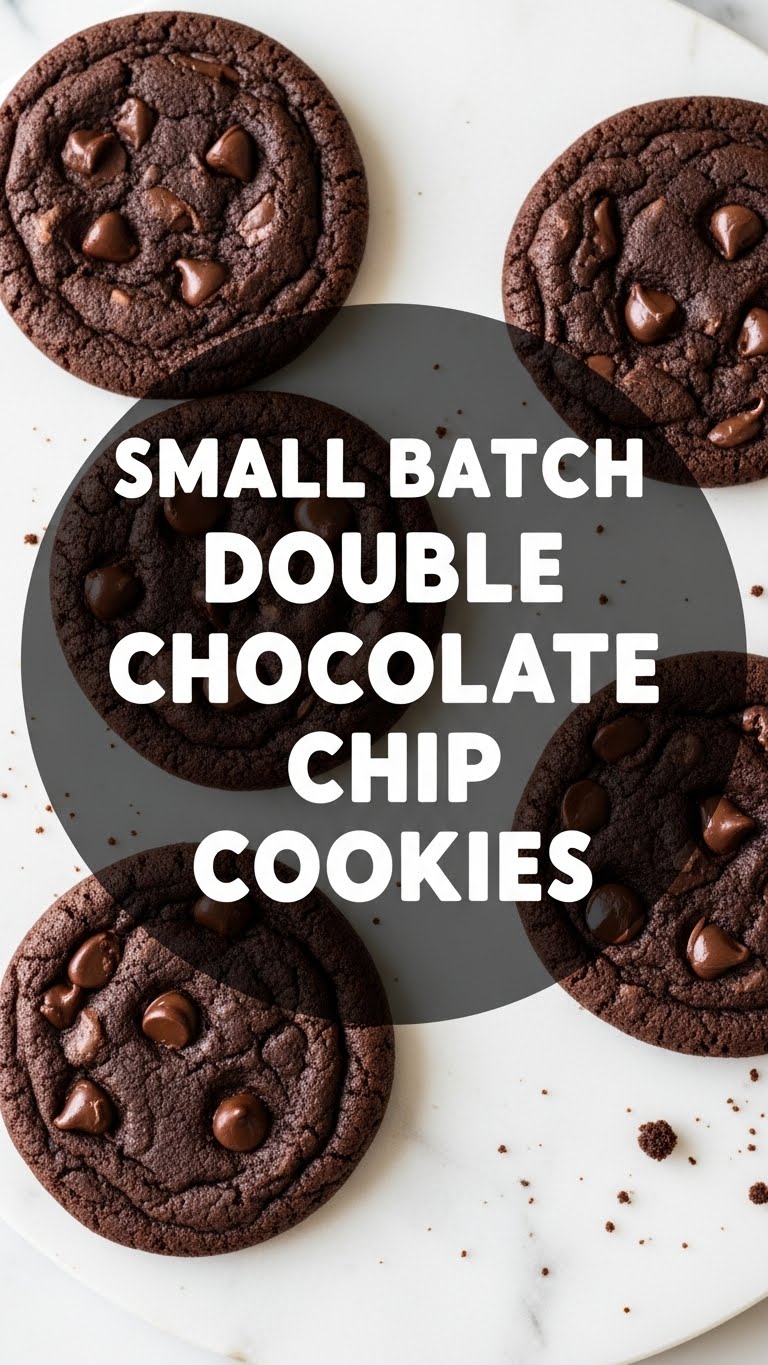
Because it’s practically a magic trick! Seriously, this isn’t just *another* cookie recipe. It’s the Goldilocks of cookie recipes: just right. You get that rich, deep chocolate flavor thanks to the cocoa powder, plus extra chocolate chips because, well, why wouldn’t you? It’s literally **double the chocolate**, so you know it’s legit.
- **Speed Demon:** From zero to cookie hero in under 30 minutes. Perfect for those sudden, intense cravings.
- **Portion Control (ish):** Makes just a few perfect cookies, so you don’t end up with a dozen staring at you from the counter. Unless you *want* a dozen, in which case, just double it, smarty pants.
- **Idiot-Proof:** If I can make these without burning down the kitchen (and I’ve come close, trust me), you absolutely can too. The steps are straightforward, no fancy techniques required.
- **Minimal Cleanup:** Fewer ingredients, smaller bowl, less mess. Your future self will thank you.
Ingredients You’ll Need
Gather your troops! These are the essentials for your small batch chocolatey adventure:
- **2 Tablespoons Unsalted Butter:** Melted, then cooled slightly. Unsalted is best, but if you only have salted, just dial back the extra salt a tiny bit.
- **2 Tablespoons Granulated Sugar:** The classic sweet stuff.
- **1 Tablespoon Light Brown Sugar, packed:** Adds a lovely chewiness and depth. Don’t skip it if you can help it!
- **1 large Egg Yolk:** Yep, just the yolk. Save the white for an omelet, or just wave goodbye to it. We need the fat for richness!
- **1/2 teaspoon Vanilla Extract:** A must for any good cookie. Don’t skimp on the good stuff!
- **1/4 cup All-Purpose Flour:** Standard baking flour, no need for anything fancy.
- **2 Tablespoons Unsweetened Cocoa Powder:** This is where the rich chocolate base comes from. Use good quality cocoa for max deliciousness.
- **1/8 teaspoon Baking Soda:** Our leavening friend, helps them puff up nicely.
- **Pinch of Salt:** Balances all that sweetness and brings out the flavors. Don’t skip!
- **1/4 cup Chocolate Chips:** Half semi-sweet, half milk chocolate is my go-to for double chocolate bliss. Or just use whatever you have—chunks, mini chips, whatever. Go wild!
Step-by-Step Instructions
Time to get your hands a little dirty (but not too dirty, it’s a small batch!).
- First things first, preheat that oven! Get it nice and toasty to **350°F (175°C)**. While it’s heating, line a small baking sheet with parchment paper or a silicone baking mat. This is a non-negotiable for easy cleanup and no-stick cookies.
- In a small bowl, whisk together the slightly cooled melted butter, granulated sugar, and brown sugar until they’re nicely combined and smooth. It won’t take long at all.
- Now, stir in your egg yolk and vanilla extract until everything is fully incorporated. The mixture should look shiny and smell amazing already.
- In a separate, even smaller bowl (or just dump it right into the wet ingredients if you’re feeling brave and messy), whisk together the flour, cocoa powder, baking soda, and that tiny pinch of salt. Make sure there are no lumps of cocoa powder.
- Add the dry ingredients to the wet ingredients. Mix them gently until just combined. **Do not overmix!** Overmixing develops gluten, which can lead to tough cookies, and nobody wants a tough cookie.
- Stir in your generous quarter cup of chocolate chips. Make sure they’re evenly distributed throughout the dough. Because every bite deserves chocolate!
- Scoop the dough onto your prepared baking sheet. You’ll get about 3-4 cookies, depending on how big you make them. I usually go for 3 decent-sized mounds. Leave a little space between them; they’ll spread a tiny bit.
- Bake for **8-10 minutes**. You’re looking for edges that are just set but centers that still look slightly soft. Remember, they continue to cook a bit after they come out of the oven.
- Let them cool on the baking sheet for a few minutes before transferring them to a wire rack to cool completely (if you can wait that long, you’re a stronger person than me). Or, you know, eat them warm and gooey. Your call.
Common Mistakes to Avoid
Even the simplest recipes have traps! Here are a few pitfalls to dodge:
- **Skipping the Preheat:** Thinking you don’t need to preheat the oven? Rookie mistake! A hot oven ensures even baking and the perfect texture from the get-go.
- **Overmixing the Dough:** We talked about this! Once the flour goes in, mix only until no dry streaks remain. Seriously, be gentle.
- **Overbaking:** This is the ultimate cookie killer. Keep a close eye on them, especially since oven temps can vary. An extra minute can turn soft cookies into hockey pucks.
- **Not Cooling the Butter:** Melted butter is fine, but if it’s scorching hot, it’ll start cooking your egg yolk. Let it chill for a few minutes before adding it to the sugars.
- **Eating All the Dough:** While incredibly tempting (and I won’t tell anyone if you do), save at least *some* for actual baked cookies. You won’t regret it.
Alternatives & Substitutions
Feel free to get creative! This recipe is forgiving.
- **Chocolate Chip Varieties:** Mix it up! White chocolate chips, dark chocolate chunks, peanut butter chips, or even chopped-up candy bars would be delightful.
- **Add-ins:** A sprinkle of flaky sea salt on top after baking (OMG, try this!), a tiny pinch of espresso powder in the dry ingredients to deepen the chocolate flavor, or a handful of chopped nuts for crunch.
- **Gluten-Free?** You can usually swap out the all-purpose flour for a 1:1 gluten-free baking blend. Just be aware that the texture might be slightly different.
- **Dairy-Free?** Use a good quality dairy-free butter substitute. They work surprisingly well in cookies!
- **No Brown Sugar?** While it contributes to the chewiness, you *can* use all granulated sugar in a pinch. The texture will be a bit crispier.
FAQ (Frequently Asked Questions)
Got questions? I’ve got (casual) answers!
- **Can I double this recipe?** Uh, yeah! What do you think “small batch” implies? If you want more than a few cookies, just multiply everything by two. Or three. Live your best life.
- **Do I have to chill the dough?** For this small batch, probably not necessary for good results. If your kitchen is super warm or your butter wasn’t cooled enough, a quick 10-minute chill can help prevent spreading, but it’s totally optional.
- **How long do these cookies last?** Honestly? Not long. You’ll eat them. But if you somehow manage to resist, store them in an airtight container at room temp for up to 2-3 days.
- **My cookies spread too much! What happened?** Could be a few things: your butter was too warm, you might have too much butter, or your flour measurement was off. Try a quick chill of the dough next time!
- **Can I use any type of cocoa powder?** Yup! Natural unsweetened is common. Dutch-process cocoa will give you a darker color and a slightly milder flavor, which is also fantastic.
- **What if I only have regular eggs, not “large”?** Just try to get as close to a large egg yolk as possible. It’s not super precise, but aim for a good-sized yolk. The volume difference in such a small recipe is minimal.
Final Thoughts
See? That wasn’t so scary, was it? You just whipped up some seriously delicious cookies, probably in less time than it takes to decide what to watch on Netflix. These Small Batch Double Chocolate Chip Cookies are proof that sometimes, less is more (especially when “less” means “just enough for me right now”).
So, go on, grab a warm cookie, maybe a glass of milk, and pat yourself on the back. You’ve earned it. Now go impress someone—or yourself—with your new culinary skills. You’re basically a professional baker now, FYI.


