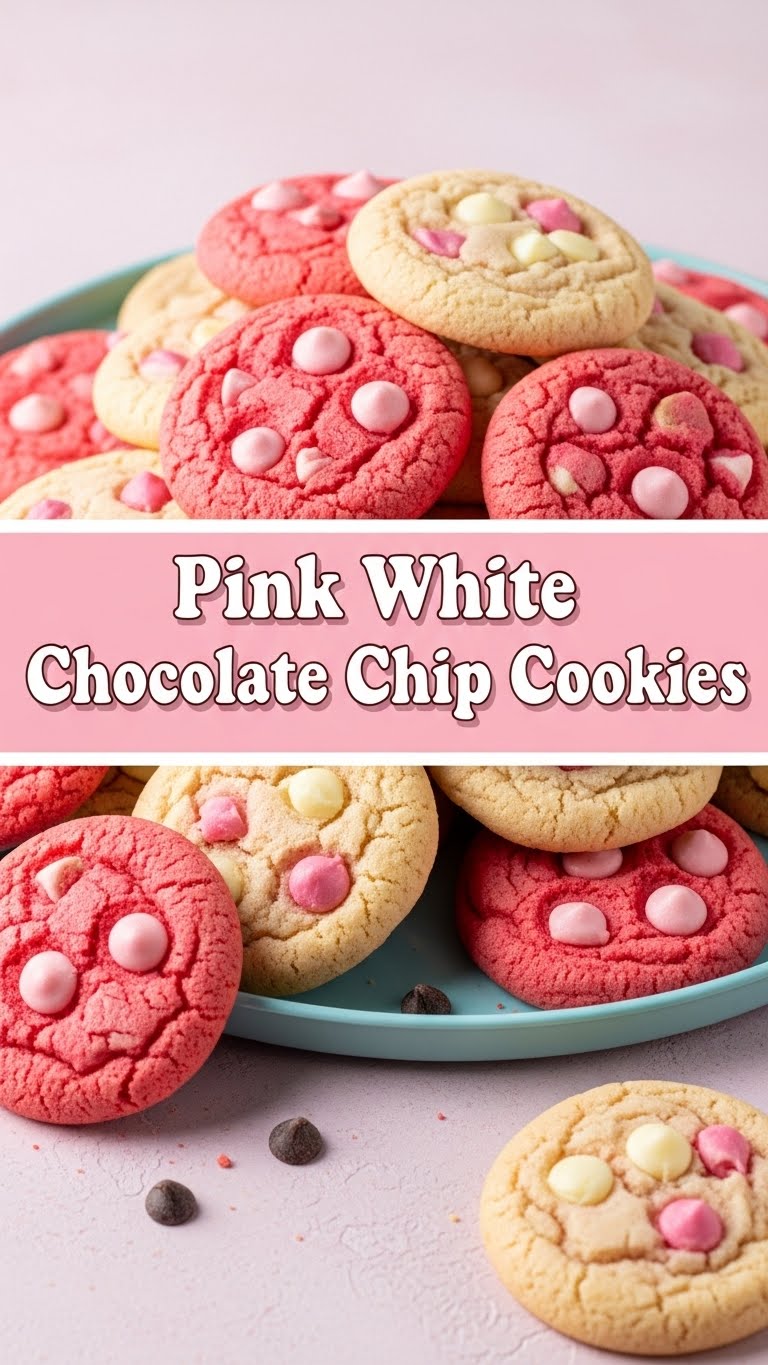
So you’re craving something tasty but too lazy to spend forever in the kitchen, huh? Same. Like, why spend hours when you can whip up something ridiculously delicious AND cute in under an hour? Today, we’re diving into the delightful world of Pink White Chocolate Chip Cookies. Trust me, these aren’t just cookies; they’re a mood. A fabulous, sugary, pink mood.
Why This Recipe is Awesome
Okay, let’s get real. This recipe isn’t just awesome; it’s practically a superhero in the cookie world. First off, it’s pretty much **idiot-proof**. Even if your idea of baking is preheating the microwave, you’ve got this. Seriously, I didn’t mess it up, and that’s saying something.
Secondly, these cookies are like a party in your mouth, but also, visually, they’re just *chef’s kiss*. The pink color? Adorable. The white chocolate chips? A creamy dream. They’re perfect for impressing friends, tricking your kids into thinking healthy food is fun (kidding, don’t do that), or just elevating your Tuesday night Netflix binge from “sad couch potato” to “glamorous snack connoisseur.” Plus, they come together super fast. Minimal fuss, maximum yum. What’s not to love?
Ingredients You’ll Need
Gather your troops, folks! Here’s what you’ll need for these magical pink wonders:
- 1 cup (2 sticks) unsalted butter, softened. Don’t be a hero and try to microwave it into submission; just let it chill out on the counter for a bit.
- ¾ cup granulated sugar. The regular stuff.
- ¾ cup packed light brown sugar. Gives ’em that chewy, depth-of-flavor goodness.
- 2 large eggs. Room temp if you’re feeling fancy, straight from the fridge if you’re like me and just wanna get this done.
- 2 teaspoons vanilla extract. Use the good stuff; it makes a difference!
- 2 ½ cups all-purpose flour. The backbone of our cookie empire.
- 1 teaspoon baking soda. Our leavening pal.
- ½ teaspoon salt. Balances all that sweetness. Crucial!
- 1 ½ cups white chocolate chips. The stars of the show (besides the pink, obviously).
- Pink food coloring (gel works best!). This is where the magic happens. Start small, you can always add more!
Step-by-Step Instructions
- Preheat & Prep: First things first, preheat your oven to 375°F (190°C). Line a couple of baking sheets with parchment paper. Trust me, it makes cleanup a breeze.
- Cream the Butter & Sugars: In a large bowl, cream together the softened butter, granulated sugar, and brown sugar until it’s light and fluffy. Use an electric mixer if you have one; your arm will thank you.
- Eggs & Vanilla Time: Beat in the eggs one at a time, making sure each is fully incorporated before adding the next. Then, stir in that glorious vanilla extract.
- Pinkify It! Now for the fun part! Add a few drops of pink food coloring to your wet mixture. Mix until you reach your desired shade of fabulous pink. Remember, it’s easier to add more than to take away!
- Dry Ingredients Unite: In a separate bowl, whisk together the flour, baking soda, and salt. Make sure it’s all nicely combined.
- Combine & Fold: Gradually add the dry ingredients to the wet ingredients, mixing on low speed until *just* combined. Do not overmix! Overmixing leads to tough cookies, and nobody wants a tough cookie.
- Chocolate Chip Shower: Gently fold in the white chocolate chips with a spatula. We want them evenly distributed for maximum deliciousness.
- Scoop & Bake: Drop rounded spoonfuls (or use a cookie scoop for perfectly uniform cookies) onto your prepared baking sheets, leaving a couple of inches between each.
- Bake It Up: Bake for 9-11 minutes, or until the edges are lightly golden and the centers are still soft. They might look a little underdone, but they’ll continue to set as they cool.
- Cool Down: Let the cookies cool on the baking sheets for a few minutes before transferring them to a wire rack to cool completely. Or just eat one warm, I won’t tell.
Common Mistakes to Avoid
- Thinking you don’t need to preheat the oven: Rookie mistake! The oven isn’t psychic; it needs time to get to temp for even baking.
- Overmixing the dough: I said it once, I’ll say it again: **Do not overmix!** You’re making cookies, not building arm strength. Just mix until the flour streaks disappear, then stop.
- Not chilling the dough (sometimes): While this recipe works without it, a quick 30-minute chill can lead to thicker, chewier cookies. If you have the patience, try it!
- Using cold butter that’s not softened: Your butter needs to be soft enough to cream smoothly with the sugar. If it’s rock hard, you’ll end up with lumpy dough and a sad mixer.
- Ignoring the parchment paper: It’s not just for easy cleanup; it helps prevent sticking and promotes even baking. Don’t skip it!
Alternatives & Substitutions
Feeling adventurous? Here are some ways to shake things up:
- Chocolate Chips: Not a fan of white chocolate? Swap them for milk chocolate, dark chocolate, or even a mix! Pink cookies with dark chocolate chunks? Yes, please!
- Add-ins: Want more texture? Throw in some sprinkles for extra fun, or maybe a handful of chopped nuts for crunch (though that might clash with the “pink” vibe, IMO).
- Flavor Boost: A tiny pinch of almond extract can give these a lovely marzipan-y undertone, which pairs beautifully with white chocolate. Or a dash of lemon zest for a bit of brightness.
- Butter Substitute: While butter gives the best flavor and texture, you *could* technically use margarine. But, like, why hurt your soul like that? If you must, look for stick margarine, not tub.
- Make ’em not pink: Honestly, if you’re not feeling the pink, just skip the food coloring! You’ll still have delicious white chocolate chip cookies. They just won’t be as Instagrammable, you know?
FAQ (Frequently Asked Questions)
Got questions? I’ve got answers (mostly):
Can I use margarine instead of butter? Well, technically yes, but why hurt your soul like that? Butter truly makes these cookies sing. If you absolutely must, use stick margarine, not the spreadable tub kind. But don’t say I didn’t warn you about the texture difference!
Do I have to chill the dough? Not strictly for this recipe! It’s designed to be pretty immediate. However, if you want slightly thicker, chewier cookies that spread less, a 30-minute chill in the fridge can work wonders. Totally optional, though!
My cookies spread too much! What did I do wrong? A few things could be at play: your butter was too soft/melted, your oven isn’t at the right temperature (invest in an oven thermometer!), or you didn’t measure your flour correctly. Also, try chilling the dough next time!
How do I get that vibrant pink color? Gel food coloring is your best friend here! It’s much more concentrated than liquid food coloring and won’t thin out your dough. Start with a few drops, mix, and add more until you’re happy with the shade.
How long do these cookies last? If you manage not to devour them all in one sitting (impressive!), they’ll stay fresh in an airtight container at room temperature for about 3-5 days. You can also freeze the baked cookies for up to a month.
Can I freeze the cookie dough? Absolutely! Roll the dough into balls, place them on a parchment-lined baking sheet, and freeze until solid. Then transfer them to a freezer-safe bag. When you’re ready to bake, just pop them into the oven (you might need to add a minute or two to the baking time).
What if I don’t have white chocolate chips? You can chop up a white chocolate bar or use another type of chip as suggested in the Alternatives section. But for true “Pink White Chocolate Chip Cookies,” you really need those white chips, fam.
Final Thoughts
So there you have it, your new favorite recipe for when you need a little sprinkle of joy (and pink!) in your life. These cookies are easy, fun, and ridiculously tasty. They’re perfect for brightening up any day, making someone smile, or just satisfying that sweet tooth of yours with a touch of flair.
Now go impress someone—or yourself—with your new culinary skills. You’ve earned it! And don’t forget to send me a pic of your glorious pink creations. Happy baking, buttercup!


