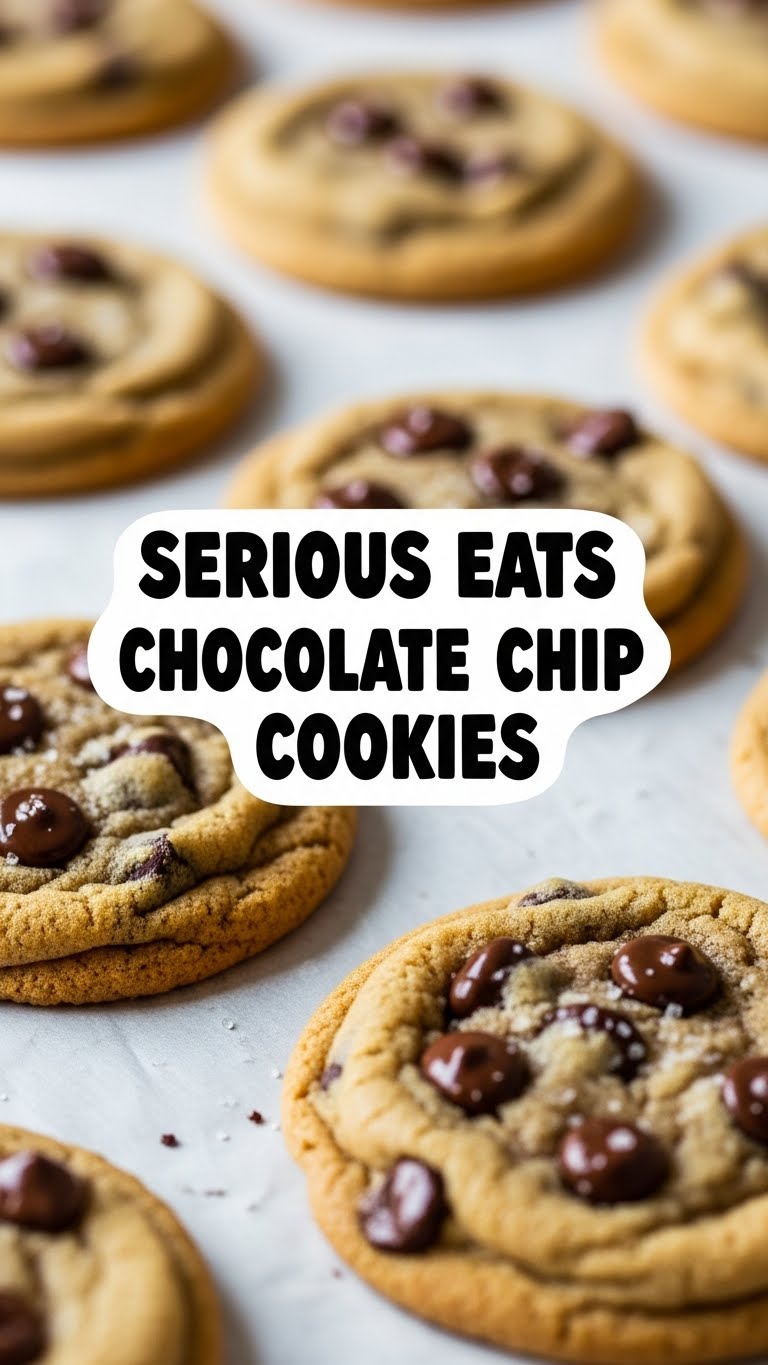
So you’re craving something tasty but too lazy to spend forever in the kitchen, huh? Same. What if I told you there’s a cookie out there so legendary, so mind-blowingly good, it’s worth a *little* effort, but still totally doable even for the chronically chill? Enter the Serious Eats Chocolate Chip Cookie. This isn’t just any cookie; it’s the cookie that launched a thousand “OMG, *this* is it!” texts. Get ready for some serious chocolate chip magic, my friend.
Why This Recipe is Awesome
Let’s be real, there are a bazillion chocolate chip cookie recipes out there. So why this one? Because it’s basically the Beyoncé of cookies – flawless, iconic, and everybody wants a piece. Kenji López-Alt, the wizard behind Serious Eats, spent ages perfecting this bad boy, and he cracked the code to **ultimate chewiness, crispy edges, and mind-blowing flavor depth**. It’s not just good; it’s a cookie that will make you question every other cookie you’ve ever eaten. Plus, it’s practically idiot-proof. If I can make these without summoning a baking demon, you can too. Seriously, it’s that good.
Ingredients You’ll Need
Gather your troops! Don’t skimp on quality here; these ingredients are the backbone of your cookie empire.
- **12 tablespoons (170g) unsalted butter:** Your golden ticket to flavor town. Unsalted, because *we* control the salt, not Big Butter.
- **1 cup (200g) packed dark brown sugar:** For that deep, molasses-y goodness. Don’t even *think* about light brown.
- **½ cup (100g) granulated sugar:** The classic sweet stuff. The dynamic duo of sweetness!
- **2 teaspoons vanilla extract:** Good stuff, please! Not the “imitation” sad kind. Splurge a little; your taste buds will thank you.
- **1 large egg + 1 large egg yolk:** Room temperature, please! They just mix better, trust me. The extra yolk is our secret weapon for chewiness.
- **1¾ cups (245g) bread flour:** Yes, **bread flour!** This is where Serious Eats gets *serious*. It’s for that glorious, chewy texture. If you can’t find it, a mix with AP flour works, but you’ll miss a little chew.
- **½ teaspoon baking soda:** The little lifter.
- **1 teaspoon salt:** Enhances everything. Don’t you dare skimp on this.
- **1¼ cups (210g) chocolate chips or chunks:** The star of the show. Go fancy, go dark (60-70% cacao is my jam), go chopped bars, go whatever makes your heart sing. Mixed kinds are fun too!
Step-by-Step Instructions
Okay, aprons on, let’s get baking! Follow these steps, and cookie nirvana awaits.
- **Brown that Butter, Baby!** In a light-colored saucepan, melt your butter over medium heat. Swirl it around. It’ll foam, then settle. Keep watching (seriously, don’t walk away!). When you see little brown bits at the bottom and it smells nutty, pull it off the heat immediately. Pour it into a heatproof bowl to cool for about 10-15 minutes. We want it warm, not sizzling hot.
- **Mix the Wet Stuff:** Once your brown butter has cooled a bit, whisk in the brown sugar, granulated sugar, and vanilla extract until well combined. Then, beat in the egg and egg yolk until the mixture is light and fluffy – about 30 seconds to a minute.
- **Whisk the Dry Squad:** In a separate medium bowl, whisk together the bread flour, baking soda, and salt. Make sure everything is evenly distributed.
- **Combine & Conquer:** Gradually add the dry ingredients to the wet ingredients, mixing on low speed (or by hand) until *just* combined. **Don’t overmix!** Overmixing leads to tough cookies, and we don’t want tough cookies.
- **Fold in the Chocolate:** Gently fold in your glorious chocolate chips or chunks. Make sure they’re evenly distributed throughout the dough.
- **The Sacred Chill (Don’t Skip This!):** Cover the dough and refrigerate for **at least 24 hours**. Seriously, this isn’t optional. It allows the flavors to deepen and the flour to fully hydrate, giving you that incredible texture. **For best results, go 36-48 hours.**
- **Preheat & Prep:** When you’re ready to bake, preheat your oven to 375°F (190°C). Line a baking sheet with parchment paper or a silicone mat.
- **Scoop ‘Em Out:** Scoop out generous portions of dough, about 2 tablespoons each, and place them on the prepared baking sheet, leaving about 2 inches between them.
- **Bake to Perfection:** Bake for 10-12 minutes, rotating the baking sheet halfway through. You’re looking for golden edges and a slightly pale, still-soft center. They’ll continue to cook a bit on the sheet.
- **Cool & Devour:** Let the cookies cool on the baking sheet for 5 minutes before transferring them to a wire rack to cool completely. Or, you know, just eat one (or three) while they’re warm. I won’t tell.
Common Mistakes to Avoid
We’ve all made baking blunders. Here’s how to dodge the most common cookie catastrophes:
- **Burning the Brown Butter:** Rookie mistake! Watch it like a hawk. Brown is good; black is bad and tastes like sadness.
- **Skipping the Chill Time:** I’m going to say it again: **DO NOT SKIP THE CHILL TIME.** This isn’t just for patience; it’s for flavor and texture development. If you skip, you’ll get flatter, less flavorful cookies. You’ve been warned!
- **Overmixing the Dough:** Once you add the flour, mix until *just* combined. Too much mixing develops gluten, making your cookies tough instead of tender and chewy.
- **Using Cheap Chocolate:** Your cookies are only as good as your chocolate, my friend. Invest in good quality chips or, better yet, chop up a nice bar of chocolate.
- **Ignoring Oven Temperature:** Ovens lie! Seriously, get an oven thermometer. An accurate temperature ensures even baking and prevents burnt edges/raw centers.
Alternatives & Substitutions
Life’s about options, even in cookie land!
- **Flour Power:** Can’t find bread flour? You can use all-purpose flour, but your cookies might be a *tad* less chewy. Still delicious, just a different vibe. **IMO, the bread flour is worth the hunt.**
- **Chocolate Wonderland:** Dark chocolate chips, milk chocolate chunks, white chocolate swirled in, chocolate discs, even mini M&M’s! Mix and match. Get creative with your chocolate choices.
- **Add-ins for Fun:** Want to jazz things up? Add a handful of toasted chopped pecans or walnuts, a sprinkle of flaky sea salt on top before baking, or even a dash of cinnamon with the dry ingredients.
- **No Brown Butter Fear?** If browning butter stresses you out, you *can* just use melted butter. But, honestly, you’re missing out on a whole extra layer of nutty, caramel-y goodness that makes these cookies legendary. Take the plunge!
FAQ (Frequently Asked Questions)
Got questions? I’ve got answers (and maybe a little sass).
- **Is the chill time *really* necessary?** Yes, yes, a thousand times yes! It gives the flour time to absorb moisture, concentrates the flavors, and prevents spreading. **FYI**, it’s the secret to that perfectly chewy texture.
- **Can I use margarine instead of butter?** Well, technically yes, but why hurt your soul like that? Butter provides superior flavor and texture. Don’t do it to yourself.
- **My cookies spread too much! What happened?** Usually, this means your dough was too warm, your oven wasn’t hot enough, or your butter was too soft/melted. Make sure your dough is properly chilled and your oven is preheated to the correct temp.
- **What’s the best kind of chocolate to use?** It’s subjective, but I’m a firm believer in high-quality dark chocolate (60-70% cacao) for its depth. A mix of dark and milk chocolate is also divine! Chop up a good quality bar for those glorious puddles of chocolate.
- **Can I freeze the cookie dough?** Absolutely! Scoop the dough into balls, freeze them on a baking sheet until solid, then transfer to a freezer-safe bag. When you’re ready for a fresh cookie, bake from frozen, adding a couple of extra minutes to the bake time.
- **What if I don’t have bread flour?** All-purpose flour is a decent substitute, but you might notice a slight difference in chewiness. Bread flour has higher protein, giving these cookies their signature texture.
- **How do I store these magical cookies?** Keep them in an airtight container at room temperature for up to 3-4 days. But let’s be honest, they probably won’t last that long.
Final Thoughts
So there you have it, your ticket to cookie nirvana. You’re now armed with the knowledge (and hopefully the ingredients) to create a batch of the most mind-blowing chocolate chip cookies known to humankind. Don’t be afraid to get your hands a little messy; the reward is so, so worth it. Go forth, bake glorious cookies, and don’t forget to share (or don’t, I won’t judge). You’ve basically earned a culinary black belt. You’re welcome!


