So you’re craving something tasty but too lazy to spend forever in the kitchen, huh? Same. We’ve all been there – staring into the fridge, wishing for a magical dessert that practically bakes itself. Well, buckle up, buttercup, because I’m about to drop a cookie recipe on you that’s so quick and unbelievably chewy, you might just think I’m a wizard. (Spoiler: I’m not, it’s just really good science… and butter.)
Why This Recipe is Awesome
Let’s be real, life’s too short for complicated recipes. This isn’t just “another” chocolate chip cookie recipe; it’s *the* recipe for those moments when a craving hits like a ton of bricks, and you need gooey, chocolatey comfort ASAP. It’s awesome because:
- It’s lightning fast: We’re talking mix-to-mouth in less than 30 minutes. No chilling required, because who has that kind of patience?
- Chewy, not cakey: We’re after that perfect bendy, melt-in-your-mouth texture, not some dry, crumbly impostor.
- Foolproof: Seriously, even I haven’t messed this one up, and my track record with baked goods can be… adventurous. It’s basically idiot-proof.
- Minimal dishes: Because doing dishes after baking is a crime.
Ingredients You’ll Need
Gather ’round, my sweet-toothed friends! Here’s what you’ll need for your quick chewy chocolate chip cookie adventure. Mostly stuff you already have, probably.
- 1/2 cup (1 stick) unsalted butter: Melted. Yes, melted! This is a key player in our chewiness game. Don’t skimp on the good stuff.
- 1/2 cup granulated sugar: The classic sweet stuff.
- 1/4 cup packed light brown sugar: This adds a lovely molasses note and helps keep things moist and chewy. Don’t even think about skipping it.
- 1 large egg: Room temperature, if you’re feeling fancy, but straight from the fridge works too for speed.
- 1 teaspoon vanilla extract: The soul of a good cookie. Don’t even think about using imitation vanilla. Your taste buds will judge you.
- 1 1/4 cups all-purpose flour: Just regular ol’ flour.
- 1/2 teaspoon baking soda: Our leavening friend.
- 1/4 teaspoon salt: Balances the sweetness and makes everything pop. Trust me, it’s essential.
- 1 cup chocolate chips: Your choice! Semi-sweet, milk, dark – live your best chocolate life. I’m partial to a mix, IMO.
Step-by-Step Instructions
Alright, ovens on standby! Let’s get these bad boys baking.
- Preheat your oven to 375°F (190°C). Line a baking sheet with parchment paper or a silicone mat. This is non-negotiable for easy cleanup and no sticking.
- Melt the butter: In a medium microwave-safe bowl, melt your butter. Keep an eye on it – you want it melted, not burnt to a crisp.
- Mix wet ingredients: To the melted butter, whisk in the granulated sugar and brown sugar until well combined. Then, beat in the egg and vanilla extract until everything is smooth and glossy.
- Combine dry ingredients: In a separate bowl, whisk together the flour, baking soda, and salt. Give it a good whisk to make sure everything is evenly distributed.
- Combine wet and dry: Pour the dry ingredients into the wet ingredients. Mix with a spoon or spatula until *just* combined. Do not overmix! A few streaks of flour are totally fine; overmixing leads to tough cookies, and nobody wants that.
- Fold in the chocolate chips: Gently fold in your glorious chocolate chips. Make sure they’re evenly distributed, because every bite deserves chocolate.
- Scoop and bake: Drop rounded tablespoons of dough onto your prepared baking sheet. Leave a couple of inches between them – they will spread.
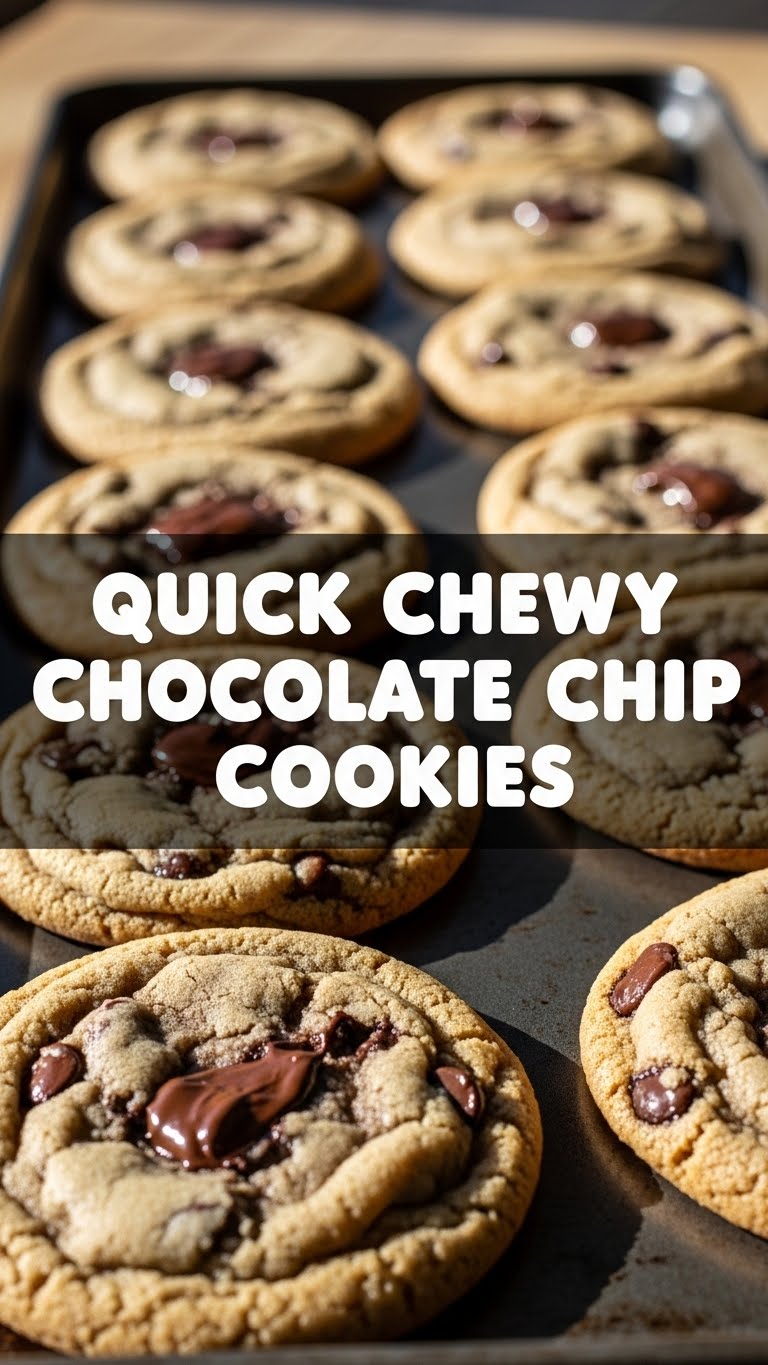
- Bake for 8-10 minutes: Or until the edges are golden brown and the centers are still slightly soft and puffy. They might look a little underdone, but that’s the secret to chewiness!
- Cool and devour: Let them cool on the baking sheet for 5 minutes before transferring to a wire rack to cool completely (if you have that kind of self-control). Then, attack!
Common Mistakes to Avoid
Look, we all make mistakes. But these are the ones that stand between you and cookie nirvana. Let’s not let that happen, shall we?
- Overmixing the dough: I said it once, I’ll say it again: **do not overmix!** Once the wet and dry ingredients are *just* combined, stop. Overmixing develops the gluten too much, leading to tough, cakey cookies. No fun.
- Overbaking: This is a cardinal sin in the chewy cookie world. If they look fully golden and set in the middle, you’ve gone too far. Pull them out when the edges are set and the centers still look a little soft. They’ll continue to cook a bit on the hot pan.
- Forgetting the salt: Seriously, don’t. Salt isn’t just for savory dishes; it actually enhances the sweetness and depth of flavor in baked goods. Skip it and your cookies will taste flat.
- Not using parchment paper: Sure, you *can* grease the pan, but parchment paper is your friend for even baking, no sticking, and super-easy cleanup. Why make life harder?
Alternatives & Substitutions
Feeling adventurous? Or just missing an ingredient? Here are some tweaks to keep things interesting:
- Butter alternatives: Can you use margarine instead of butter? Well, technically yes, but why hurt your soul like that? Butter truly gives the best flavor and texture. If you must go dairy-free, use a good quality vegan butter alternative.
- Chocolate chips: Mix ’em up! Use dark, milk, white chocolate, or even a combination. Chopped chocolate bars also work wonderfully for those melty puddles.
- Add-ins: Feeling wild? Throw in a handful of chopped nuts (pecans or walnuts are great), a sprinkle of sea salt on top before baking for that gourmet touch, or even some crushed pretzels for a sweet and salty crunch.
- Flour power: While all-purpose is king here for consistency, if you’re feeling a bit healthier, you *could* swap a quarter cup of it for whole wheat flour, but be warned, it might alter the texture slightly. For gluten-free, use a 1:1 gluten-free baking blend, but results may vary.
FAQ (Frequently Asked Questions)
Got questions? I’ve got (mostly sarcastic) answers!
- Can I use cold butter? Nope! For this quick, chewy recipe, melted butter is key to that lovely texture. Save the softened butter for your elaborate baking projects.
- My cookies are spreading too much, what gives? A few culprits: your butter might have been too hot when you added the sugars/egg, your oven might not be hot enough, or your flour measurement was off (too little flour). Make sure to measure accurately!
- Do I really have to use brown sugar? Yes, you really do. Brown sugar contains molasses, which contributes to the chewiness and moisture of the cookie. Granulated sugar alone makes for a crispier cookie.
- How long do these magical cookies last? If you manage not to eat them all in one sitting, they’ll stay fresh in an airtight container at room temperature for up to 3-4 days. But let’s be honest, they rarely last past day one.
- Can I freeze the dough? Absolutely! Roll the dough into balls, place them on a baking sheet, and freeze until solid. Then transfer to a freezer-safe bag for up to 2-3 months. Bake from frozen, adding a couple of minutes to the baking time. Handy for future cravings, FYI.
- Why are my cookies hard? You overbaked them! See “Common Mistakes to Avoid.” Pull them out sooner next time!
Final Thoughts
And there you have it, folks! Your new go-to recipe for quick, chewy chocolate chip cookies that will make you feel like a baking superstar, even on your laziest days. So go ahead, whip up a batch (or three), grab a cold glass of milk, and enjoy the pure, unadulterated joy of a warm, homemade cookie. Now go impress someone – or yourself – with your new culinary skills. You’ve earned it!


