So, you’ve got that chocolate craving hitting hard, but the thought of a multi-tiered, fondant-covered masterpiece makes you want to crawl into bed and cry? Been there, my friend. Been there. Or maybe you’re just looking for that perfect treat that says, “I made this delicious thing!” without actually needing to, you know, *work* for it. 😉
Why This Recipe is Awesome
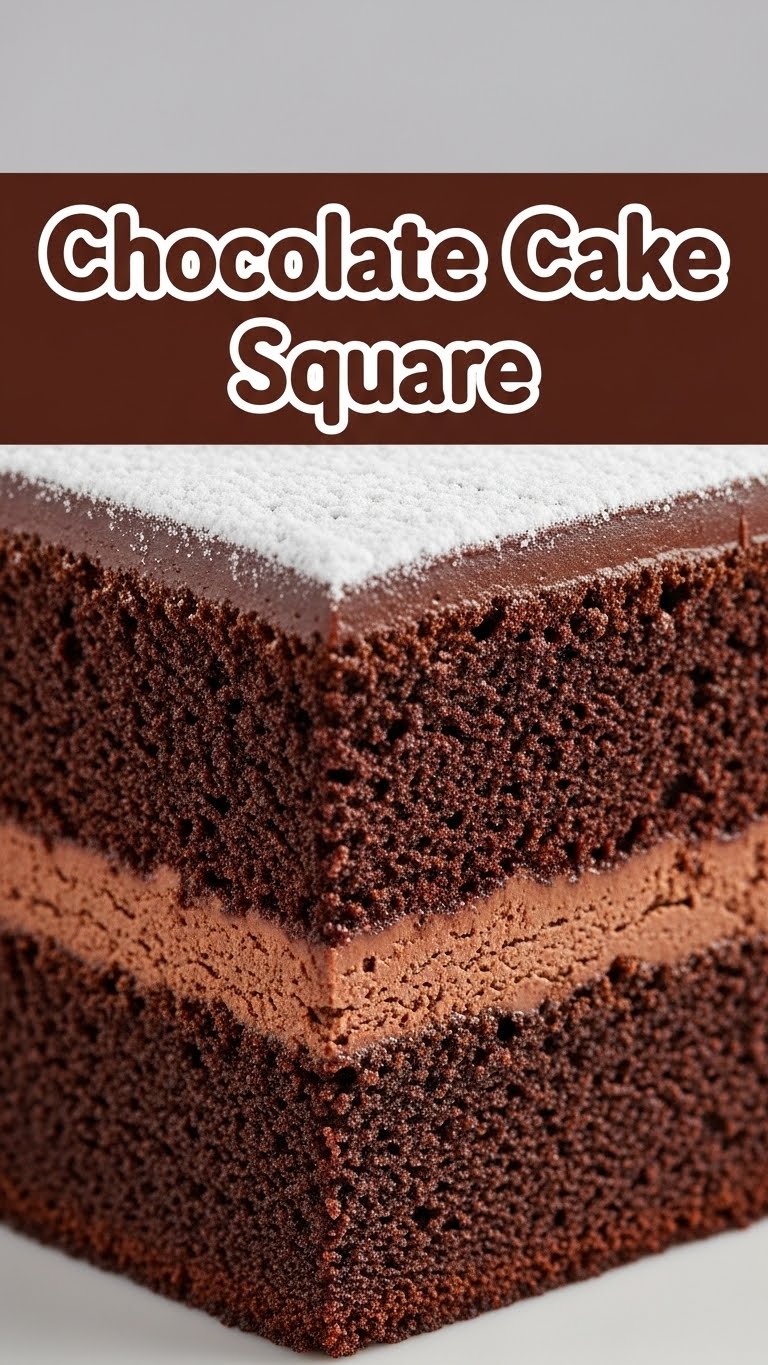
This isn’t your grandma’s “spend all day in the kitchen” kind of cake. Oh no. This is the **”I need chocolate NOW and I have 30 minutes”** kind of cake. We’re talking maximum chocolatey goodness with minimum fuss, minimal dishes, and maximum bragging rights.
It’s so simple, even your pet hamster could probably follow the instructions (if he had opposable thumbs and a tiny whisk, bless his heart). **Seriously, it’s pretty much idiot-proof.** You just dump, mix, bake, and voilà! Instant joy in square form. Plus, squares are way less intimidating than slicing a perfect round cake, right?
Ingredients You’ll Need
Gather your chocolatey arsenal! You probably have most of this stuff lurking in your pantry already.
- 1 ½ cups all-purpose flour: The foundation of our delicious empire.
- 1 ½ cups granulated sugar: Because life’s too short for unsweetened cake, am I right?
- ½ cup unsweetened cocoa powder: The real MVP here, for that deep, dark chocolate magic.
- 1 teaspoon baking soda: Our little lift-off agent for a fluffy cake.
- ½ teaspoon salt: Just a pinch to make everything pop and balance the sweetness. Don’t skip it!
- 2 large eggs: The binders of deliciousness, holding it all together.
- 1 cup milk: Any kind works! Whole, 2%, almond, oat – whatever makes your heart sing.
- ½ cup vegetable oil: For ultimate moisture! No need for creaming butter, which saves you a step and a stick of butter. Winning!
- 1 teaspoon vanilla extract: Because vanilla makes everything fancy-ish, even if it’s just a square.
- ½ cup hot water or hot coffee: This is our secret weapon, a **game-changer for intensifying chocolate flavor**. Trust me on this one.
Step-by-Step Instructions
Alright, apron on, game face ready! Let’s get baking!
- **Preheat Power-Up:** First things first, get that oven heated to 350°F (175°C). And while it’s warming up, grab an 8×8 or 9×9 inch baking pan and give it a good grease and flour dusting. Or line it with parchment paper for zero-sticking drama.
- **Dry Mix Magic:** In a large bowl, whisk together your flour, sugar, cocoa powder, baking soda, and salt. Make sure there are no lumpy bits of cocoa powder trying to hide!
- **Wet Ingredients Waltz:** In a separate medium bowl, lightly whisk your eggs, then stir in the milk, vegetable oil, and vanilla extract until well combined.
- **Combine & Conquer:** Pour the wet ingredients into the dry ingredients. Mix them with a spatula or spoon until *just* combined. **Avoid overmixing!** A few small lumps are totally fine; overmixing leads to a tough cake, and nobody wants that.
- **The Hot Liquid Boost:** Now, carefully pour in your hot water or hot coffee. Stir until the batter is smooth and a bit runny. This step works wonders for the texture and flavor, FYI.
- **Into the Oven!** Pour your glorious chocolate batter into your prepared pan. Give it a gentle tap on the counter to release any air bubbles.
- **Bake It Till You Make It:** Pop that pan into the preheated oven for 30-35 minutes. You’ll know it’s done when a toothpick inserted into the center comes out clean or with moist crumbs attached.
- **Cool Down:** Let your cake cool in the pan for about 10-15 minutes before transferring it to a wire rack to cool completely. Patience, young padawan, it’s worth it!
- **Square Up!** Once completely cool, slice your cake into perfect (or perfectly imperfect, we don’t judge) squares. Frosting is optional, but highly, highly recommended.
Common Mistakes to Avoid
Don’t be *that* person! Learn from my past kitchen mishaps (so you don’t have to):
- **Forgetting to preheat the oven:** That’s like trying to run a marathon without tying your shoes. Your cake won’t rise properly and will take forever to bake. Rookie mistake!
- **Overmixing the batter:** I mentioned this already, but it’s crucial! Treat your batter gently. Overmixing develops the gluten too much, giving you a dense, rubbery cake instead of a light, fluffy one.
- **Opening the oven door constantly:** Resist the urge to peek! Especially during the first 20 minutes. It drops the oven temperature and can cause your cake to sink.
- **Not greasing/flouring the pan properly:** Unless you enjoy chiseling cake out of a pan, do this step right. Nothing is sadder than a beautiful cake stuck forever.
- **Cutting it while it’s hot:** I know, the smell is intoxicating. But warm cake crumbles easily. Let it chill out and firm up before slicing.
Alternatives & Substitutions
Feeling creative? Or maybe you’re missing an ingredient? No worries, we’ve got options!
- Milk: Any milk works! If you’re dairy-free, oat milk, almond milk, or soy milk are fantastic choices.
- Oil: Melted butter (cooled slightly) can be used instead of vegetable oil if you prefer that buttery flavor. Just know oil generally makes for a moister cake!
- Hot Water/Coffee: If you’re not a coffee person (gasp!), just use hot water. The coffee just really deepens the chocolate flavor without making it taste like coffee, IMO.
- Frosting Fun: This cake is amazing on its own, but a simple chocolate ganache, a classic buttercream, or even just a dusting of powdered sugar takes it up a notch. Or, serve warm with a scoop of vanilla ice cream – pure bliss!
- Add-ins: Want to jazz it up? Fold in some chocolate chips, sprinkles, chopped nuts, or even a swirl of peanut butter into the batter before baking.
FAQ (Frequently Asked Questions)
Got questions? I’ve got (casual) answers!
- Can I use margarine instead of butter/oil? Well, technically yes, but why hurt your soul like that? Stick to oil for moisture or butter for flavor.
- My cake turned out dry, what happened? Most likely, it was overbaked. Keep an eye on the clock and trust the toothpick test! Or, possibly overmixed.
- Do I *have* to use hot water/coffee? Not strictly *have* to, but it makes a noticeable difference in the texture and intensifies the chocolate. It’s totally worth it!
- How long do these chocolate cake squares last? If kept in an airtight container at room temperature, they’ll be good for 3-4 days. But let’s be real, they rarely last that long.
- Can I make this recipe in a different sized pan? Yes! If you use a larger pan (like a 9×13), it will be thinner and bake faster (around 20-25 mins). For a smaller pan, it will be thicker and take longer. Keep an eye on it!
- Is this recipe good for beginners? Heck yes! This is basically the “gateway drug” to more complex baking. It builds confidence!
Final Thoughts
See? I told you it was easy! You’ve just whipped up a batch of delicious, moist, chocolatey cake squares that are perfect for any occasion (or lack thereof). Whether you’re sharing them with friends, bribing your significant other, or just having a cozy night in, these squares are a guaranteed hit.
Now go impress someone—or yourself—with your new culinary skills. You’ve earned it! Enjoy your chocolatey triumph!


