So, you’ve got that irresistible craving for something rich, chocolatey, and utterly decadent, but the thought of spending hours slaving away in the kitchen makes you want to just order takeout? Girlfriend, I feel you. We’re talking about that dreamy dessert with a molten, gooey center that oozes out like a warm, chocolatey river when you cut into it. Yep, we’re making chocolate lava cake, and it’s way easier than it sounds. No chef’s hat required, just a love for all things chocolate!
Why This Recipe is Awesome
Okay, let’s be real. This isn’t just a recipe; it’s a magic trick. You basically throw a few ingredients together, pop ’em in the oven, and minutes later, you’re a culinary wizard. Seriously, this recipe is so straightforward, it’s practically idiot-proof. Even if your past baking adventures usually end in a smoke alarm symphony, you’ve got this. It’s quick, it’s impressive, and it tastes like you spent all day on it. Plus, who doesn’t love a dessert that requires minimal effort for maximum “OMG, you made this?!” reactions? It’s the ultimate show-off dessert that takes less time than scrolling through TikTok, and that’s a win in my book!
Ingredients You’ll Need
Gather your chocolatey troops! Here’s the line-up for your epic lava cake adventure:
- Unsalted Butter (1/2 cup / 113g): The good stuff. Don’t even think about margarine here unless you’re trying to punish yourself.
- Good Quality Dark Chocolate (4 oz / 113g): Go for something around 60-70% cocoa. This isn’t the time for Hershey’s milk chocolate, unless you’re into a super sweet vibe, which is fine, I guess.
- Large Eggs (2 whole, plus 2 yolks): Gives it that rich, custardy texture. Don’t skip the extra yolks!
- Granulated Sugar (1/4 cup / 50g): Just enough sweetness to balance the dark chocolate.
- All-Purpose Flour (2 tablespoons / 16g): Just a tiny bit to give it structure without making it cake-y. We want molten, not solid!
- Pinch of Salt: Enhances all those lovely chocolate flavors. Seriously, don’t skip the salt!
- Vanilla Extract (1/2 teaspoon): A little hug for your chocolate.
- Optional: Cocoa Powder (for dusting molds): Helps prevent sticking and adds a nice finish.
Step-by-Step Instructions
Get ready, because this is going to be faster than you can say “molten chocolate magic!”
- Prep Your Stage: Preheat your oven to 425°F (220°C). Grab four 6-ounce ramekins (those cute little oven-safe bowls). Butter them generously, then dust with cocoa powder or flour. Tap out the excess. This step is crucial for easy release!
- Melt the Goodness: In a microwave-safe bowl or a double boiler, melt the butter and chopped dark chocolate together. Stir until completely smooth and glorious. Let it cool for a few minutes while you move to the next step.
- Whisk It Real Good: In a separate medium bowl, whisk the whole eggs, egg yolks, and granulated sugar together until they’re light in color and slightly thickened. You’re aiming for pale yellow and fluffy.
- Combine Forces: Slowly pour the slightly cooled chocolate mixture into the egg mixture, whisking constantly until just combined. Don’t overmix! Stir in the flour and salt until no streaks remain, then add the vanilla extract.
- Fill ‘Em Up: Divide the batter evenly among your prepared ramekins. Don’t overfill them; about three-quarters full is perfect.
- Bake Time! Pop those babies into the preheated oven for 12-14 minutes. The edges should look set, but the center should still be jiggly. This jiggly center is the secret to your molten core!
- The Grand Reveal: Carefully remove the ramekins from the oven. Let them cool for just 1-2 minutes. Run a thin knife around the edge of each cake, then invert each one onto a serving plate. A little tap on the bottom usually helps.
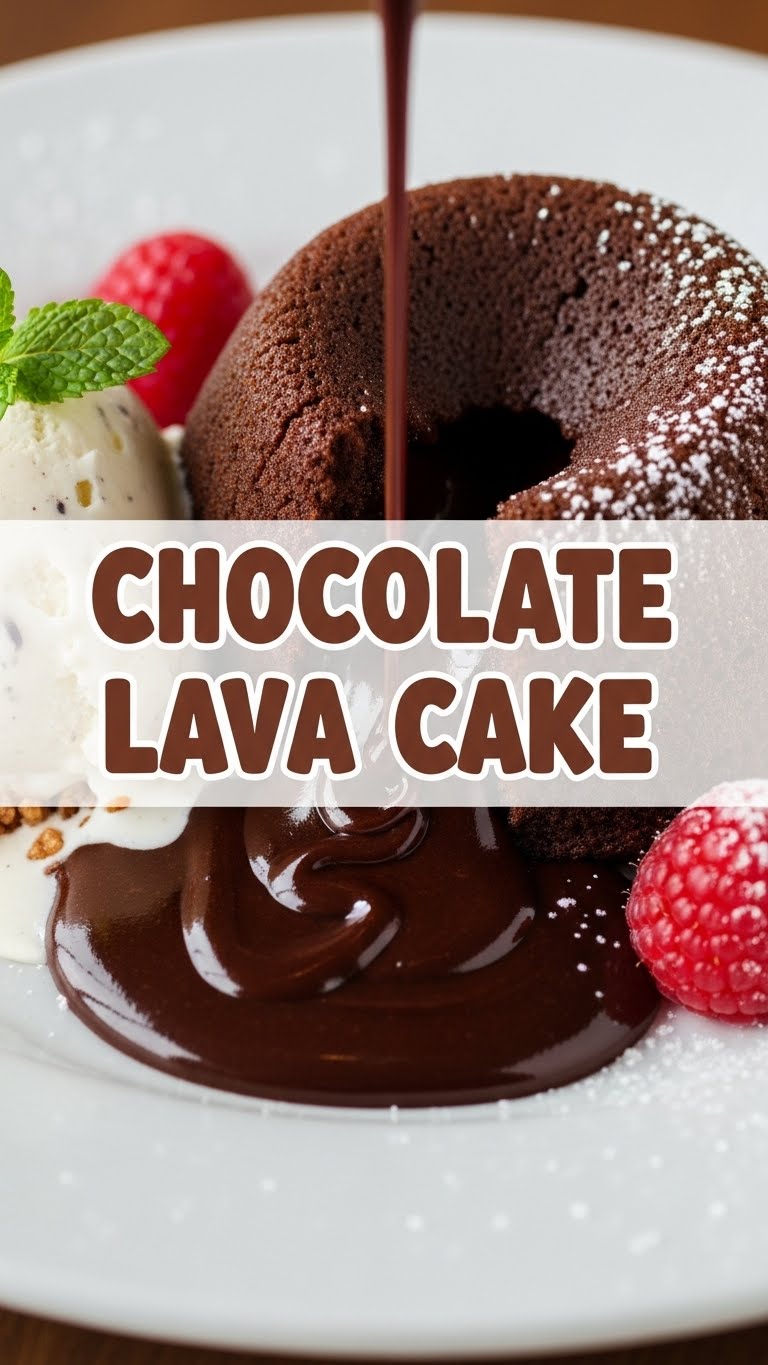
- Serve and Devour: Garnish with a sprinkle of powdered sugar, a dollop of whipped cream, or a scoop of vanilla ice cream. Dig in immediately and watch that molten center flow!
Common Mistakes to Avoid
Listen up, buttercup! We’re all about success here, so let’s dodge these common pitfalls:
- Overbaking: This is the cardinal sin! If you bake it too long, you’ll end up with a regular chocolate cupcake, which is fine, but not what we’re going for. Keep an eye on that jiggly center!
- Not Buttering/Dusting Molds: Thinking you can skip this step? Rookie mistake! Your cake will stick, and you’ll be left with a sad, broken mess. Don’t do it to yourself.
- Under-Preheating the Oven: Baking at the wrong temperature is like going on a date without knowing anything about the person. It just doesn’t work. Make sure your oven is fully preheated for even cooking.
- Ignoring Quality Ingredients: Using cheap chocolate will result in cheap-tasting lava cake. Invest a little in some decent dark chocolate; your tastebuds will thank you.
Alternatives & Substitutions
Feeling adventurous or got some dietary quirks? No worries, we can totally customize this!
- Chocolate Swap: Don’t love dark chocolate? Try milk chocolate for a sweeter cake, but expect it to be a bit gooier. White chocolate lava cake is also a thing, but you’ll need to adjust the sugar.
- Gluten-Free: Swap the all-purpose flour for a good quality gluten-free all-purpose blend (the ones with xanthan gum usually work best). Easy peasy.
- Flavor Boost: Add a dash of espresso powder to the chocolate for a deeper flavor, or a splash of orange zest for a chocolate-orange twist. Feeling boozy? A teaspoon of a liqueur like Grand Marnier or Kahlúa works wonders!
- Dairy-Free: Use a high-quality dairy-free butter substitute and dairy-free dark chocolate. Some brands work better than others, so do a quick taste test if you’re unsure.
FAQ (Frequently Asked Questions)
Got questions? I’ve got answers! (Mostly.)
- Can I make these ahead of time? Absolutely! You can fill the ramekins with batter, cover them with plastic wrap, and refrigerate for up to a day. Just add a few extra minutes to the baking time when you’re ready to bake.
- What if I don’t have ramekins? You can use oven-safe custard cups, coffee mugs, or even muffin tins (fill only halfway and reduce baking time). Just make sure whatever you use is oven-safe and well-greased!
- My cake didn’t have a molten center, what happened? You, my friend, overbaked it! Next time, pull them out when the edges are set but the center still wobbles like Jell-O.
- Can I use margarine instead of butter? Well, technically yes, but why hurt your soul like that? Butter provides a richer flavor and better texture. IMO, stick to butter for the best results.
- How do I store leftovers? If you have any (highly unlikely!), cover and refrigerate. Reheat gently in the microwave for a few seconds until warm and gooey again.
Final Thoughts
See? I told you it was easy! You just conquered the glorious chocolate lava cake. You’ve gone from zero to hero in under 30 minutes, and now you have a ridiculously delicious dessert that looks fancy but was secretly a breeze. So go on, indulge a little. You earned it! Now go impress someone—or yourself—with your new culinary skills. You’ve earned it!


